AUTUMN CHALLENGES
OCTOBER

YOU WILL NEED: Containers for soil, water, paper, twigs and/or paint brushes and (optionally) pads, string and clothes pegs
HOW TO DO IT:
1. SEARCH FOR NATURAL COLOURS
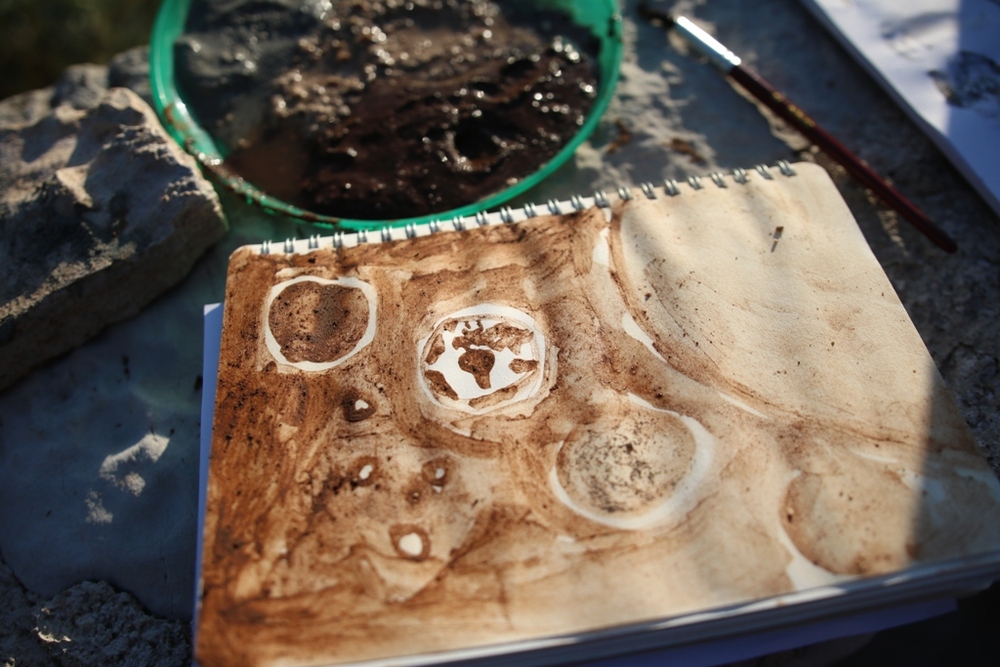
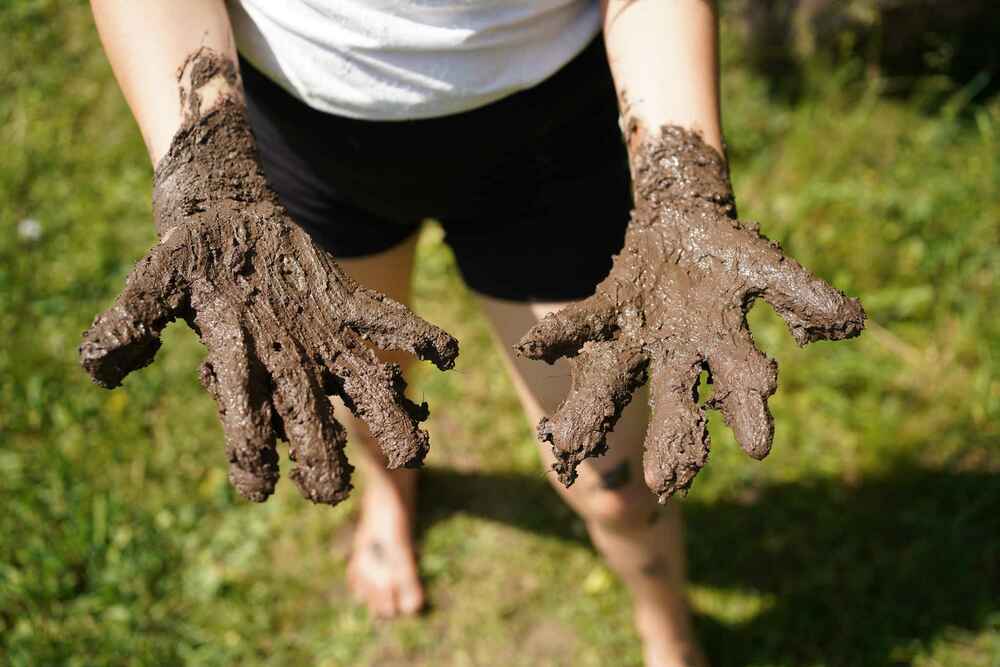
What can you find in nature to draw with if you had no crayons or chalks on hand? Have you ever tried mud painting? No? Let’s do it!
First, we let children run around and just look for different colours and shades.
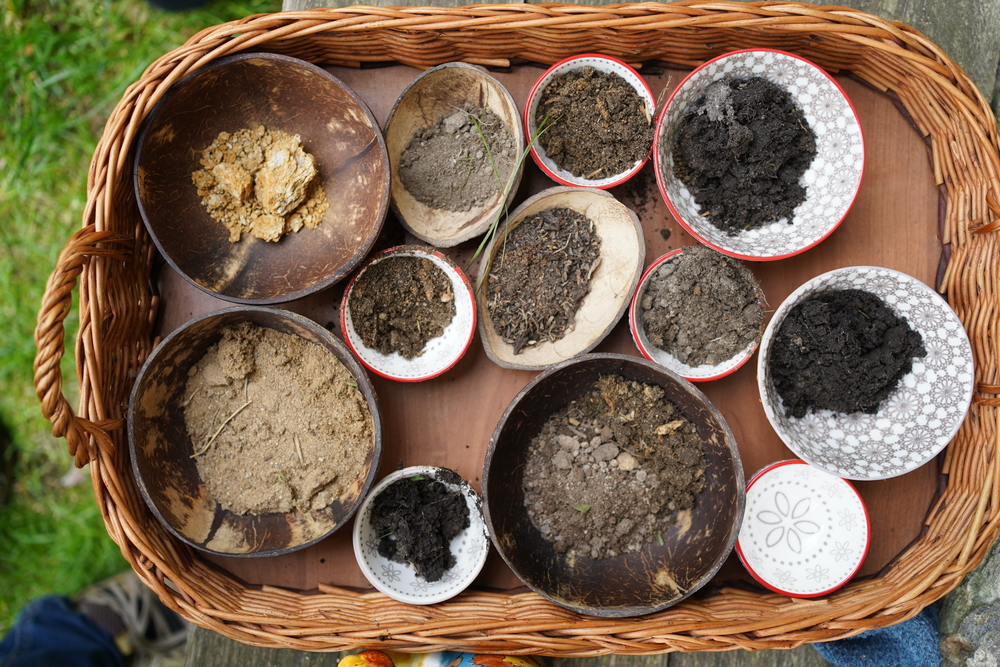
2. PALETTE COLLECTION
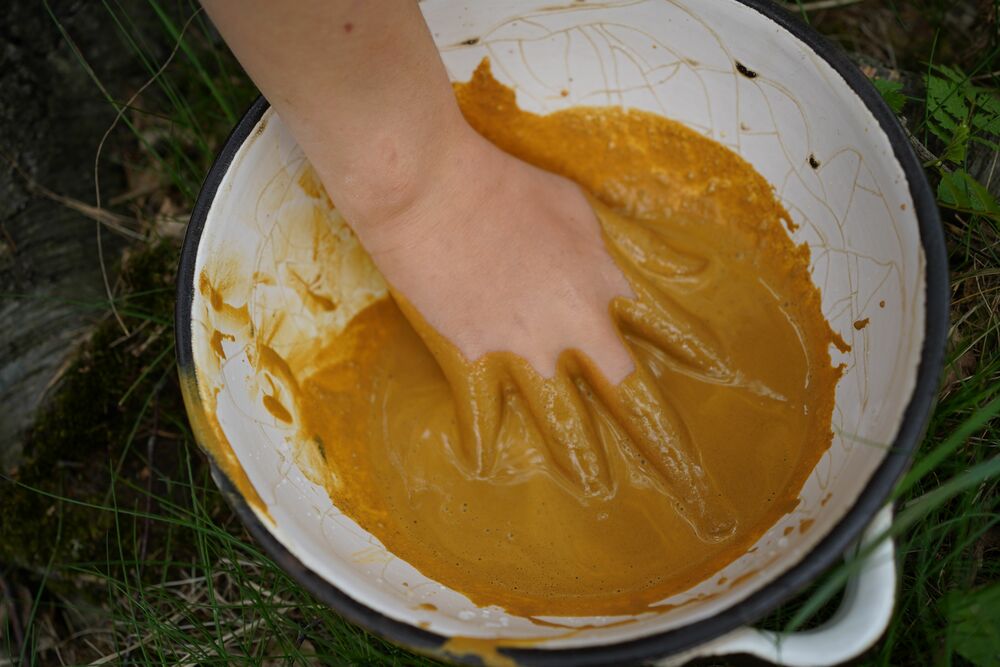
The children should be shown how to gently take soil samples of each of the different colours they have found (black or brown earth, rusty or brownish shades of clay, light sandy soil, grey gravel etc.). You need to collect just small samples from places where the trees and any other plants or animals won‘t miss it. Mix the soil samples with water in containers to form thick slurries. It is a good idea to show the children that it is better to add water gradually. It should be possible to have a whole range of colours from which you can create a shared palette to make art with.
3. PAINT BRUSHES
Now is the time to prepare the paint brushes when the colours are ready. You can grab some paint brushes as you head out if you lack the time but it is always better to make your own out in the field. Children can try painting with a simple twig, see how great it feels to paint with their fingers or learn to make their own brushes with natural materials. Try your new paint brushes and how they paint on a scrap piece of paper.
4. MY PICTURE
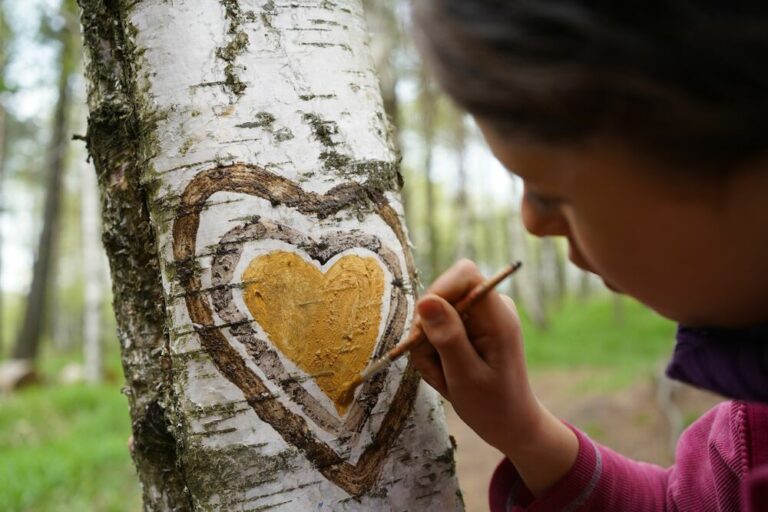
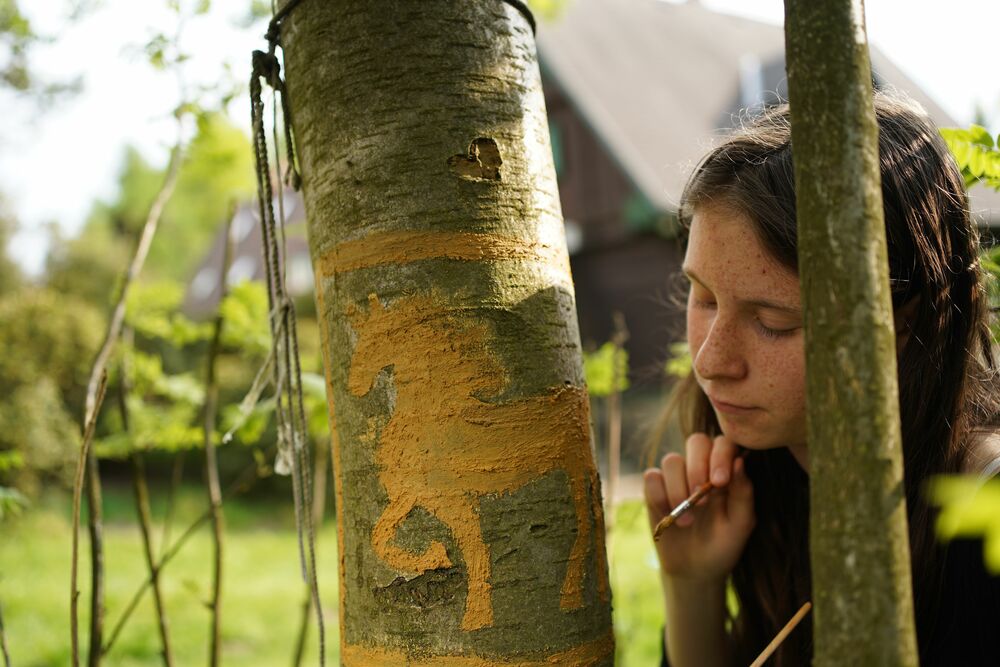
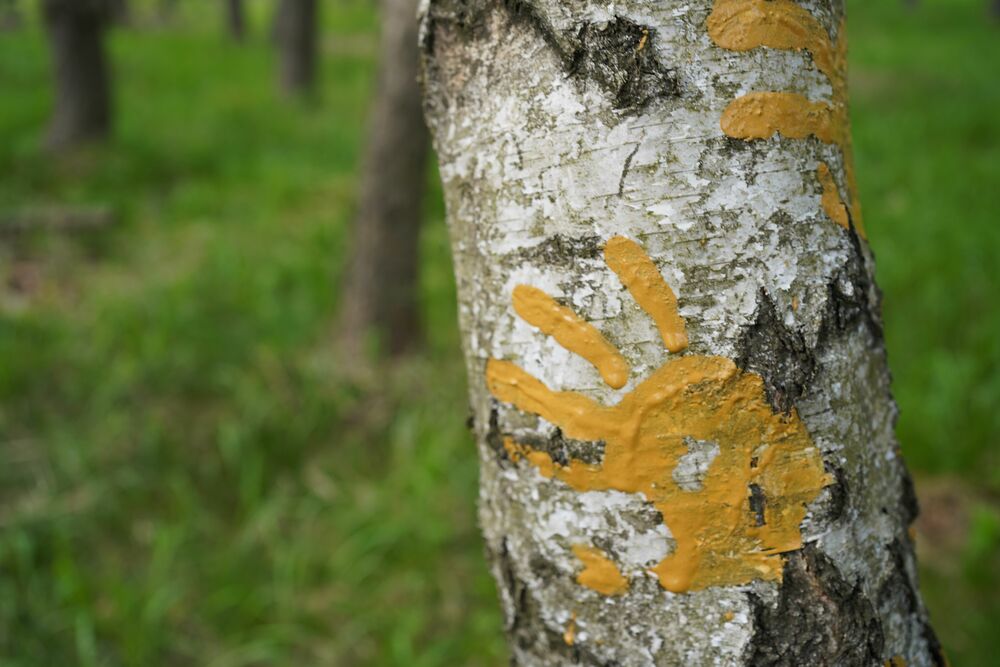
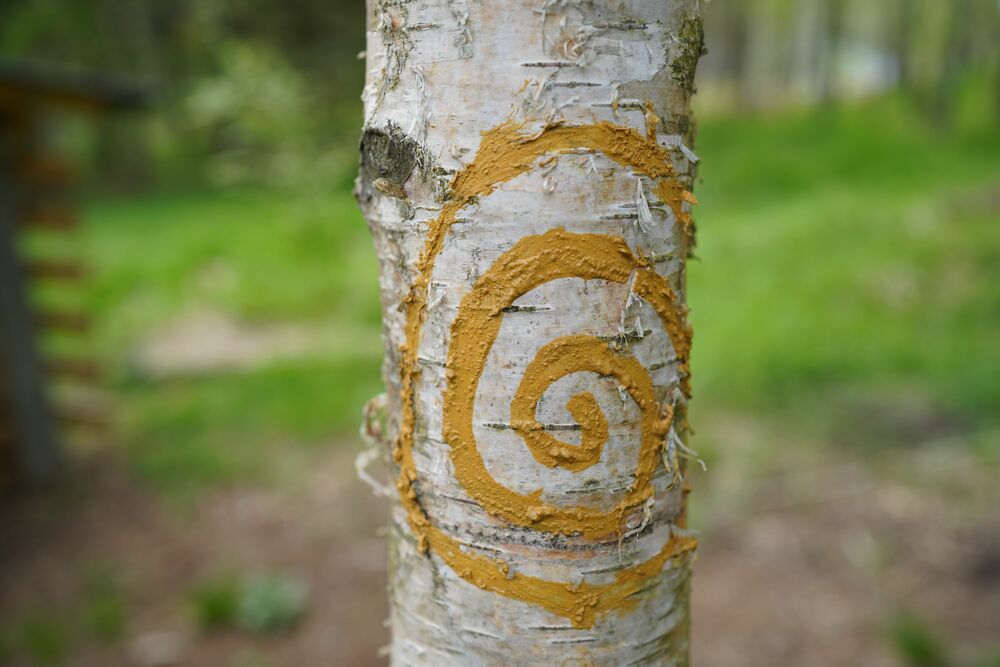
Everything is now ready for creating art so everyone walks around to find their spots and subjects for painting. The children can of course paint on paper, but also many other surfaces like pavements, wooden terraces, or pieces of wood, etc. can become a canvas. They can as well try painting on tree trunks if there are trees in the vicinity with smooth bark like beech hornbeam or birch. It is also possible to paint on stumps or dry fallen wood.
TIP: Some children might work better in a group on one big common picture. Encourage them to do so they can experience being creative in nature as part of an artistic team.
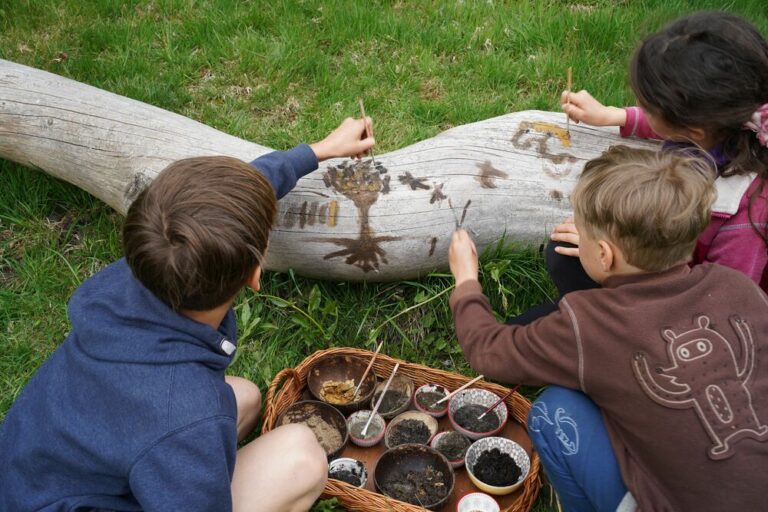
TIP: If the children are having fun making art outdoors, they can have a go at stamping. Prepare soil goo and then dip various natural materials into it and stamp them on paper. That is how lovely ornaments, forms, and graphics can be made. Children can also make original wrapping paper by stamping with natural products. Just bring larger heets of paper or plain wrapping paper with you.
5. SOIL PICTURE GALLERY
Whoever is done can add their painting to a common outdoor „soil picture gallery“. It is great to add titles to the images but it is not necessary. You can make the gallery by tying a line or a string between a couple of trees. When everyone is done, walk through the gallery together. You can stop at the individual paintings and talk about what each child sees there, how the paintings were made, etc. You can discuss how it felt to work with soil paints.
TIP: If time allows you can invite other visitors to your picture gallery (parents, other classes, passers-by, etc.). The gallery could be hung on the school / kindergarten fence for an impro.

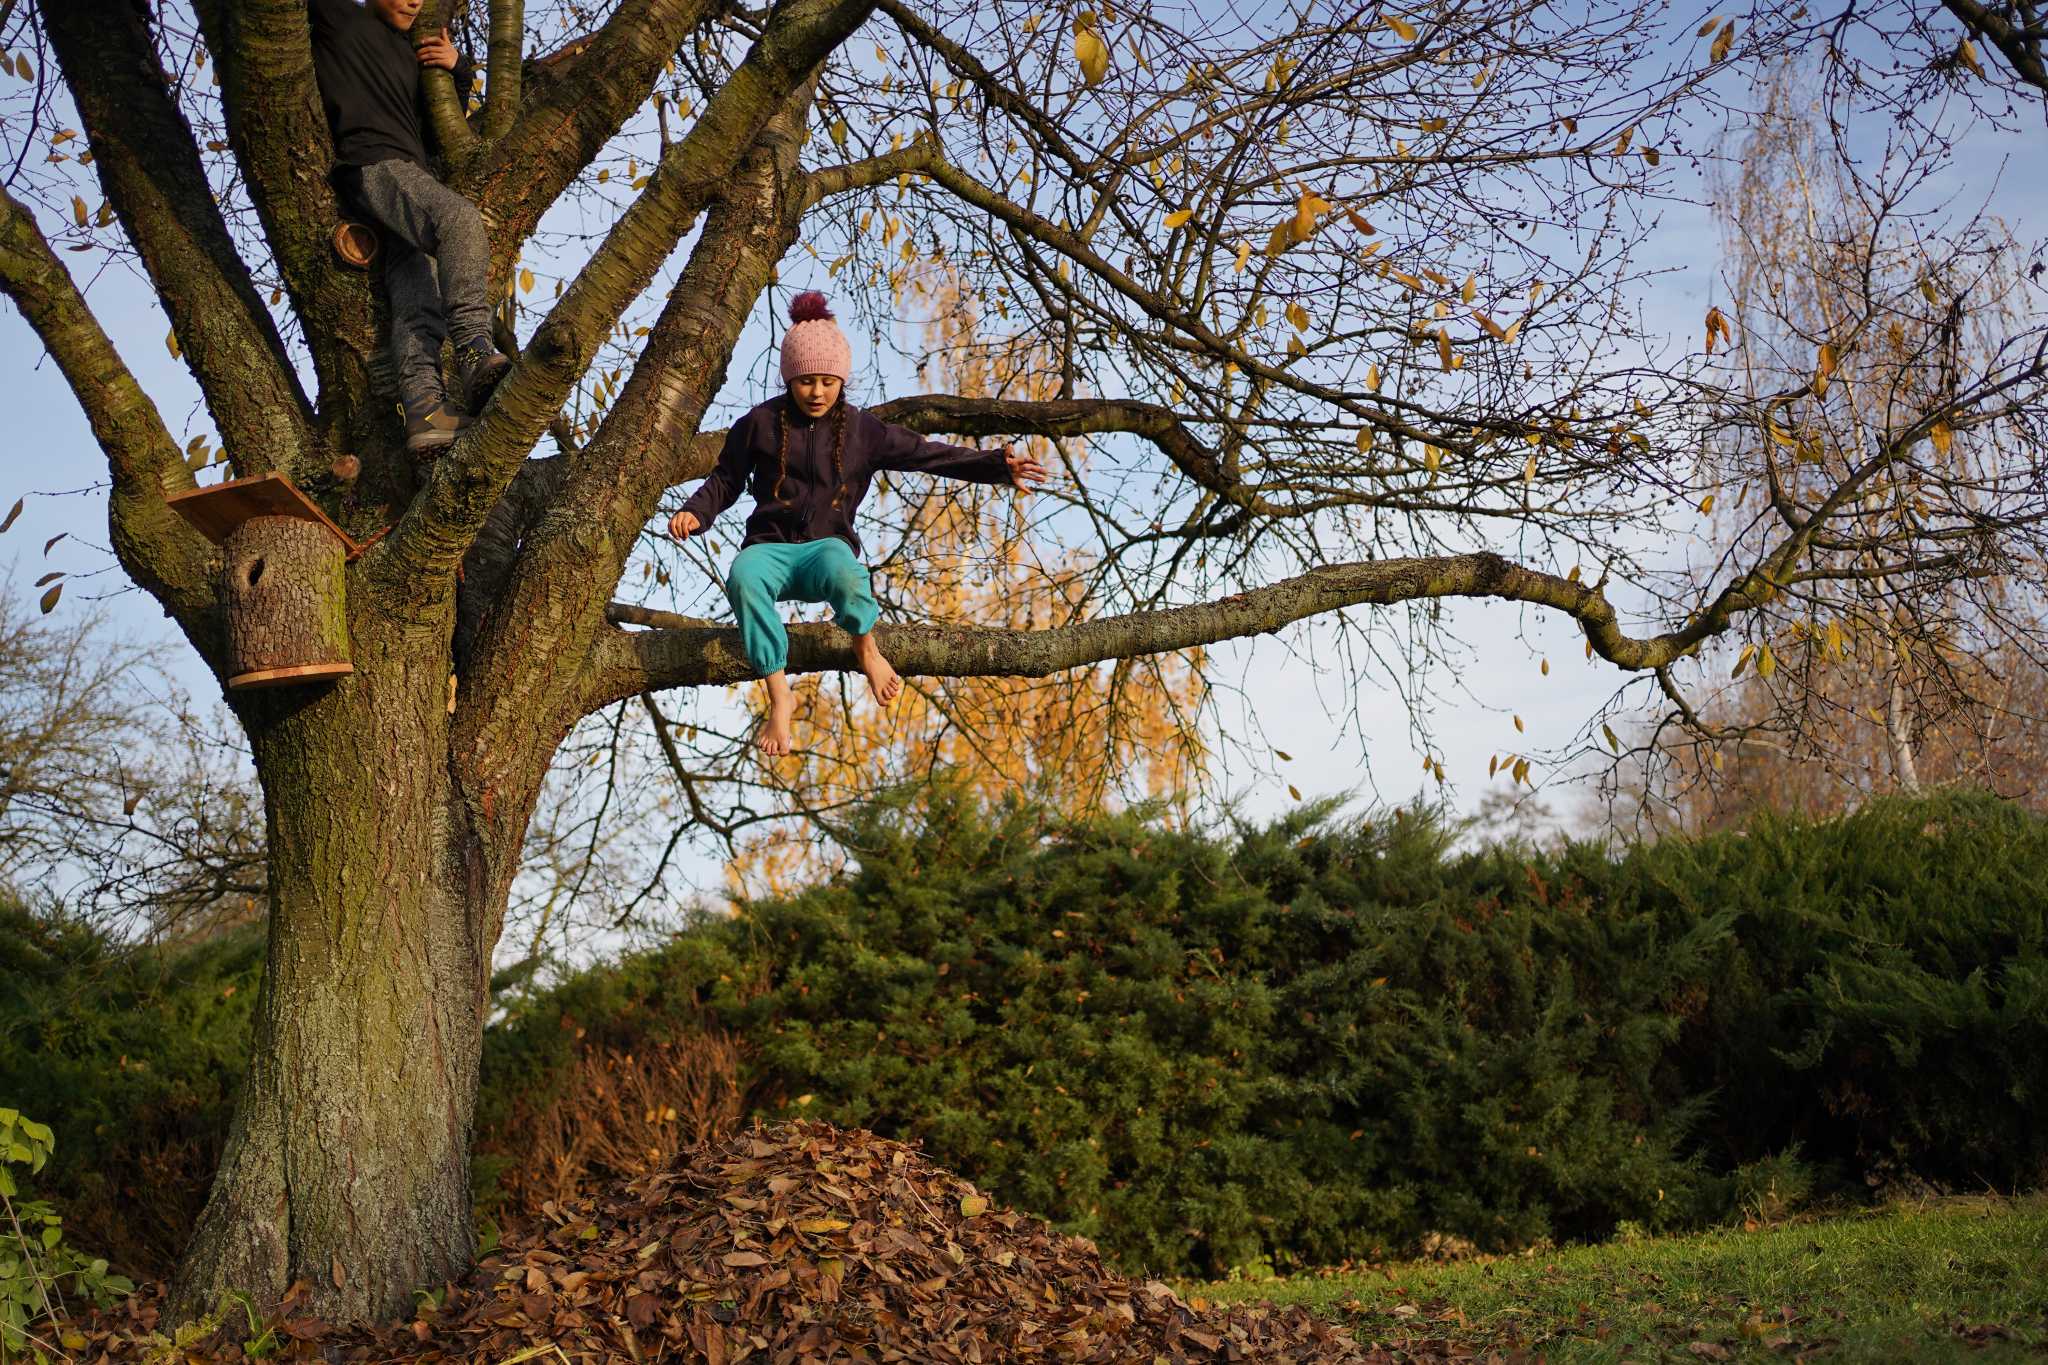
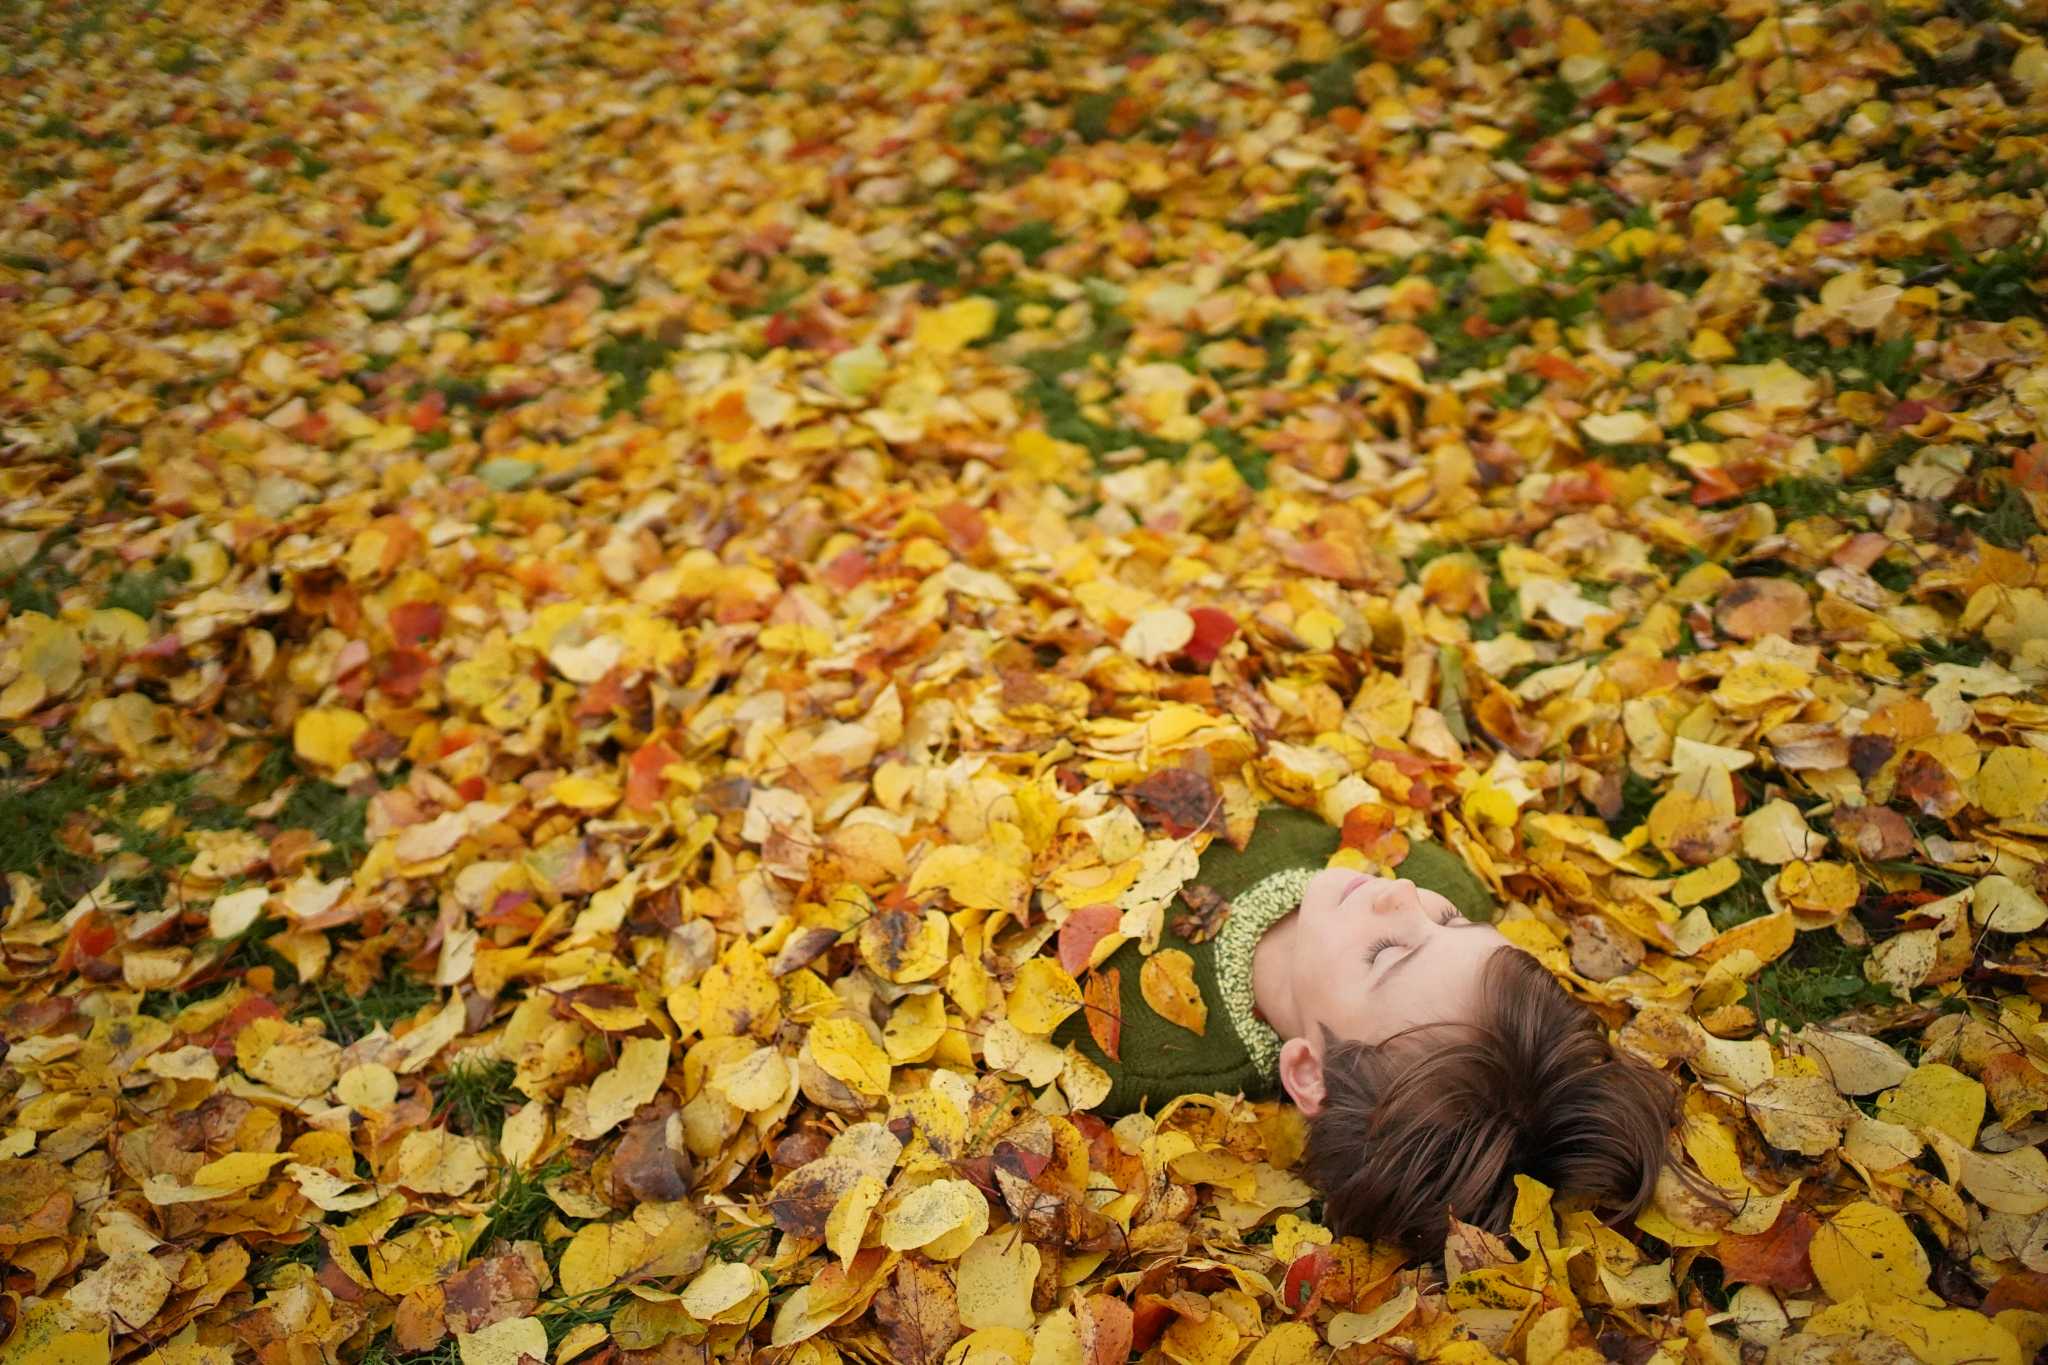
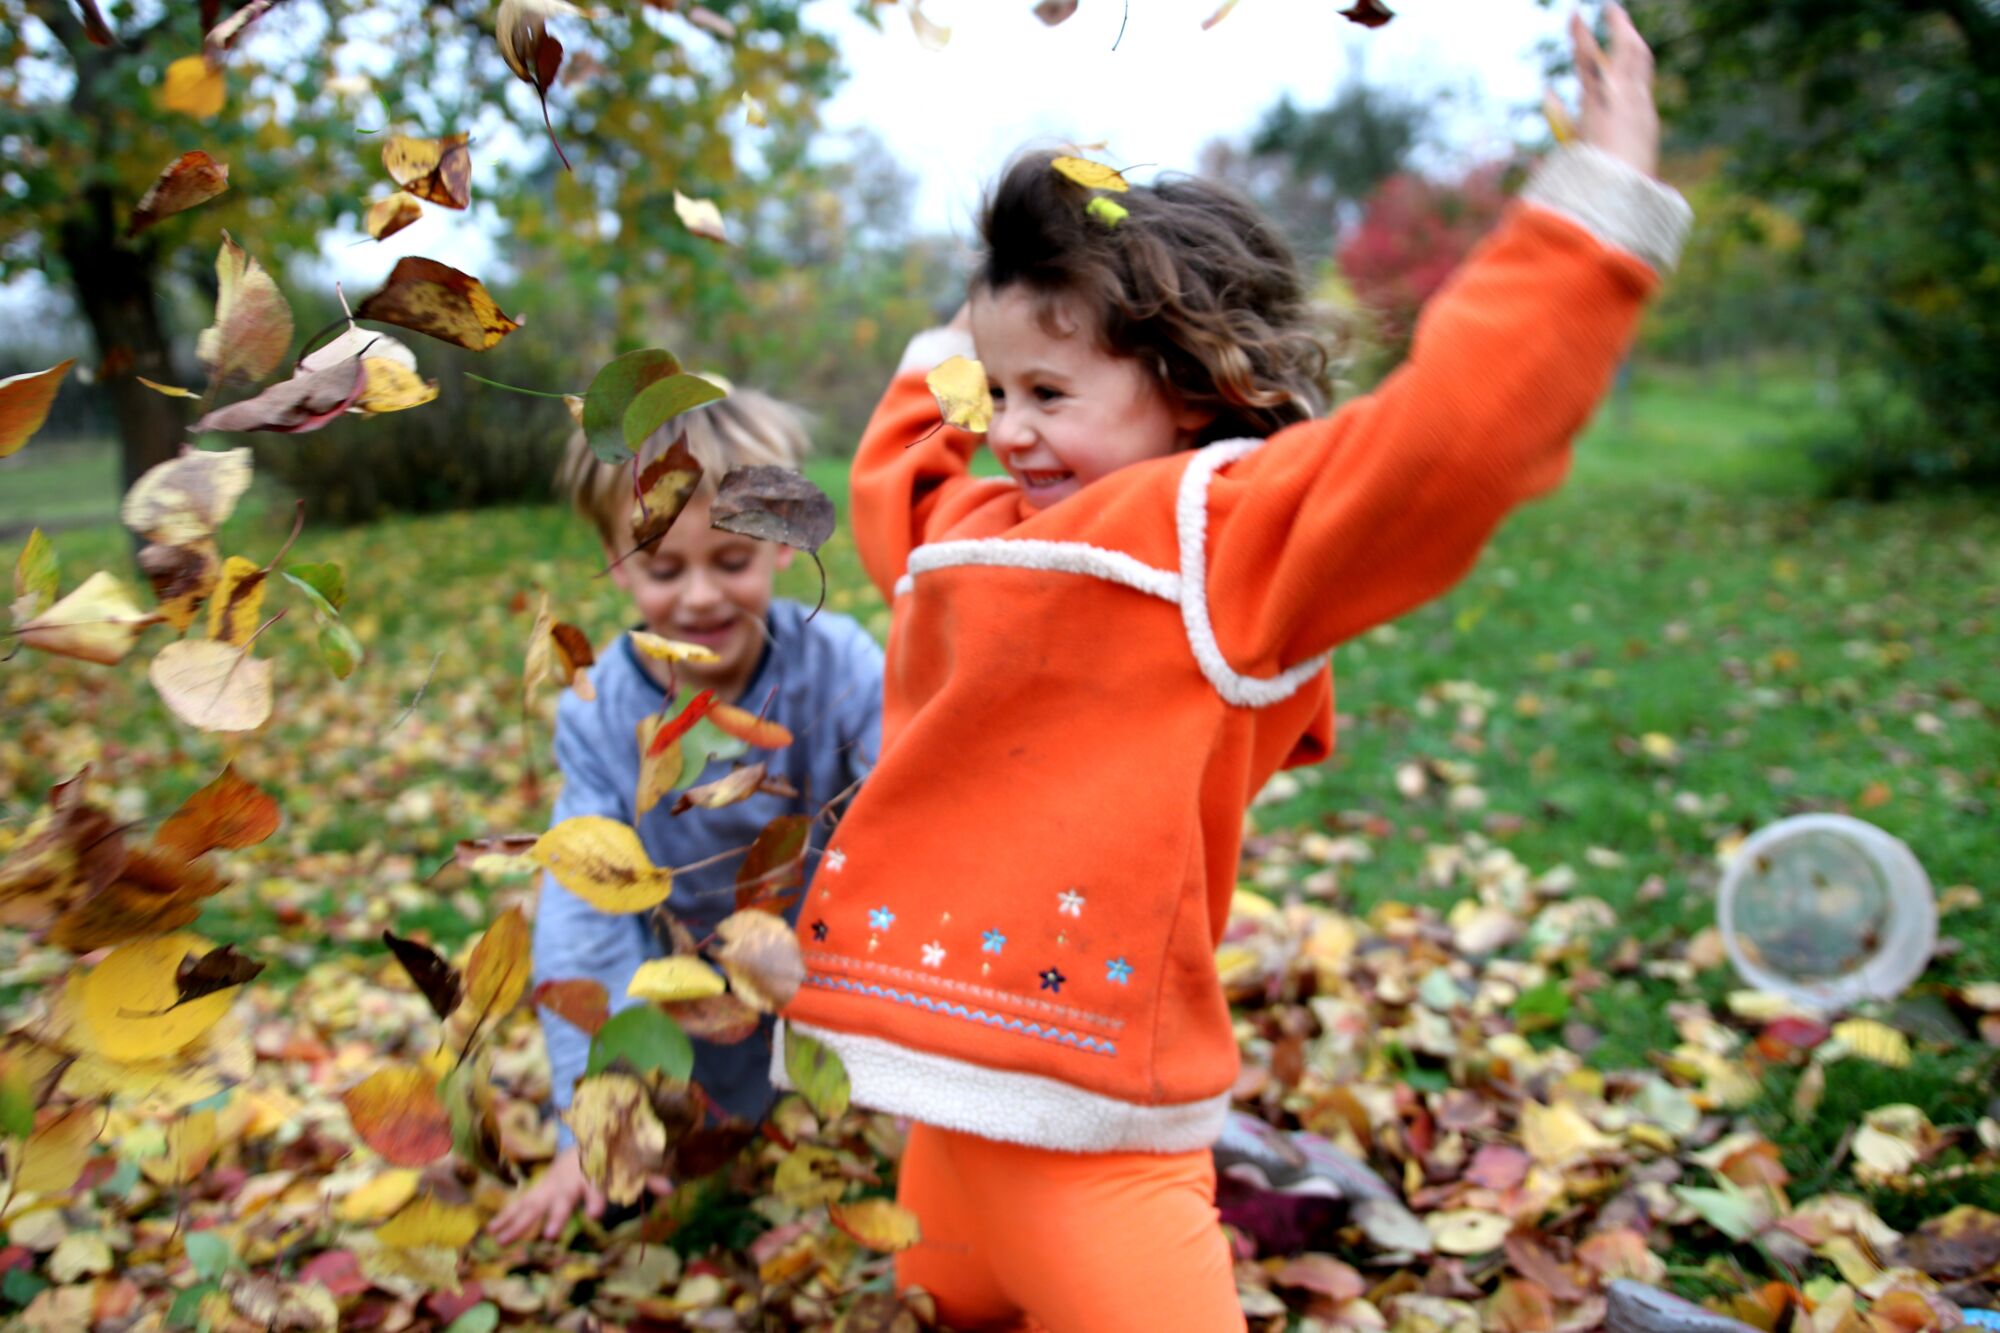
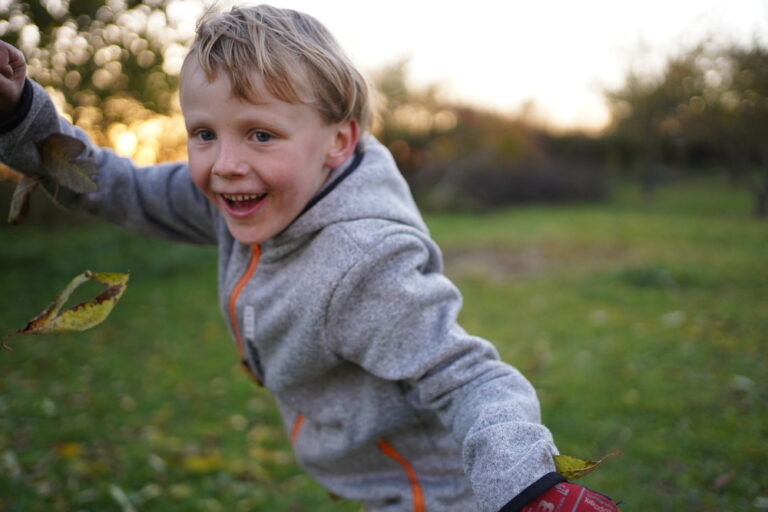
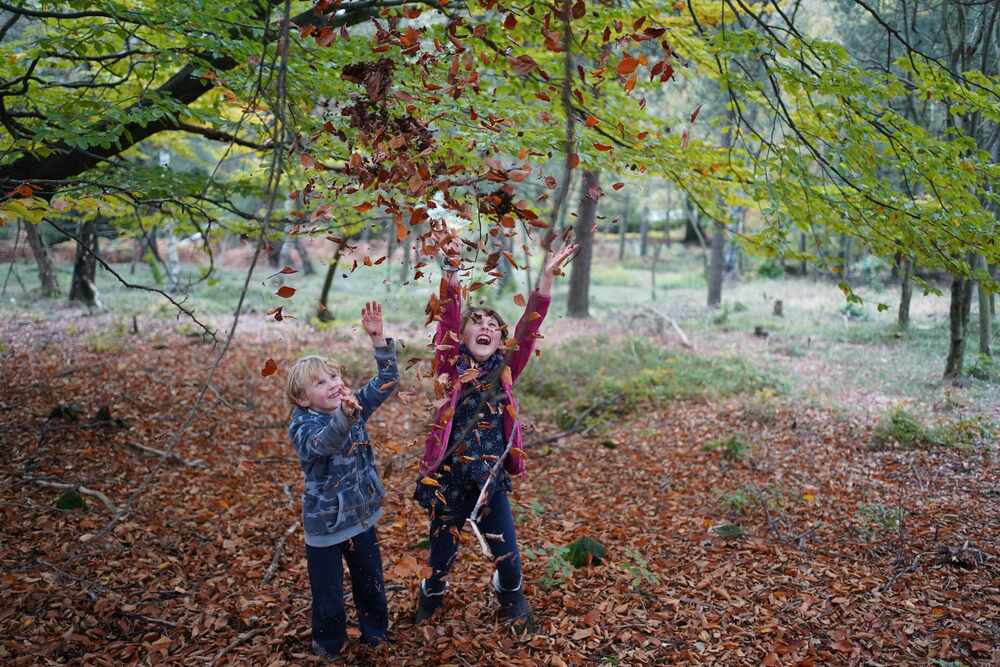
How just a little can cause a lot of joy… Just pile up some leaves and you will see.
YOU WILL NEED: a place with a lot of fallen leaves, rake(s)
1. PILE PREPARATION
Choose a suitable spot for an extra large pile of leaves and start raking. Children will join you if they know in advance what their reward will be. The jumping can begin as soon as the pile is big enough.
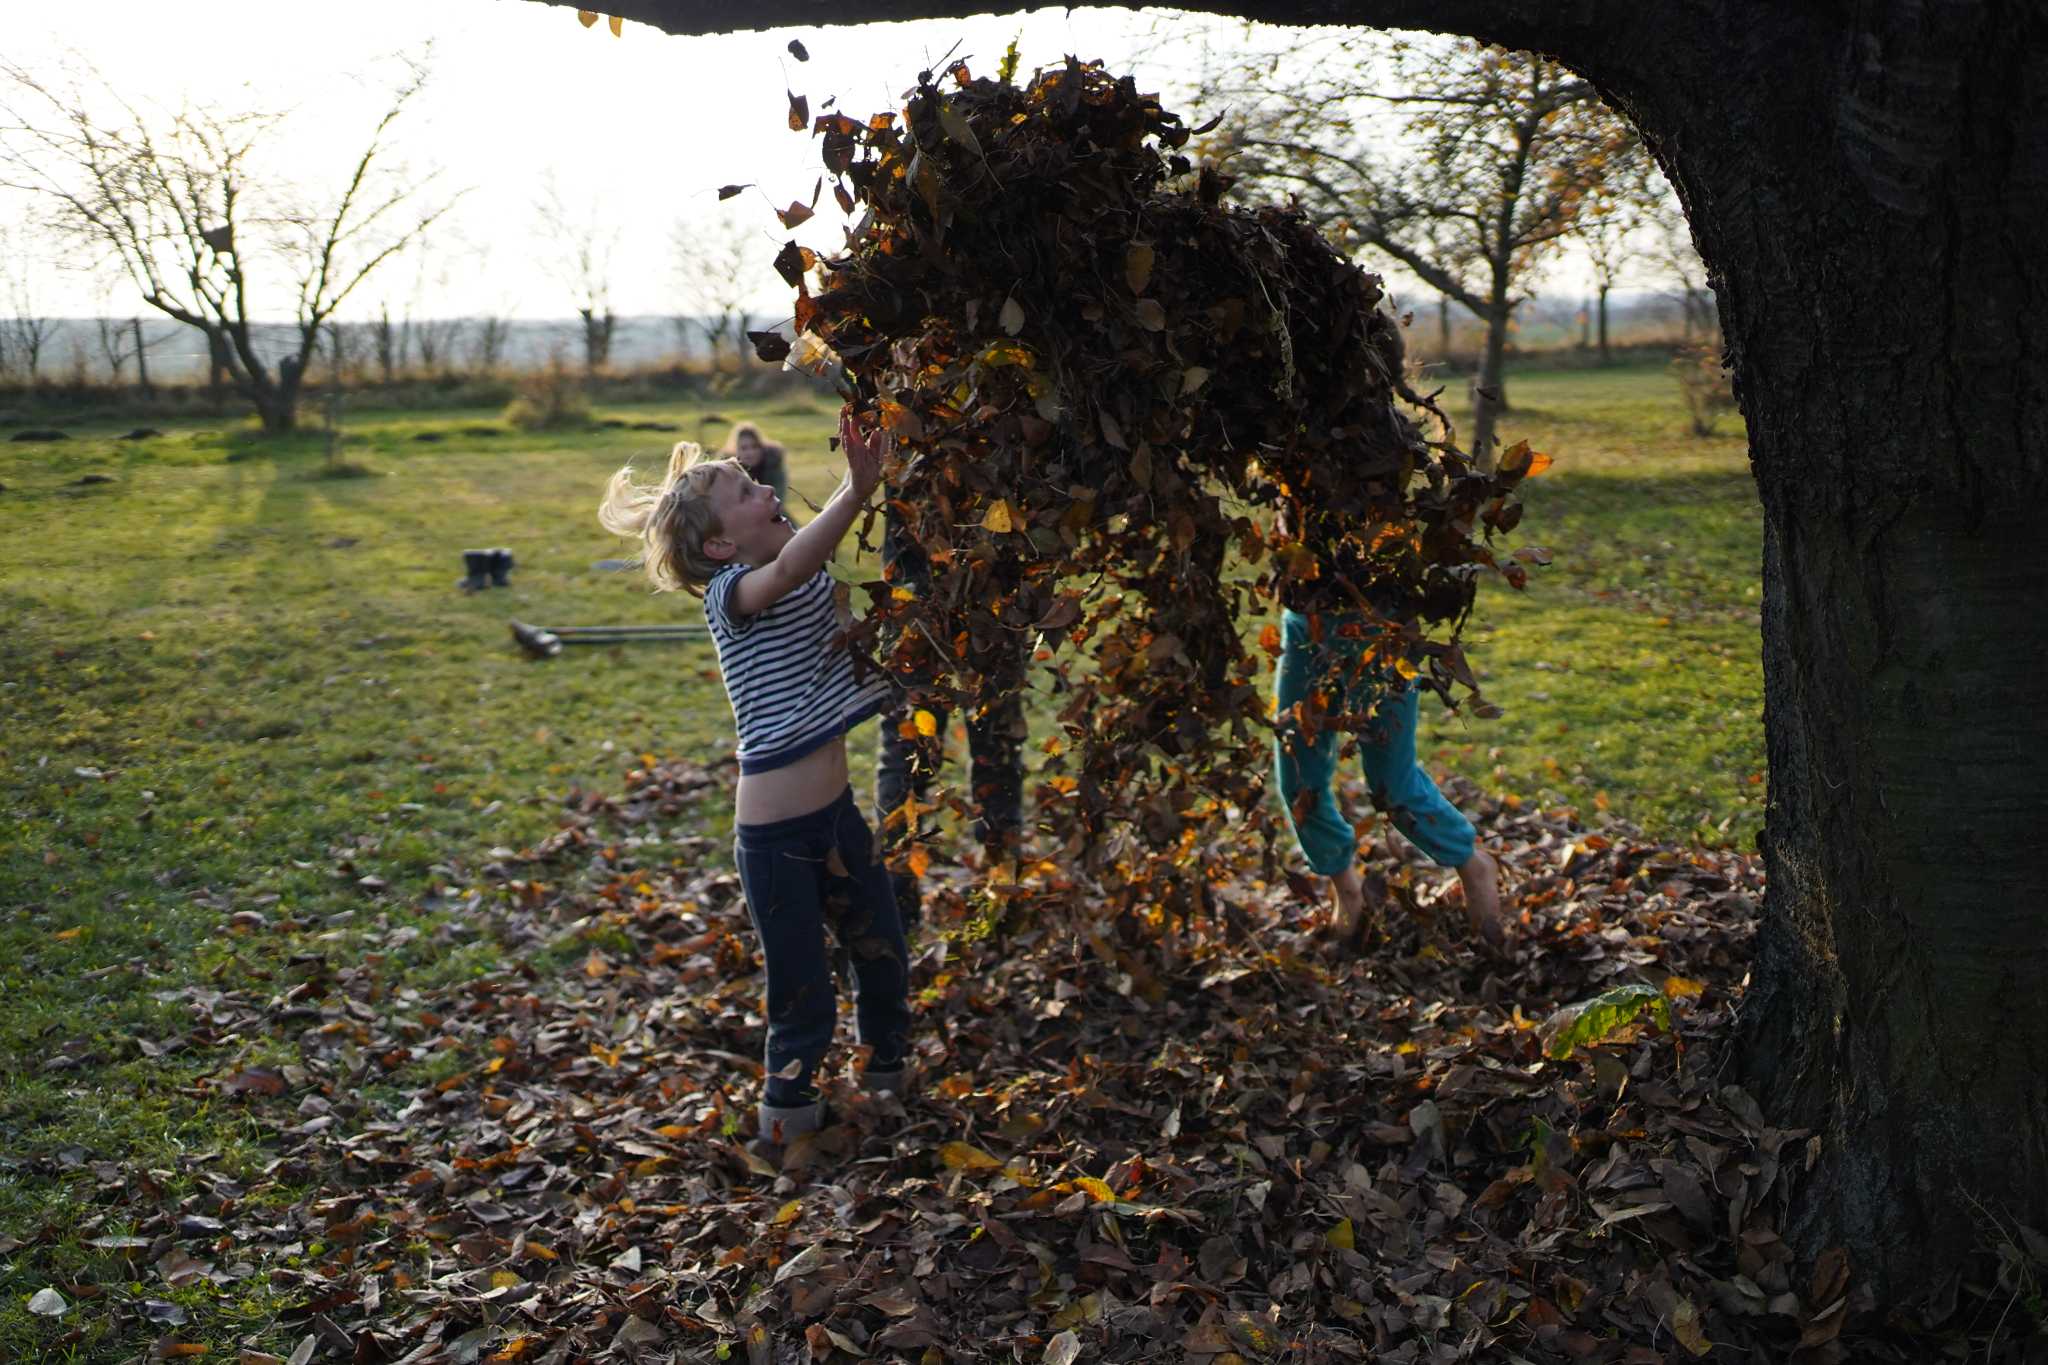
2. JUMPS
You can do a standing jump from next to the pile or take a running start or leap from a raised mound or other higher ground. The most popular method is, of course, jumping from a greater height, ideally from the branches of a tree. It is useful to fluff up the leaves of the pile after each jump so that the leaves continue to provide soft landings.
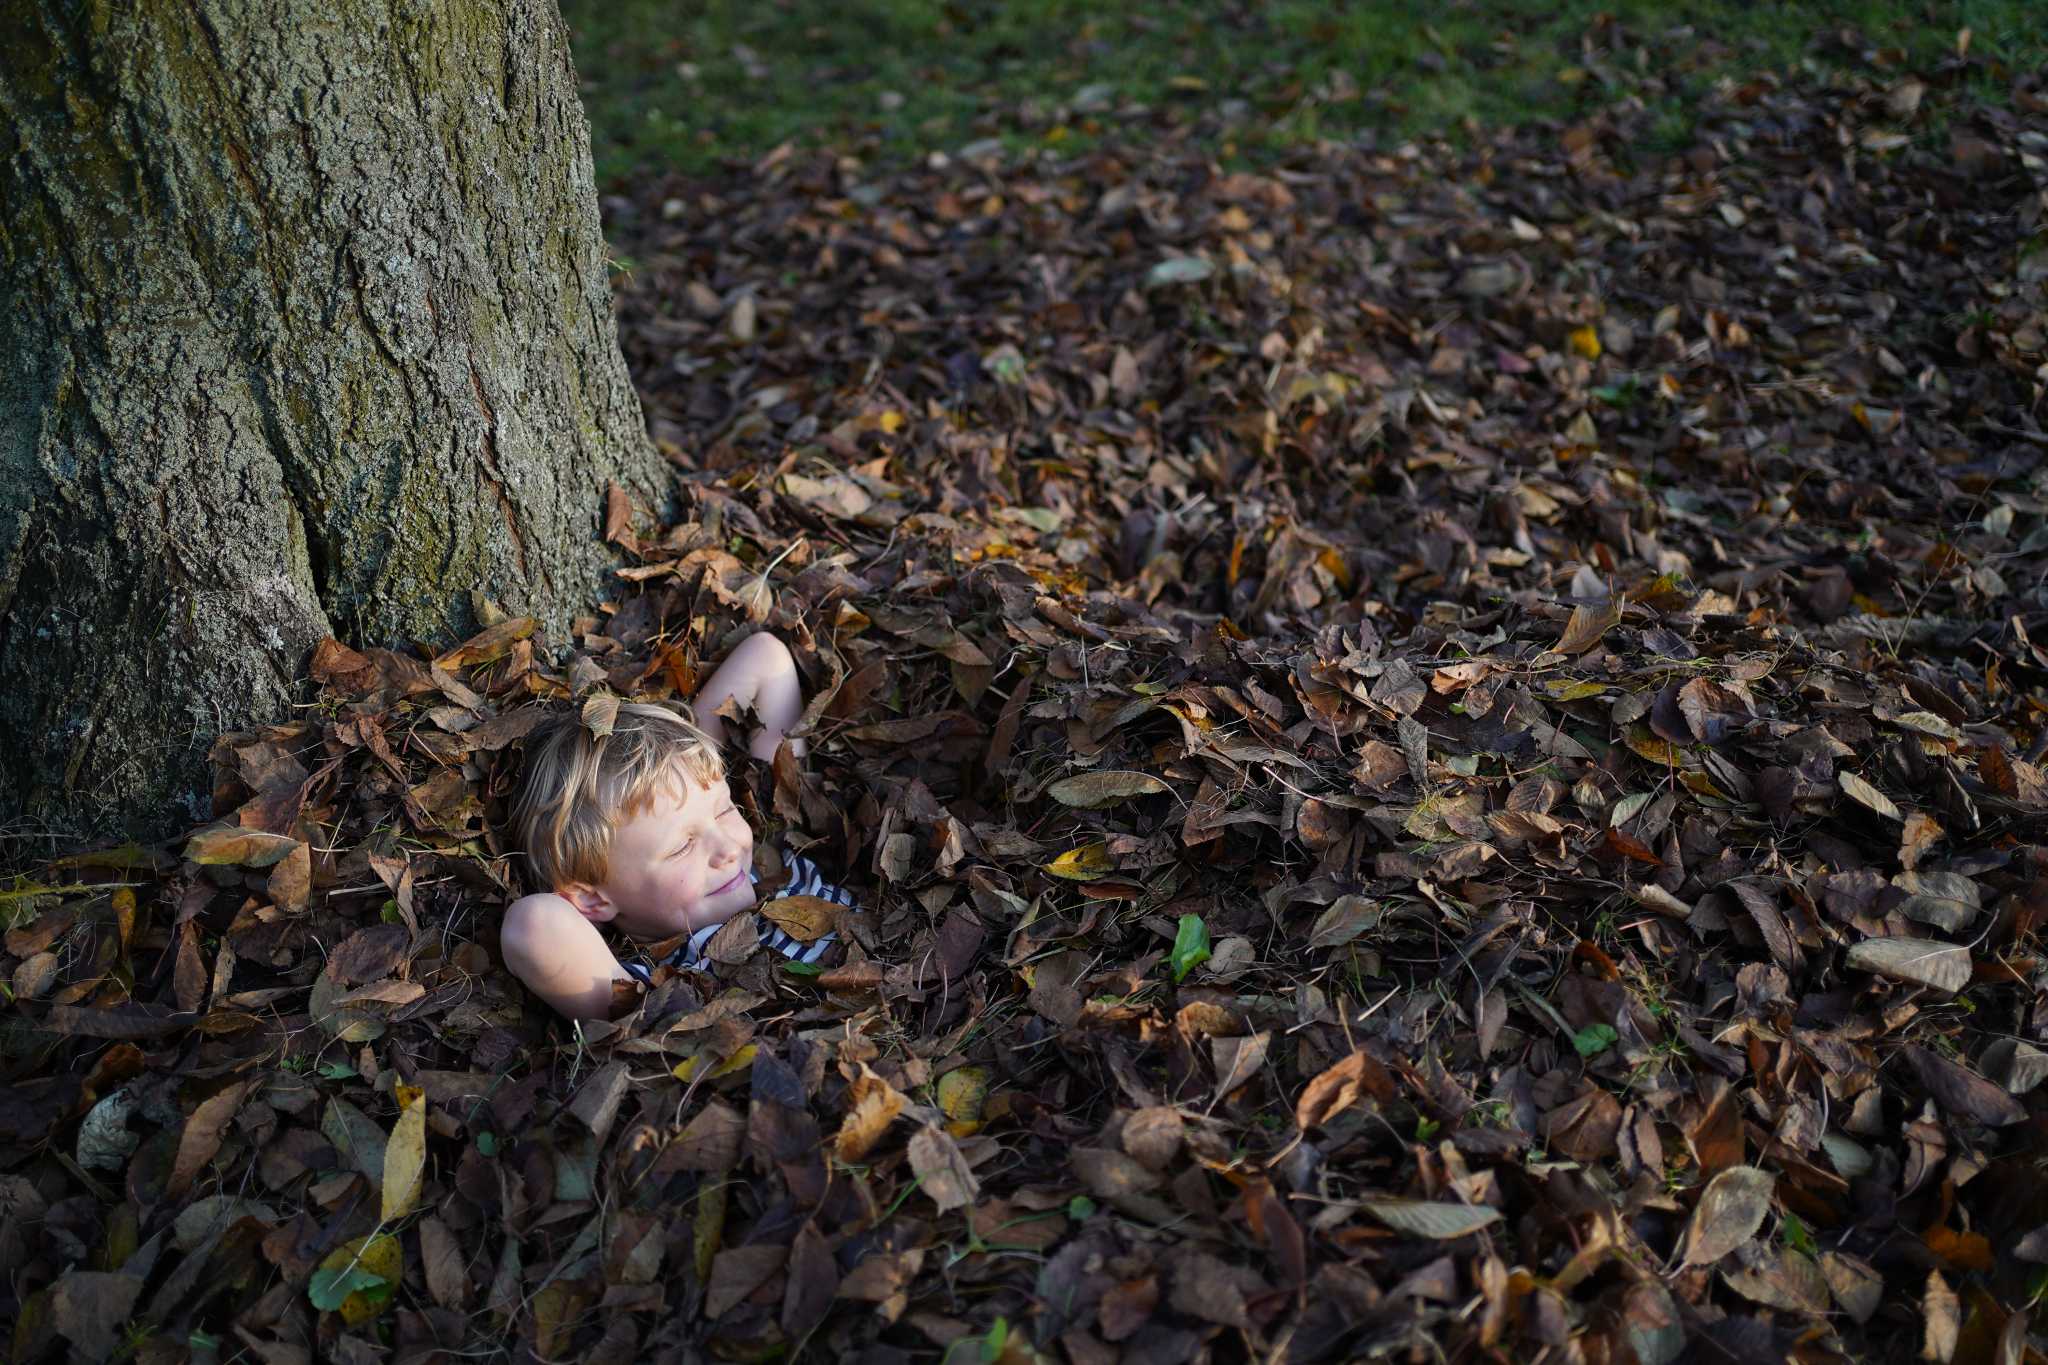
3. WHAT NOW
When the children have enjoyed enough jumping, let them alone for a while so that they have the space to come up with their own games.
They can try:
• Tunnelling through the pile of dry leaves like a mouse
• Creating a leaf spiral or maze
• Making a floorplan of their house or flat in the leaves
4. CALMING DOWN
When everyone is done running amok, it's a wonderful opportunity to stop and bury themselves into the pile of leaves. Will it be hotter or colder than outside? Why do some animals build their winter dens in leaves?
5. WHO LIVES HERE?
At the very end, it is useful to clean up the leaves but do not remove them completely. It's better to leave heaps of leaves around in suitable places, as houses for the winter months. Together, you and the children can observe who comes to live there (hedgehogs, insects, spiders, etc.).


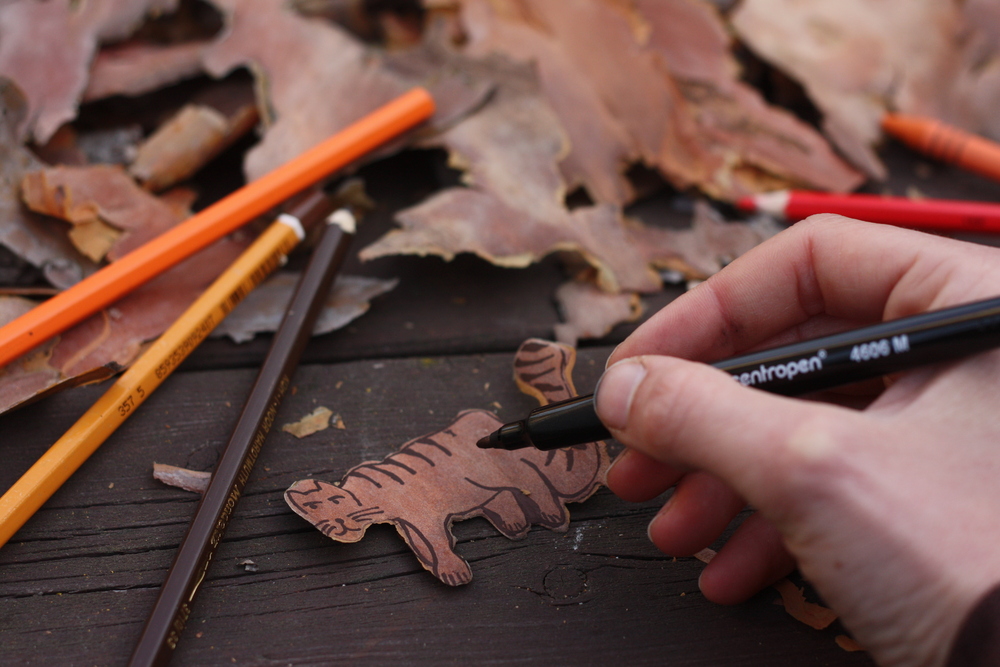
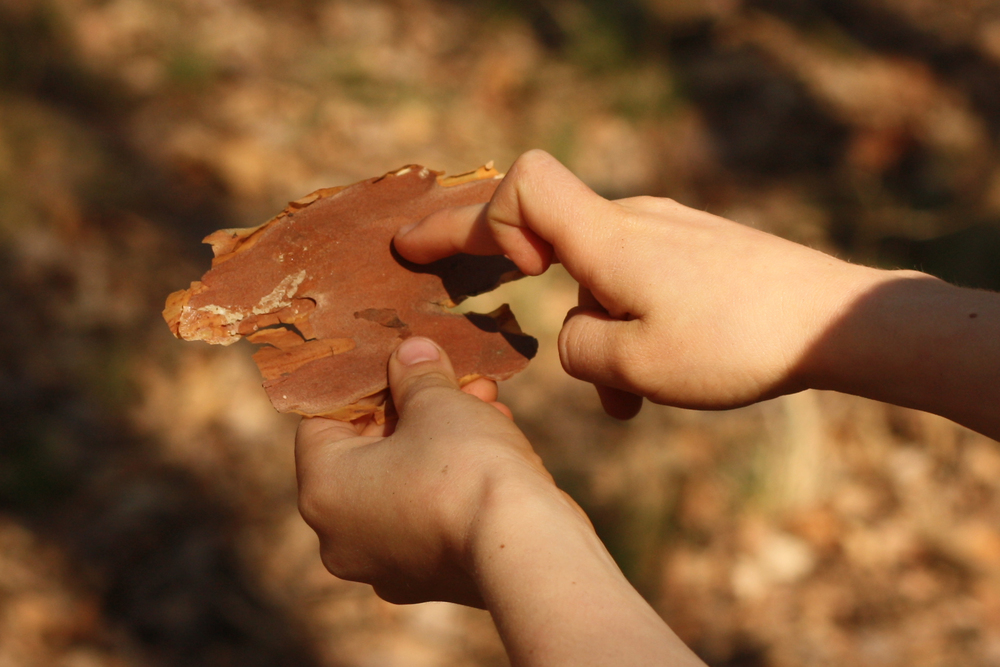
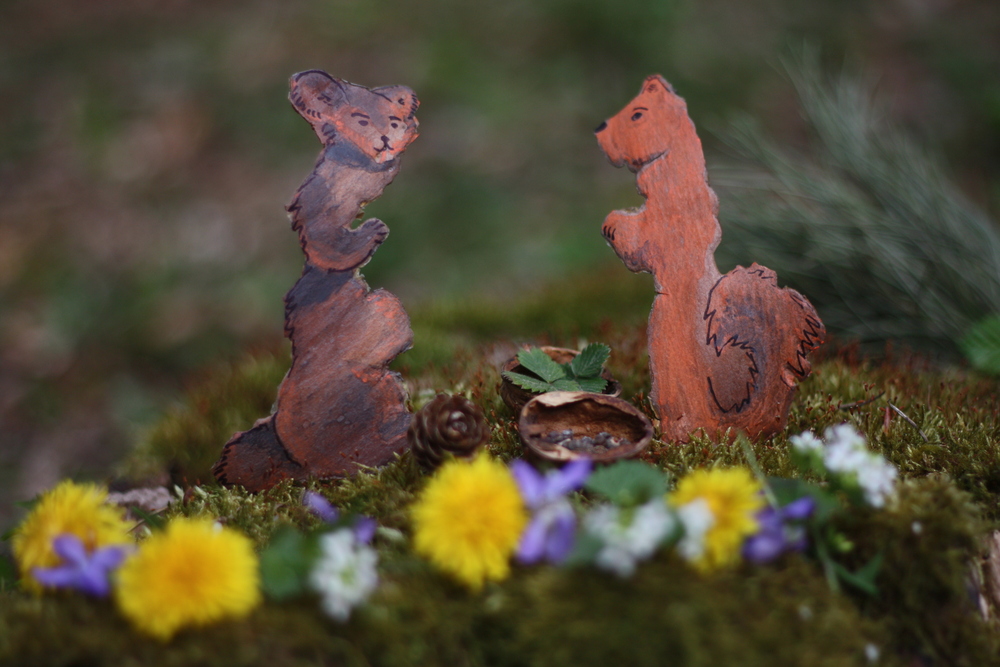
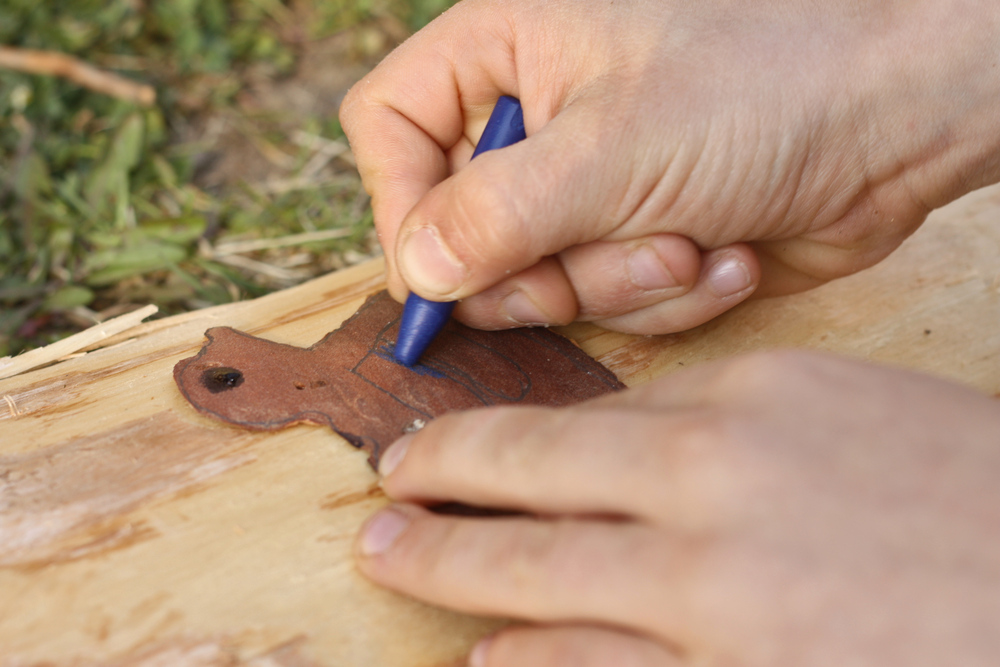
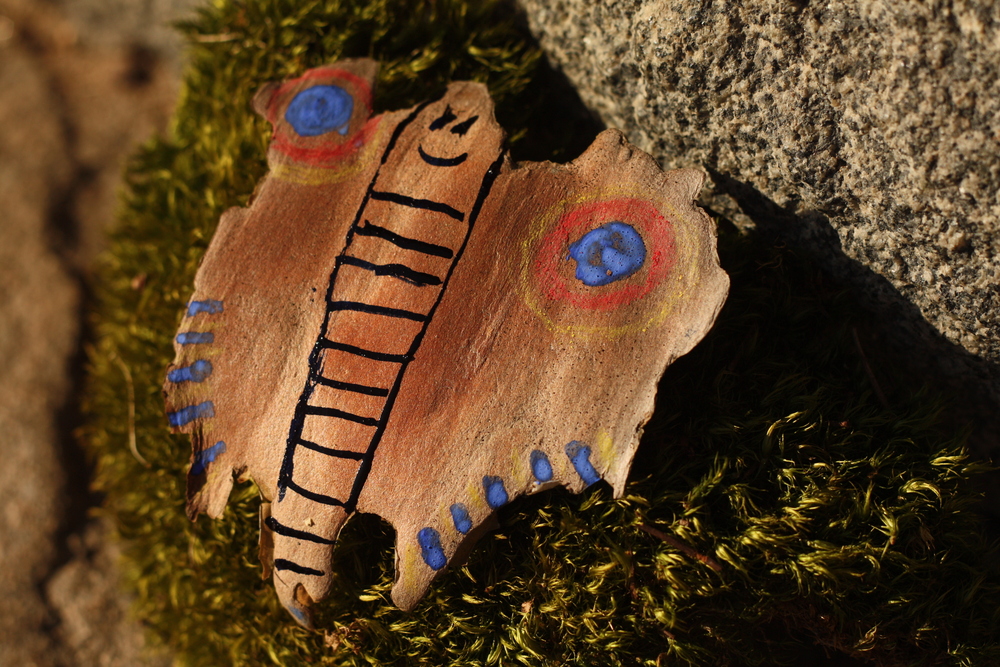
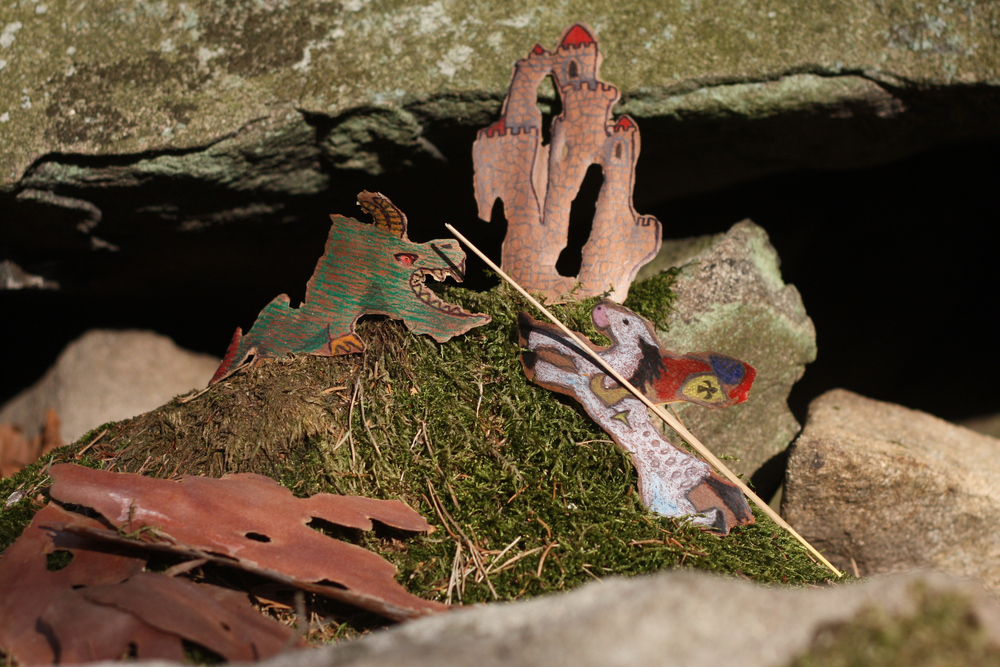
Have you ever looked for animals, objects or fairy tale characters in the clouds? This time go to a forest together and look for pictures in the bark of a pine tree instead.
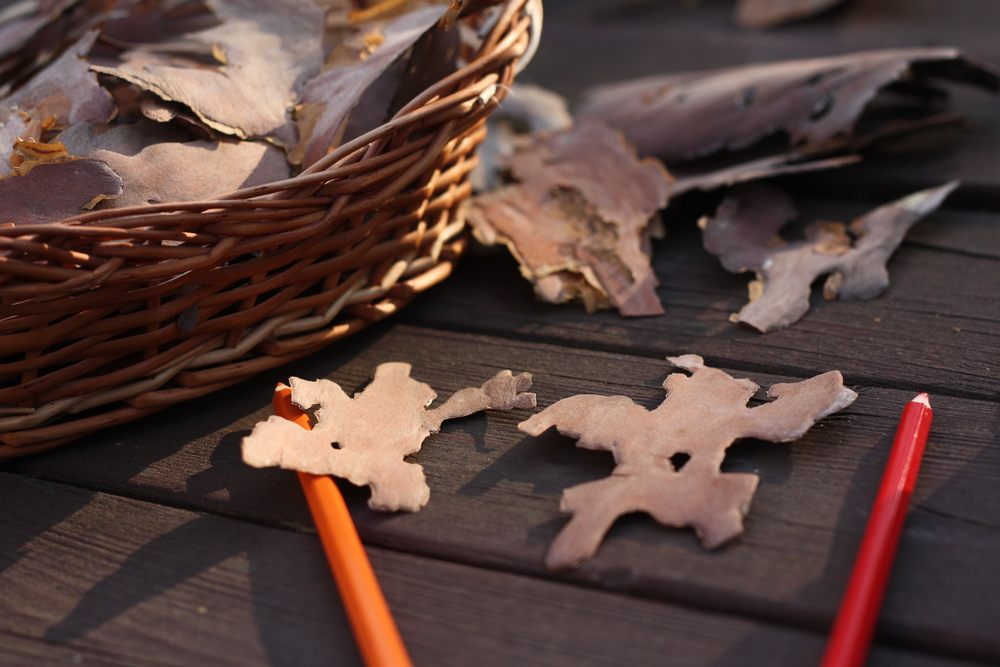
YOU WILL NEED: a location with plenty of pines, sycamores or other trees whose bark peels off, paints, crayons, watercolour pencils, soft colouring pencil, or markers
HOW TO DO IT: First you will need to find the source of the right bark; pine or sycamore bark worked best for us but you can also try larch and other trees. Do not peel the bark directly from the tree – small pieces fallen to the ground will suffice and offer the best shapes anyway.
Then all you have to do is search and let your imagination run wild. Submarine, airship, giraffe or maybe a castle? Everyone can see something different in the bark and that's the best part. You can show each other what your piece made you think of and why. And most importantly, you can use crayons to complete a few selected pieces.
Decorating the bark is easy and you can get started right on the spot. Or you can always collect some bark to bring with you to a heated room.
TIP: For drawing on the bark, watercolour crayons or wax crayons and a soft pencil work best. A thin black marker can also be used to highlight details.
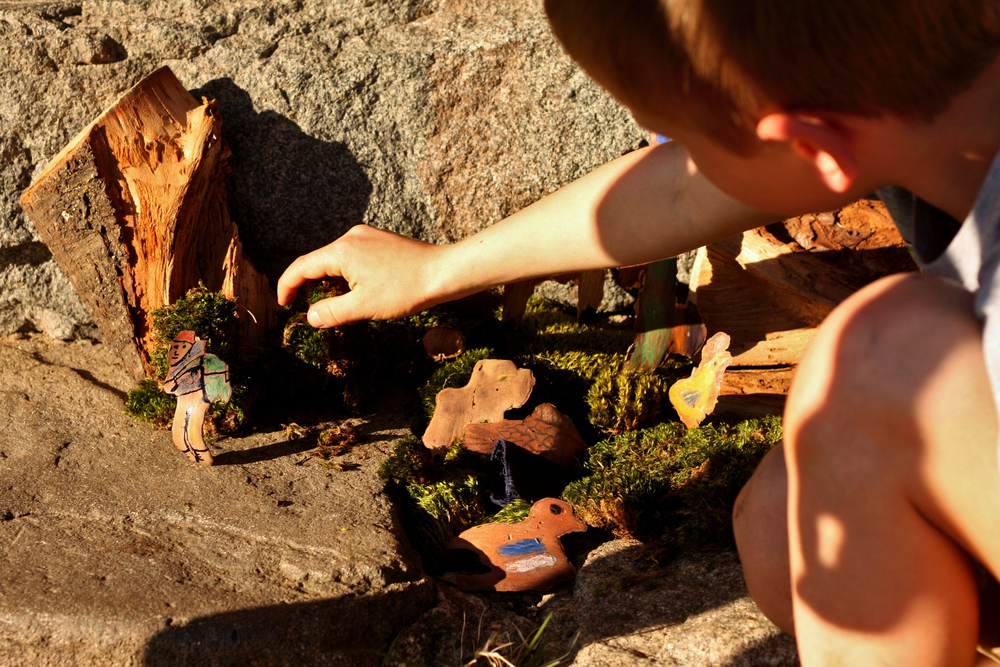
With the characters, animals or objects you have drawn, you can then play theatre, organise an exhibition, or involve them in a game. Children, if given the time and space, will often come up with their own ideas for games, amazing acts or new adventures.

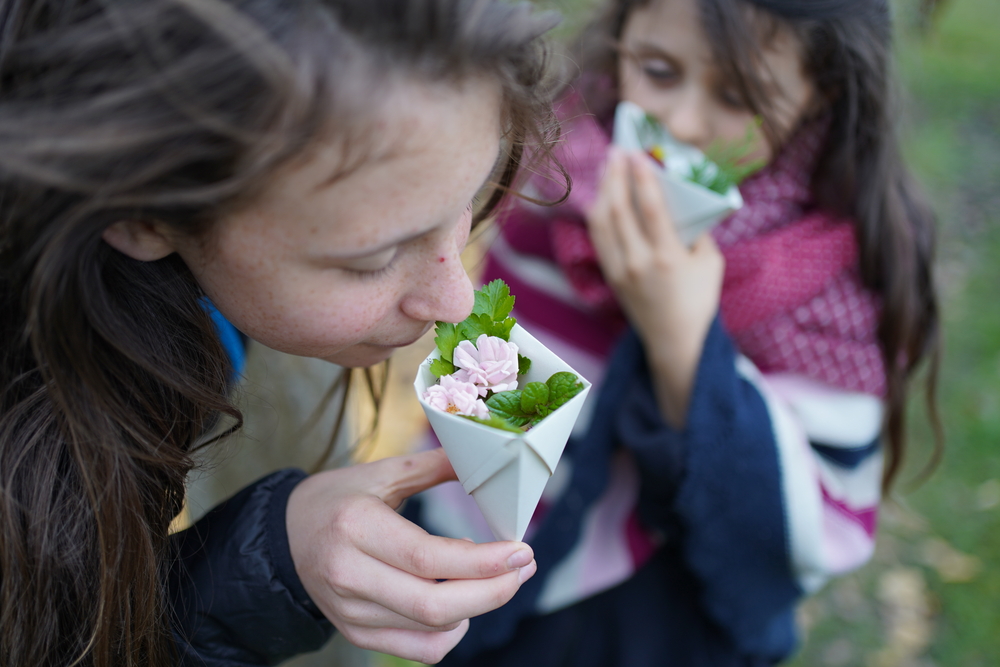

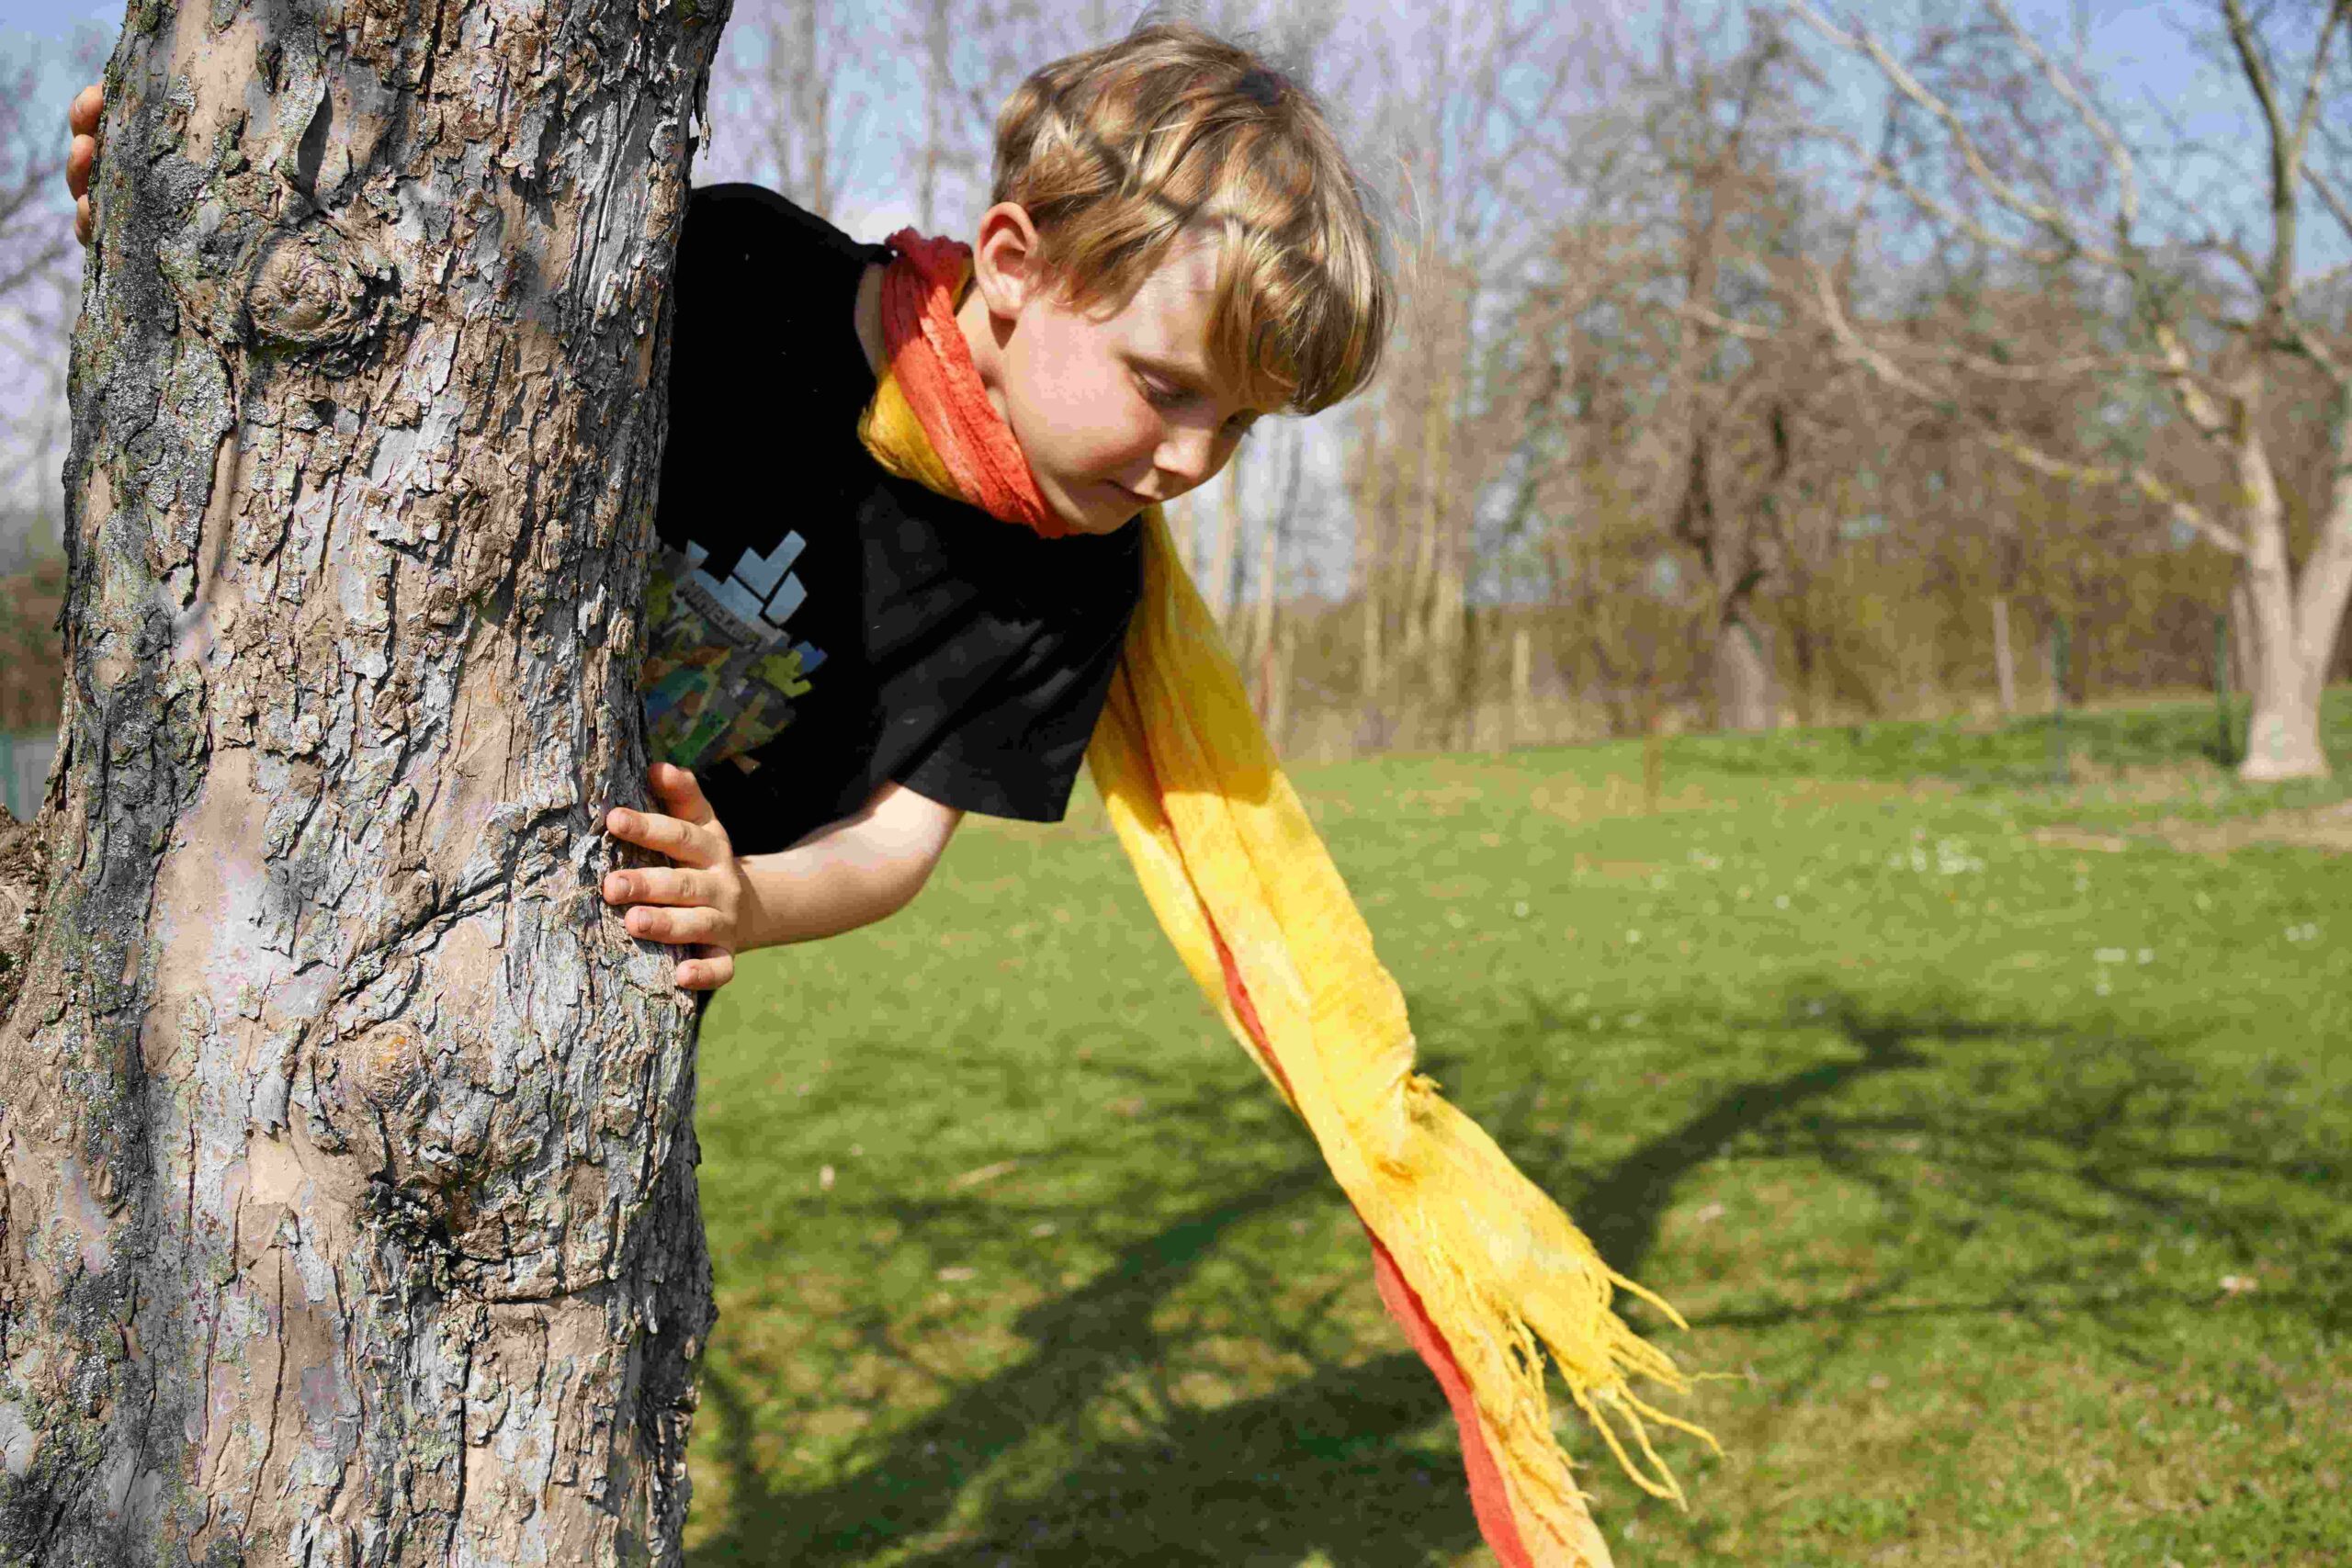
Focus on the smells in a trees‘ vicinity while spending time among the trees. Make your own perfume from natural materials.
YOU WILL NEED: A place with trees or shrubs, papers, pencils
1. TREE FRAGRANCES
Have you ever tried to smell a tree? It‘s unbelievable how many different scents there are around trees. The children should select a place among the trees and then lie down there for a while (1–5 minutes depending on age) and try to pick out the different smells that are all around them. Then let them walk around the tree and try to find the various smells – of bark, branches, soil between roots, leaves, flowers or fruits (if there are any). What scents are pleasant? Which ones are sort of disturbing? They can note them down.
2. FOREST FRAGRANCE
Distribute square sheets of paper to the children and advise them how to make a drinking cup with it. Now children can, alone or in pairs, make up their own unique fragrance, using natural items they find around the tree, and put them into the cup. All you need is a piece of bark, soil, clay, leaf, twig, polypore from the tree trunk, etc.
TIP: It is often useful to remind children of the rule of careful collection. There is no need to tear off big parts to make a small amount of perfume, etc.
3. PRESENTATION OF PERFUMES
When everyone has their perfumes ready they can meet, compare other‘s scents and present their scents. What were they made of? What memories do they evoke? Do they smell nice to everyone?
TIP: Do you know that some trees and shrubs are actually used in perfumes or medicines? Can you think of a few? (Rose hips, pine, cedar, citrus, etc.) Other trees repel insects (e.g. elderberries used to be planted near stables and houses because they drive away insects).
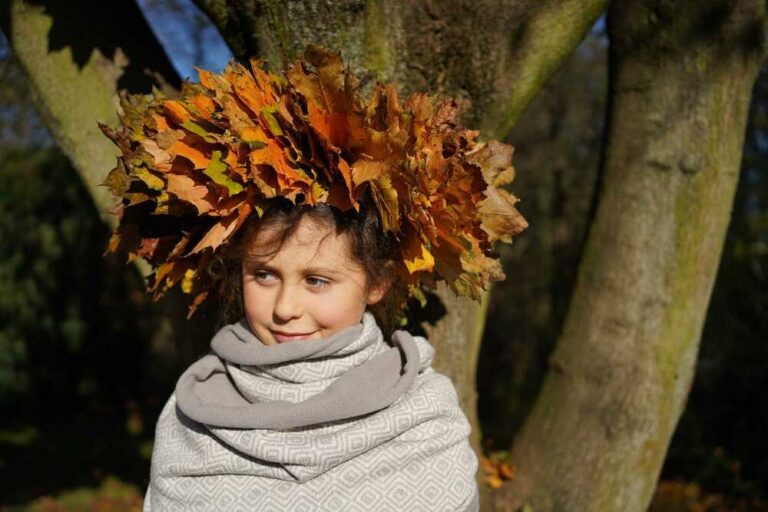
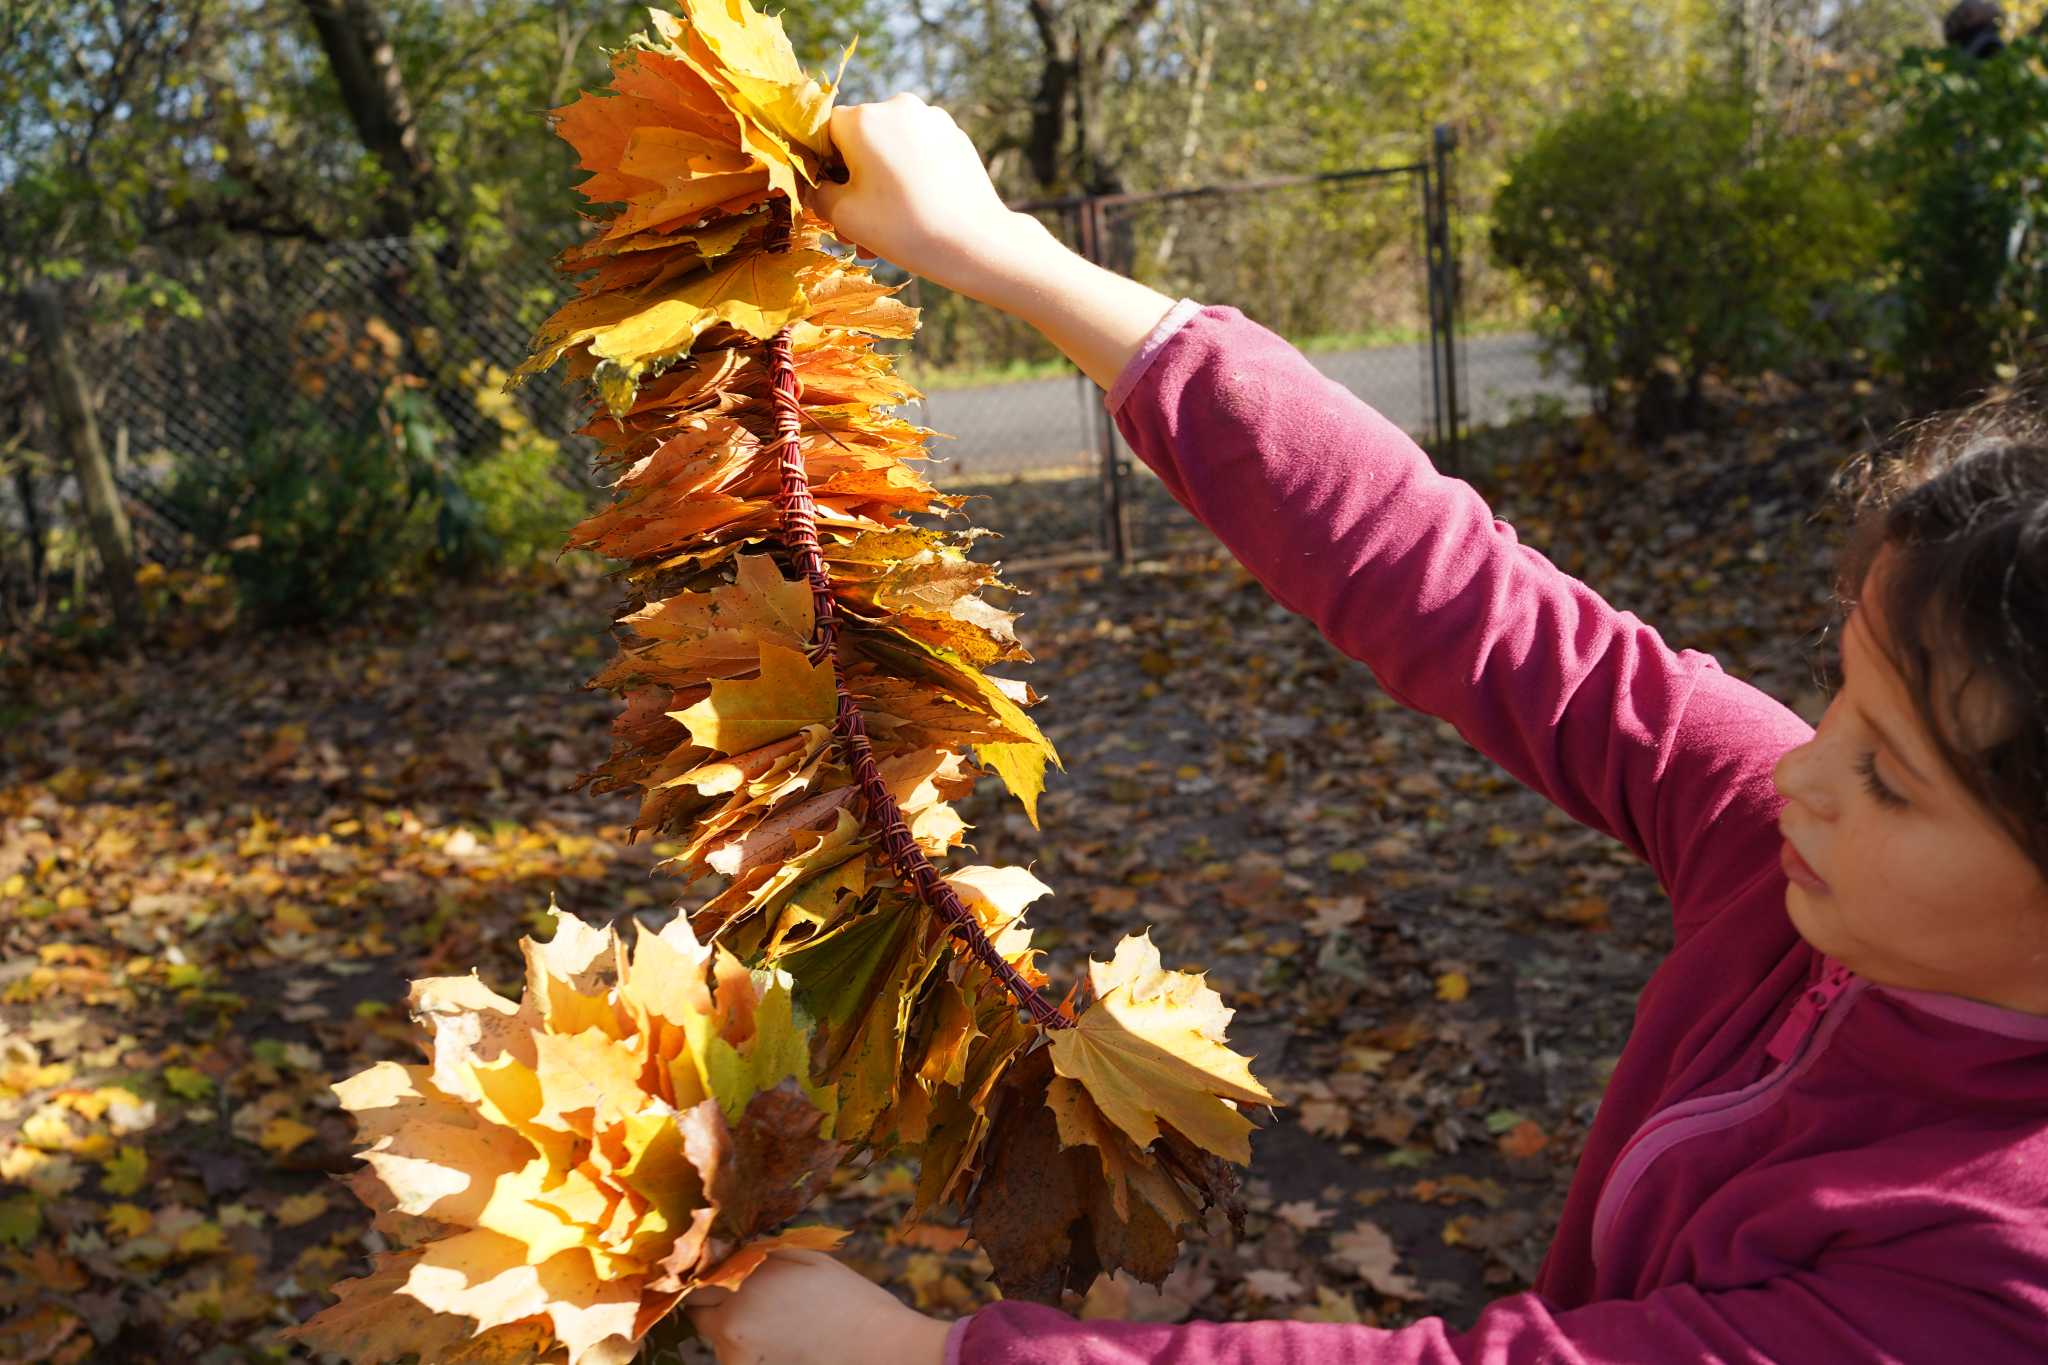
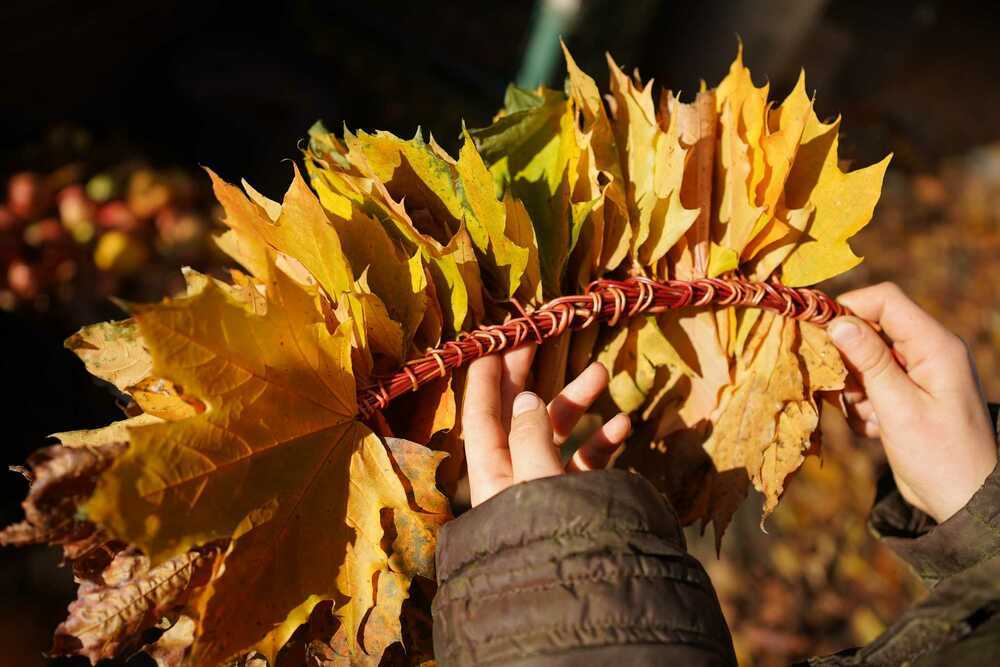
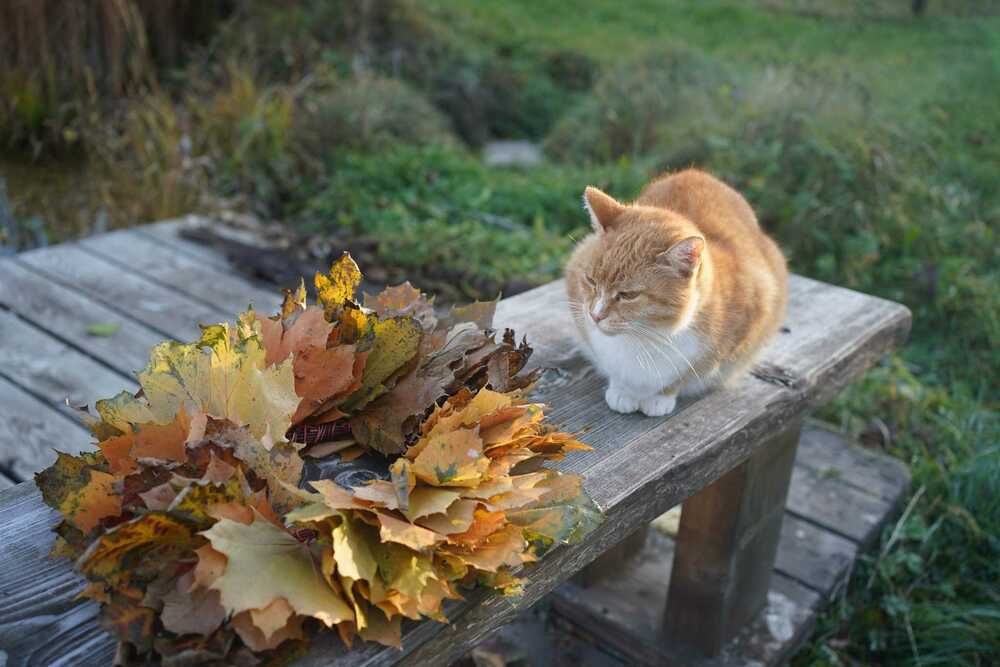
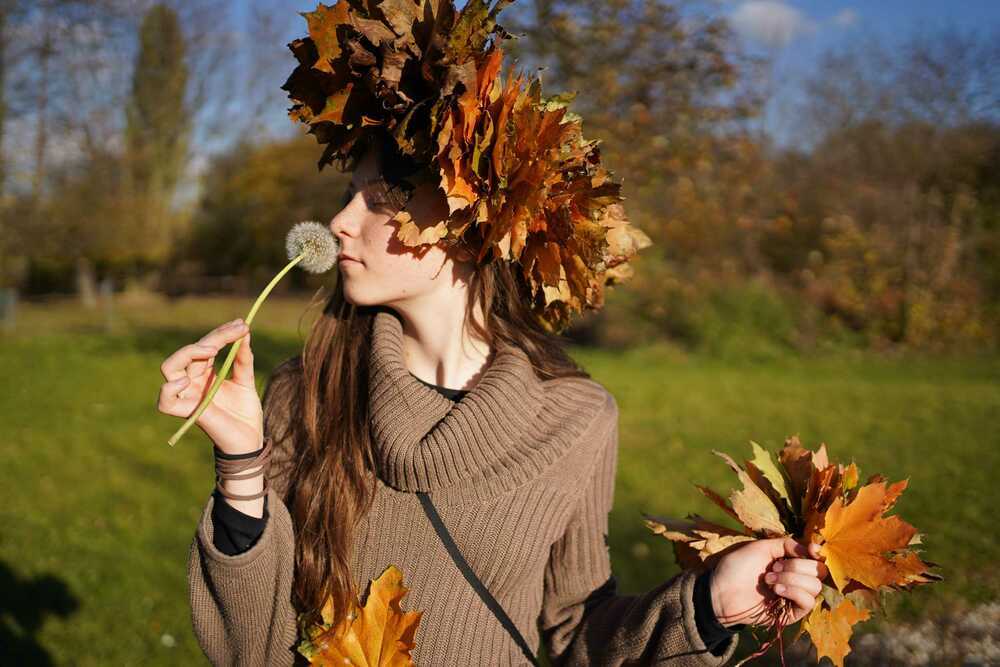
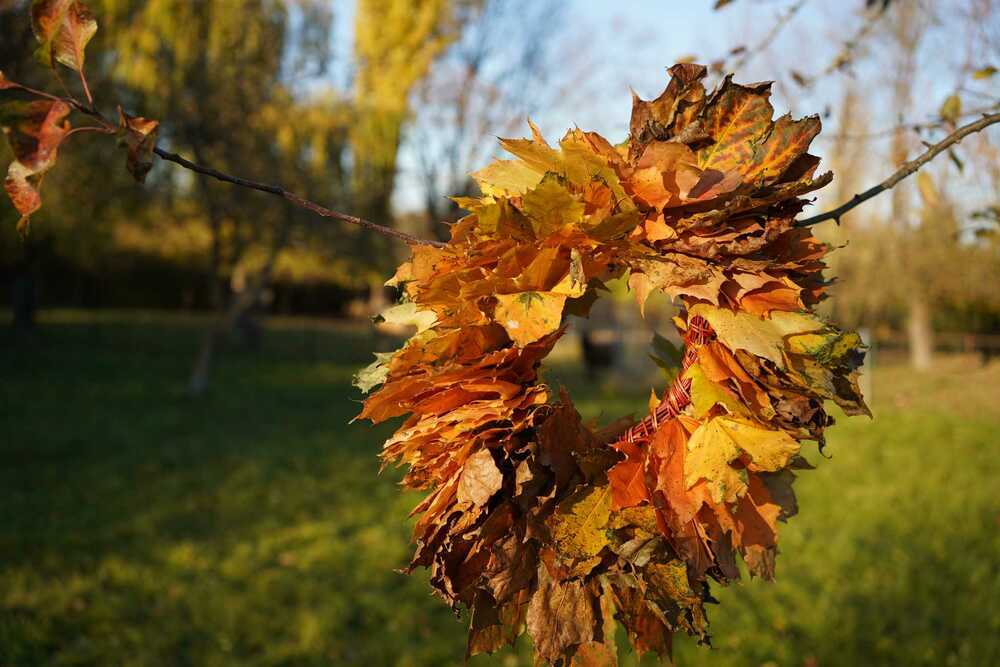
YOU WILL NEED: a source of fallen leaves with longer petioles (stems)
HOW TO DO IT:
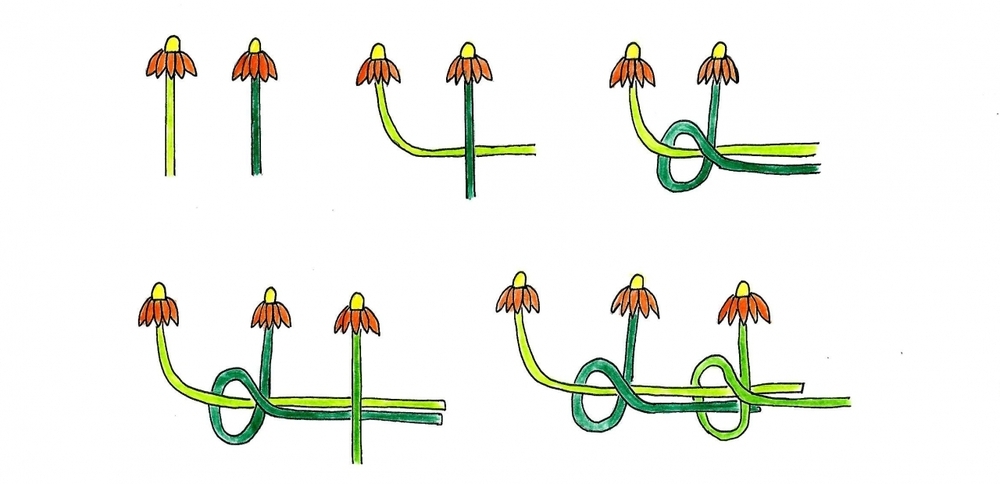
First of all, you will need to stock up on suitable leaves. Let the children explore where there are a number of different tree species or where there are lots of fallen leaves. The wreath is best woven from leaves that have long petioles; maple leaves work well plus they are wonderfully colourful in the autumn. Try other trees too, such as sycamore, chestnut or walnut.
A leaf wreath is woven in the same way as a flower one. Attach each new leaf with its petiole perpendicular to the previous ones, then wrap it around and align the end of the petiole with the others. You can find a lot of manuals on the internet.
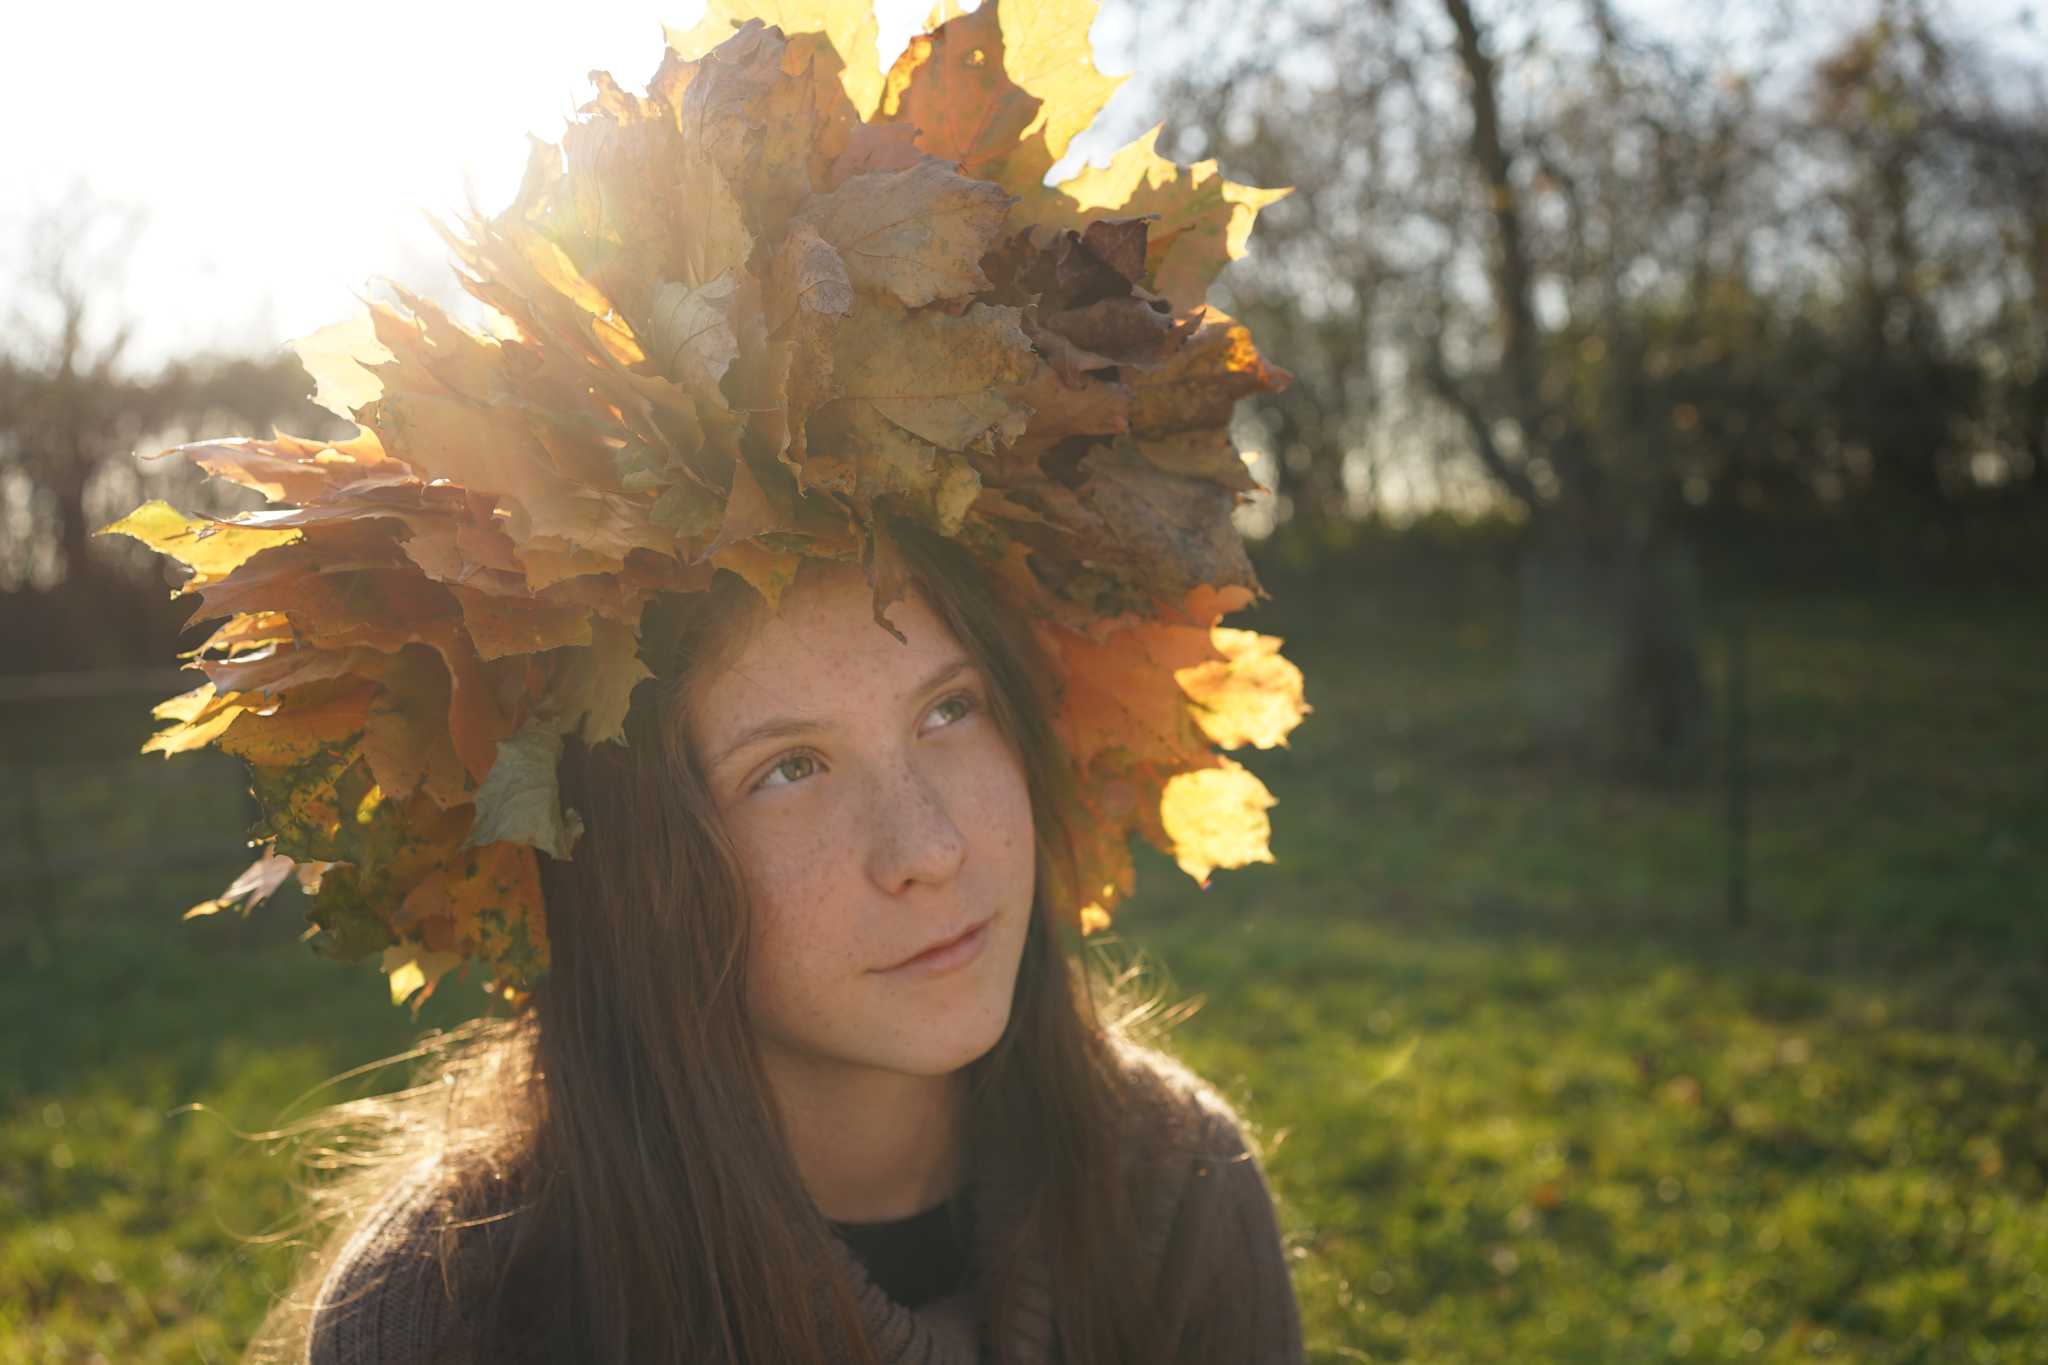
When each child has a wreath, let them play freely. What would it feel like to be a tree fairy? Or the mighty King of Leaves? The children can try to see how they can blend into nature in autumn when they are wearing their autumnal leaf wreath. They can organise a fashion show or, better yet, a theatrical performance. Children are sure to invent their own games if they are given the opportunity.

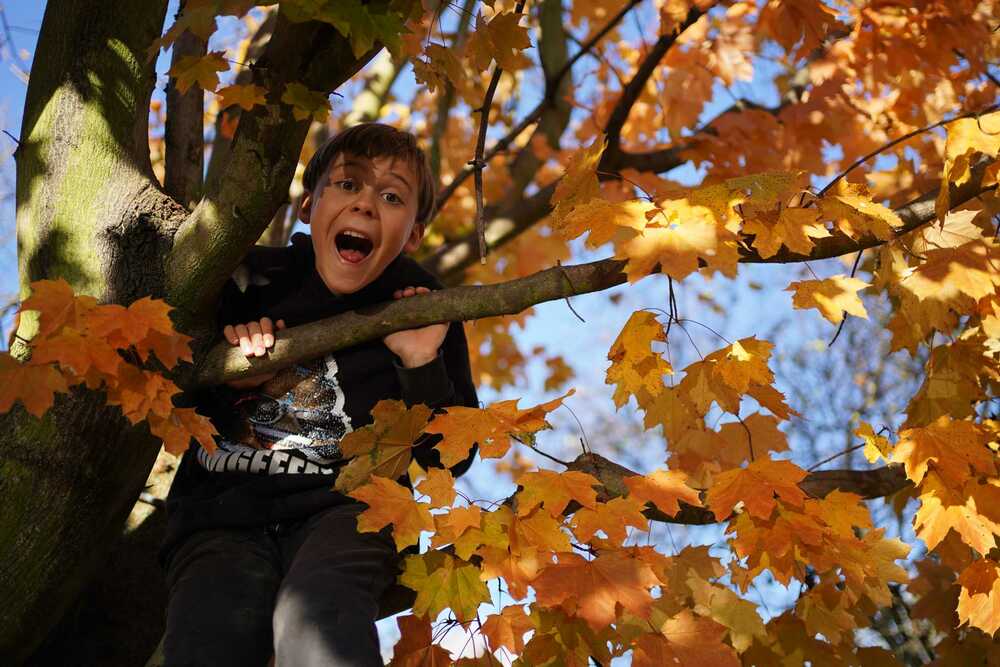
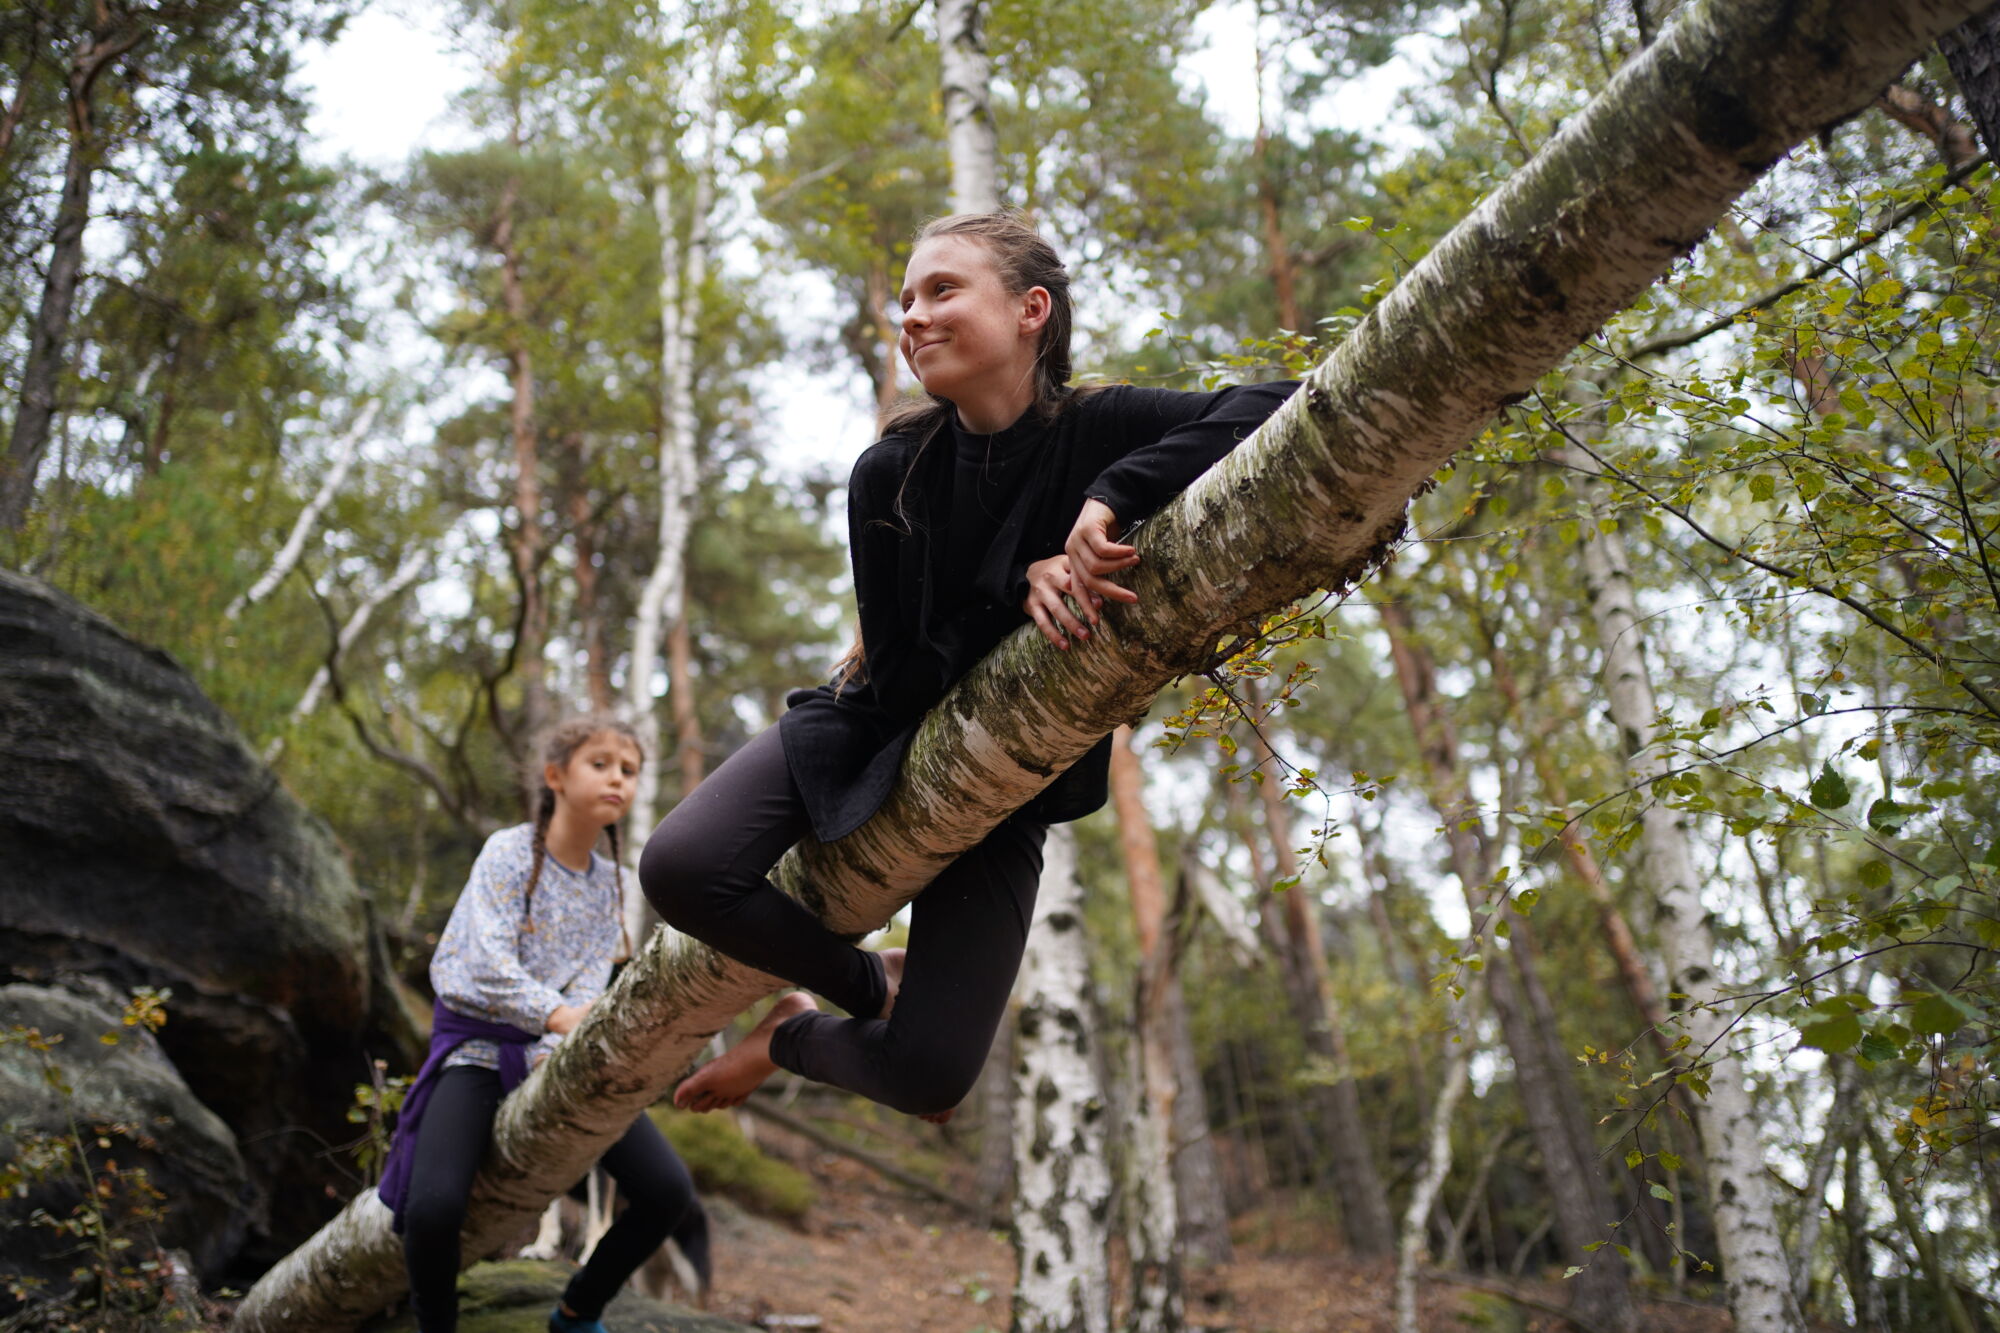
Give your legs some exercise with this classic game and explore the surrounding trees.
YOU WILL NEED: a place with different types of trees to run around
Look around you. How many trees grow here? Are they all the same? Ask the children which trees they know and which they don't and together you can look them up in a reference book or guide and learn to recognise them.
HOW TO PLAY:
Explain the rules – a designated catcher has to catch the others. One person is the leader of the game who stands on the side and determines which tree is a “den” or “home base”. Anyone who wants to hide away at the den has to listen to the instructions of the game leader because the location changes every now and then – sometimes it is a birch, sometimes a hornbeam and then a linden. It is advisable to change the den's location so the catcher always has an opportunity to catch someone and the game proceeds at a good pace. No fair just standing by the beech tree!
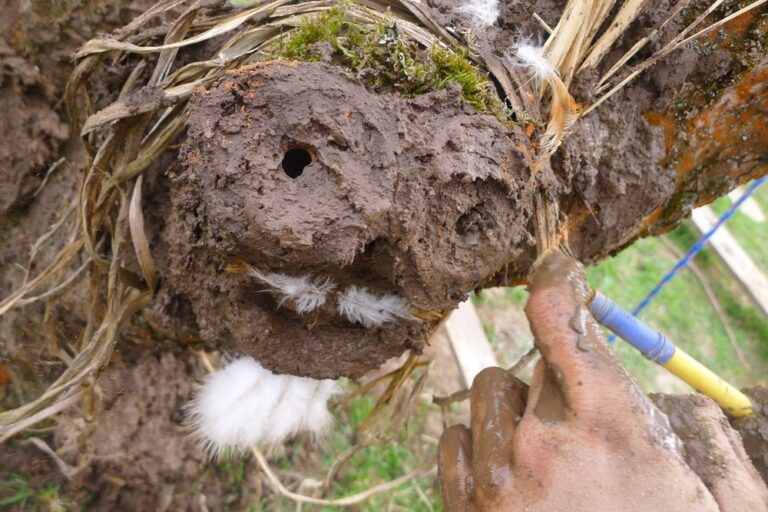
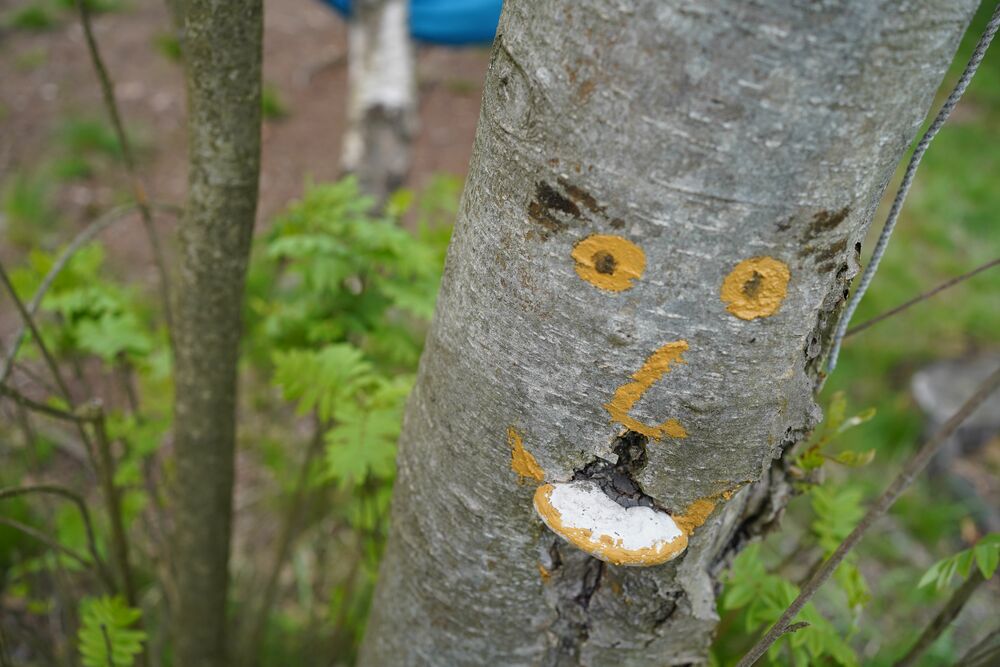
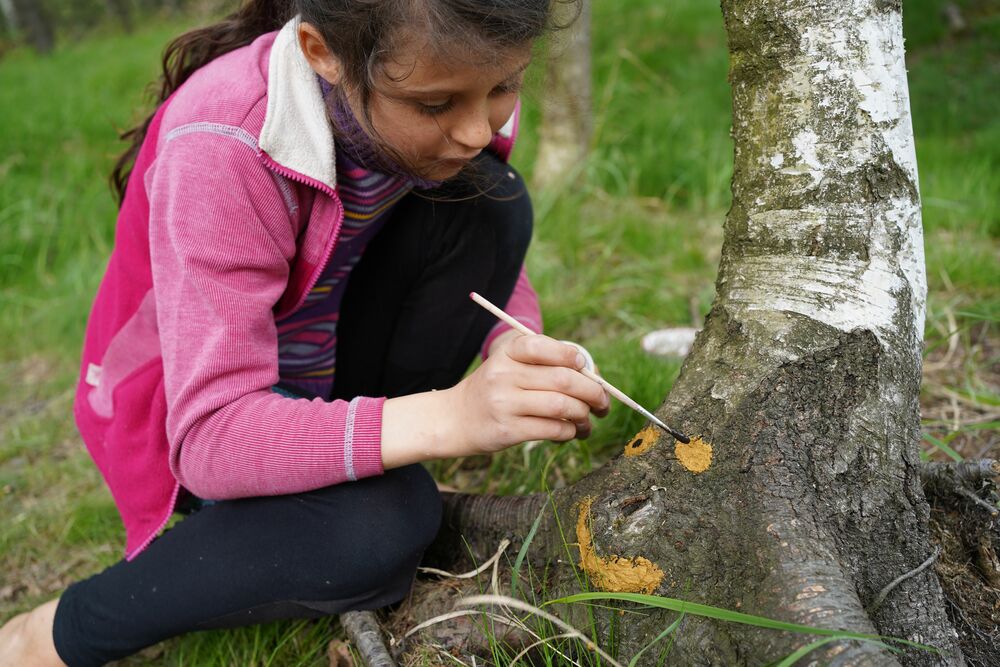

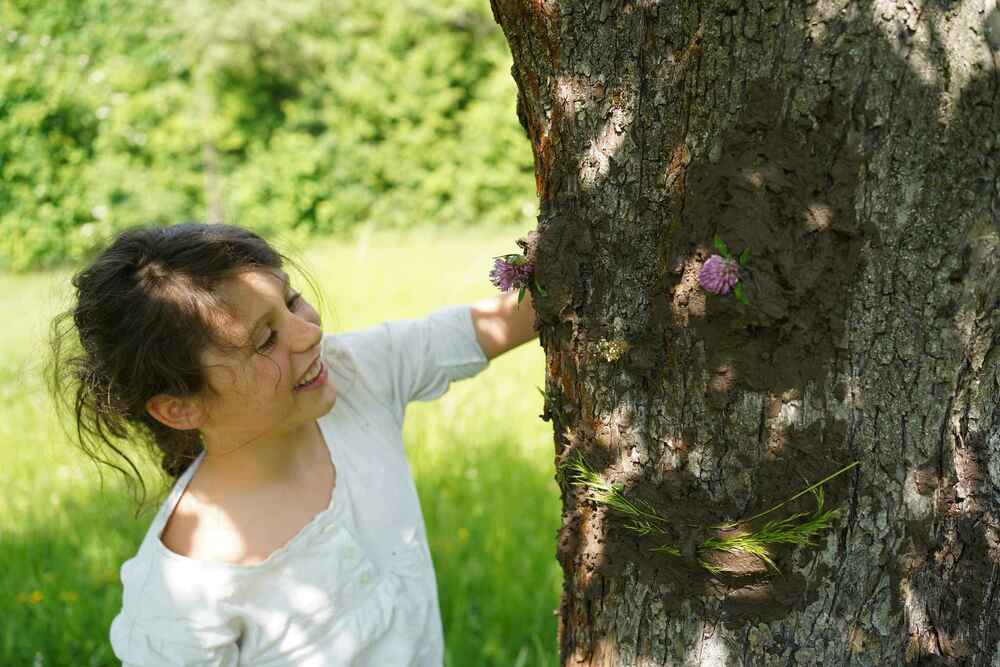
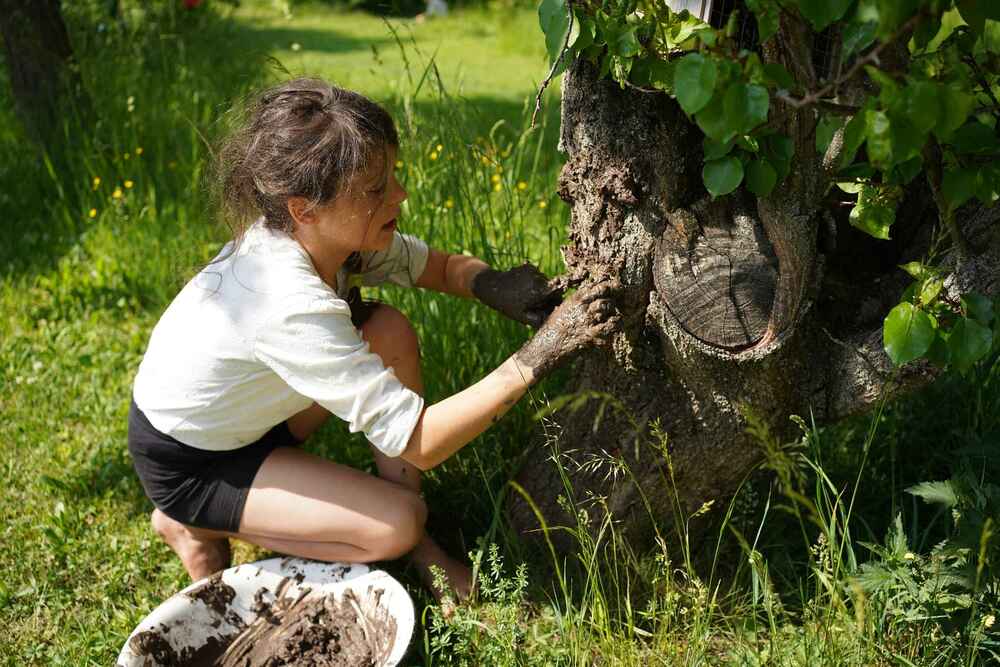
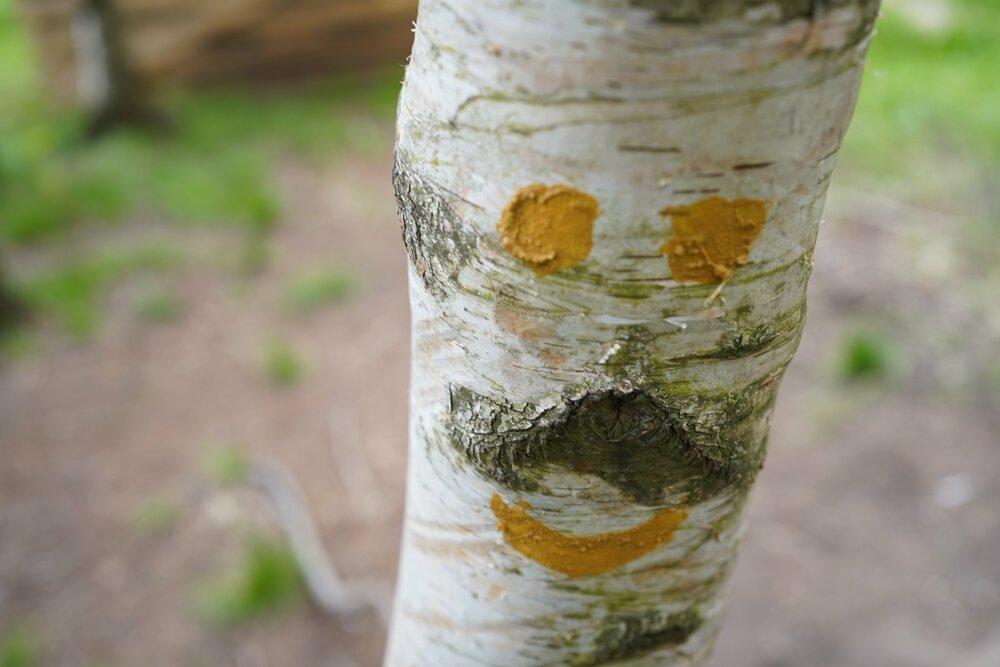
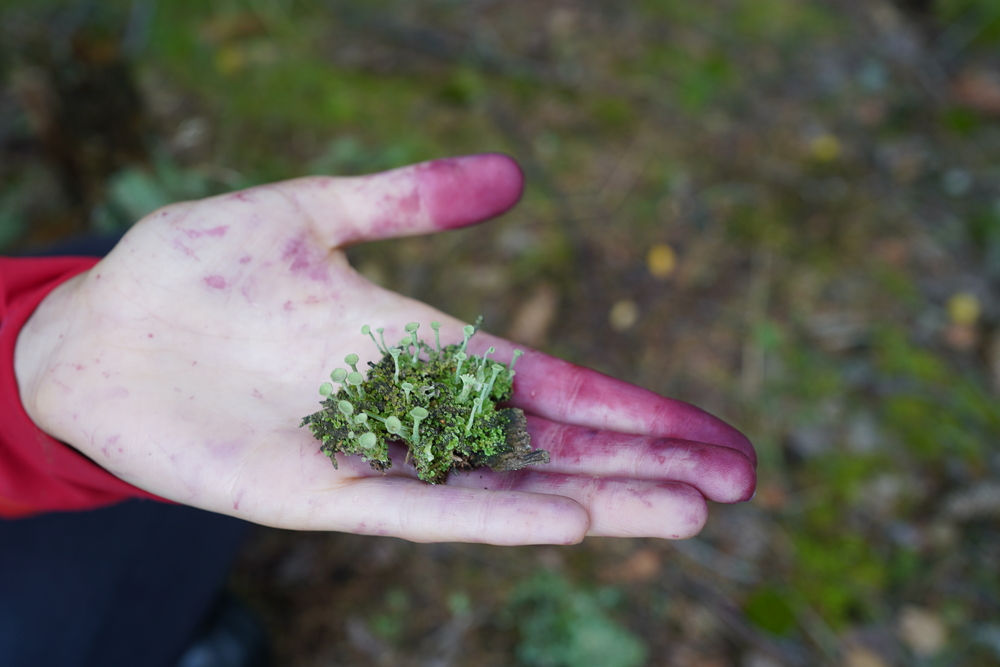
Let trees come to life, meet them as magical creatures. Create a face for your favourite tree using soil.
YOU WILL NEED: Containers for mixing mud, water, natural material for decoration, rags for wiping hands
1. MEET YOUR TREE
You can start with a short walk among the trees, telling a story or reading a short text. The goal is to calm down and tune into a creative mood. Agree upon the boundaries where the children can roam and then let them walk alone and choose their own tree, or part of a tree, that fascinates them, interests them or they are curious to know more about. The choice is up to them and they should be allowed to use their intuition to find the tree that is “just right”.
2. MAKE A FACE
Where possible, gather up suitable soil. It should be rather sticky and clayey so it models well. Mix it with water to create a rather solid mud that will hold well to the bark of a tree.
Show the children how they can create a tree‘s eyes, nose, and mouth. Let them choose the most suitable place on a tree first and then have them gradually model a face. The clay will hold best on the trees with the coarsest bark.
TIP: Children can add other natural materials to the soil face (dry grass, twigs, flowers, pine cones etc.). If there is a shortage of trees in the area, more than one child can work on each tree at the same time. It will depend on the size of the trees‘ trunks and the dynamics of the group.
3. DIALOGUE
Now that the trees have faces, they can come to life and the children can sit with them and talk. How is the growing going? What have the trees experienced? What do they observe every day? What do they enjoy the most? And, conversely, what annoys them the most? What would they like to tell people?
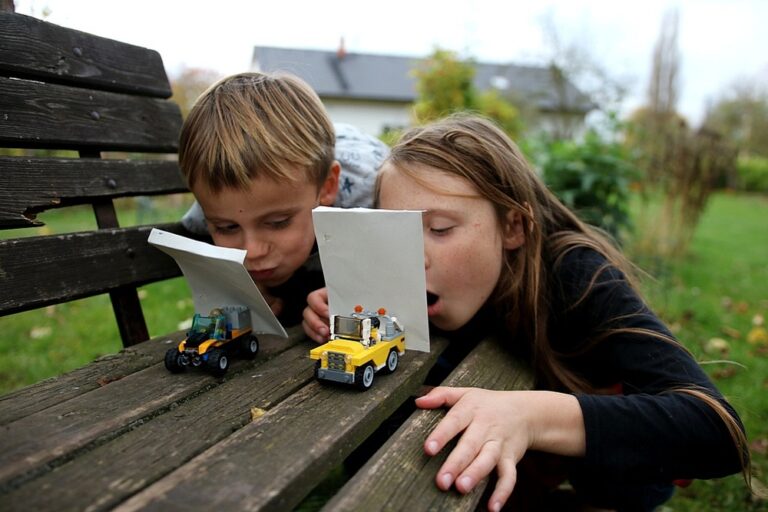
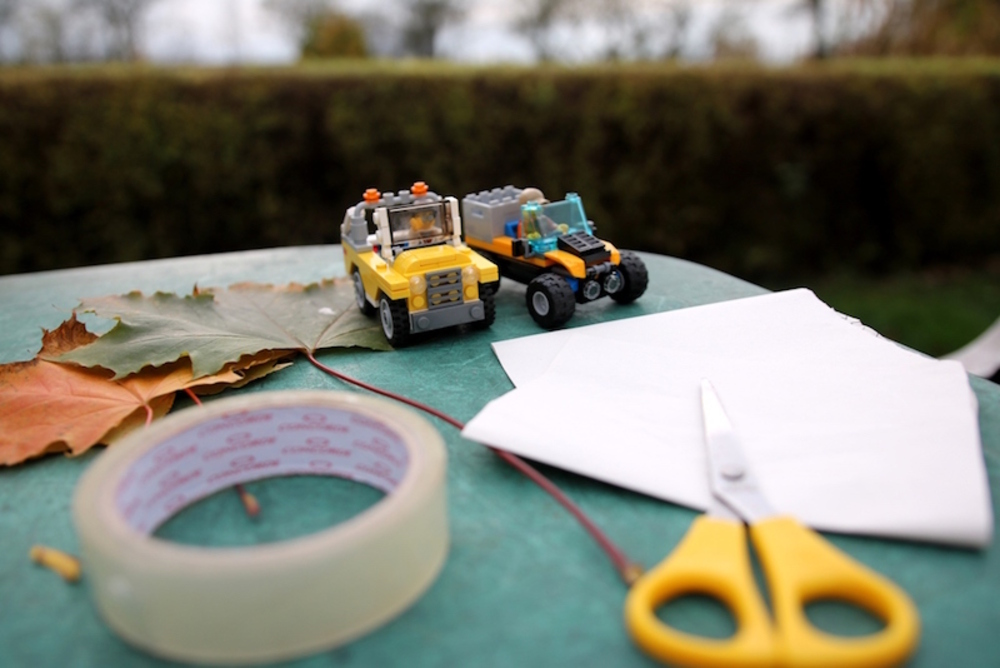
Do you need to lure some children outside who would rather stay inside? Try bringing a favourite toy to the garden or park – Lego. Embark on a science experiment which will explore wind propulsion.
YOU WILL NEED: Lego cars and passengers, sheets of paper, scissors and tape
HOW TO DO IT:
Build simple Lego cars, ideally with the rear higher to make a place for a sail. Use tape to attach the sail (a sheet of paper but you can try natural materials as well). It is vitally important the cars should have the right passengers who can handle wind-powered driving. The children should be able to explain to you who is suitable for driving in wind and who is not.
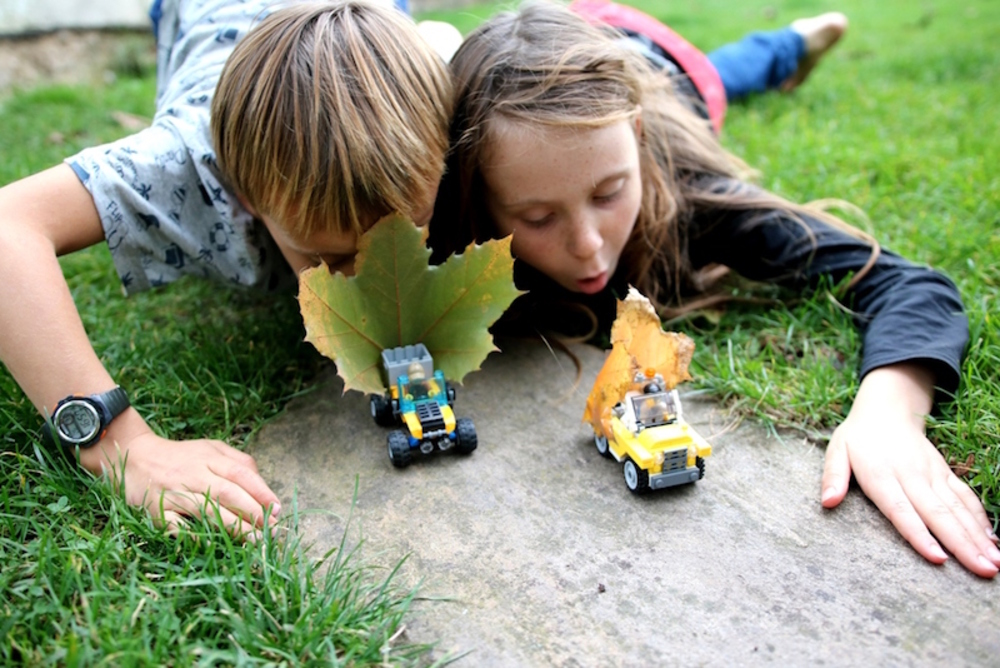
Now it's time to go racing! Ready, steady, … and blow! Whose car went further, who had to blow harder? You can now begin experimenting, if everyone wants to, by measuring the length of each run, then trying the cars on different surfaces and testing different materials for the sail. Racing can quickly turn into a rescue mission or an escape from a tornado to make the game more creative and not so competitive. If you're lucky enough to have a windy day you can see what the wind will do to your cars.
It might be necessary for the continued peace between the racing participants to shift the focus away from the competition aspect of racing and devote yourselves to another activity when the thrill of creating leads to arguments over who has best wheels, surface, incline, bigger sail, etc. The game can be used to draw everyone outside where other activities can be introduced. If you want a real race, you need to make sure that the cars have the same construction and the same wheels because the whole experiment is all about friction and some wheels, especially off-road wheels) can slow down the ride quite a bit.
Lego windsurfing is a great exploratory opportunity; the children will suddenly notice differences in slopes, smoothness of surfaces and obstacles in the terrain much more. If you find yourselves in the garden, it is a good idea to try making a track on a plank or other board. This way research can continue by experimenting with the slope and its effect on speed.
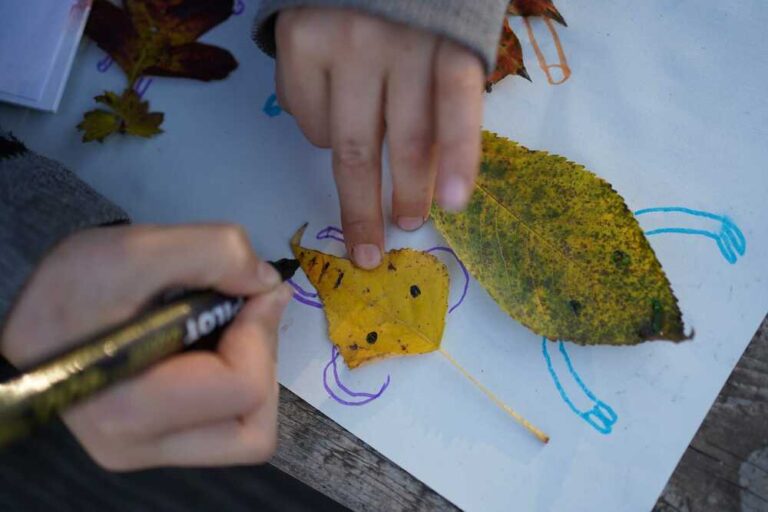
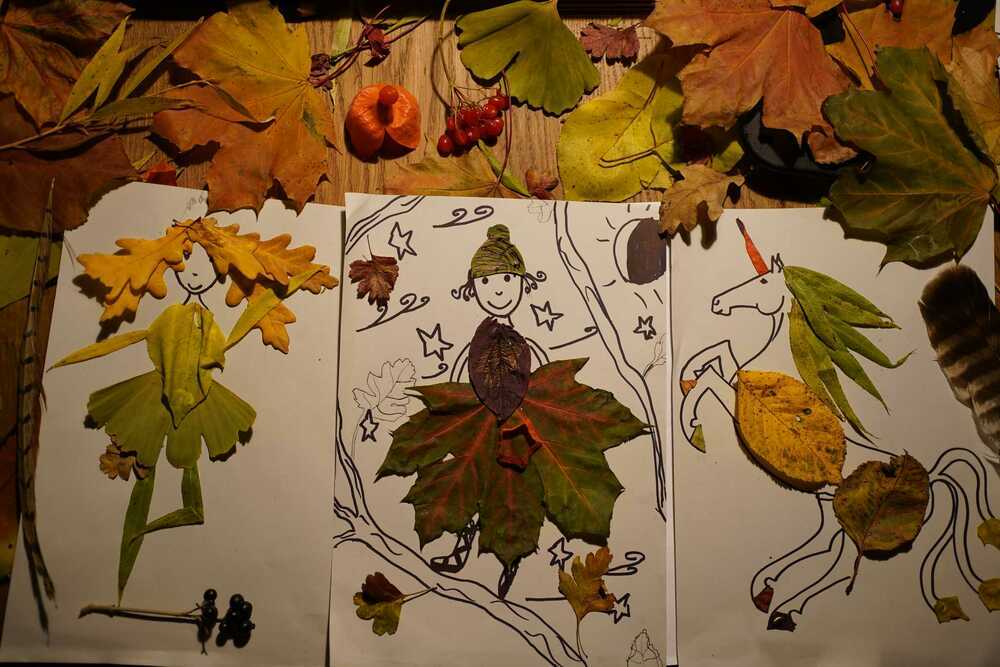
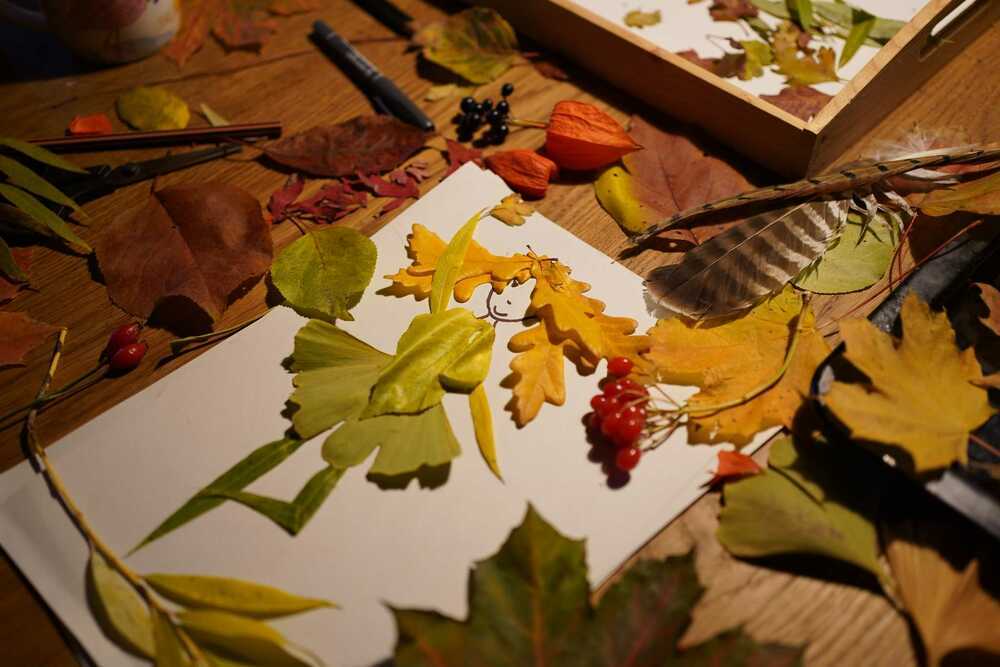
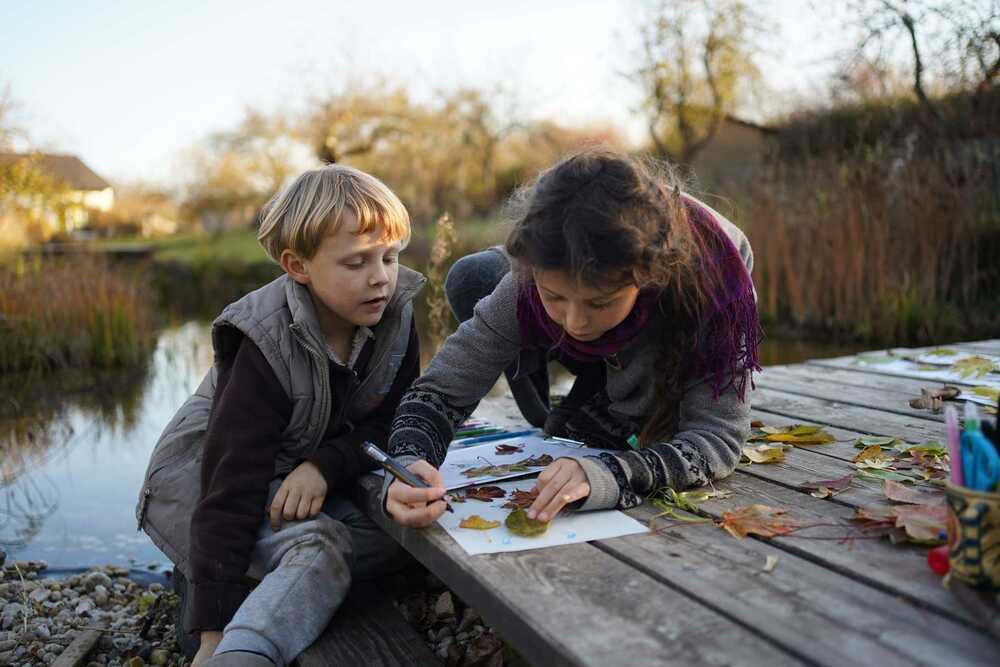
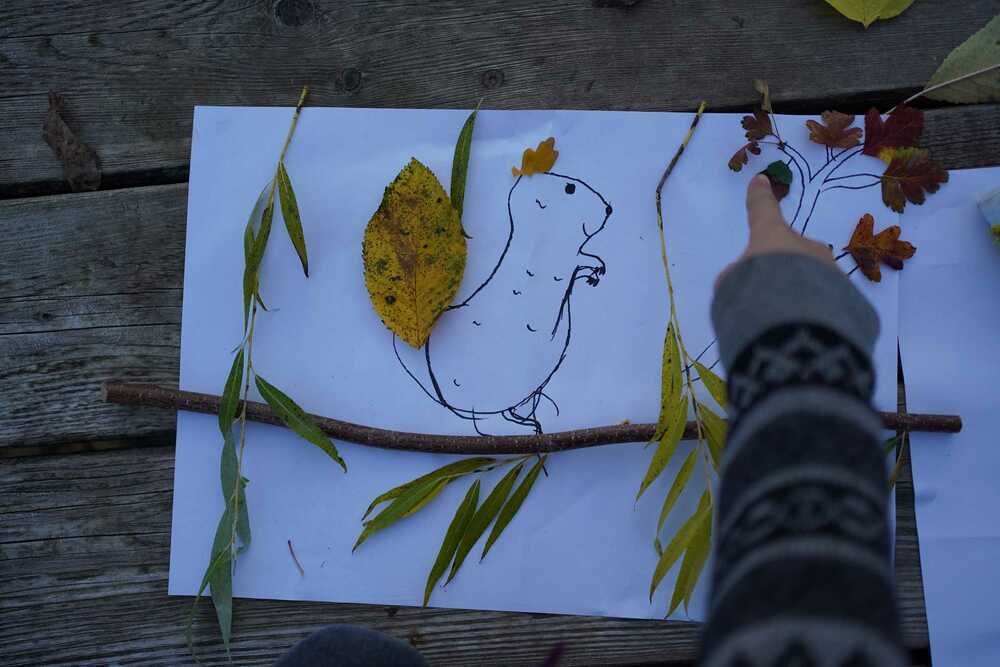

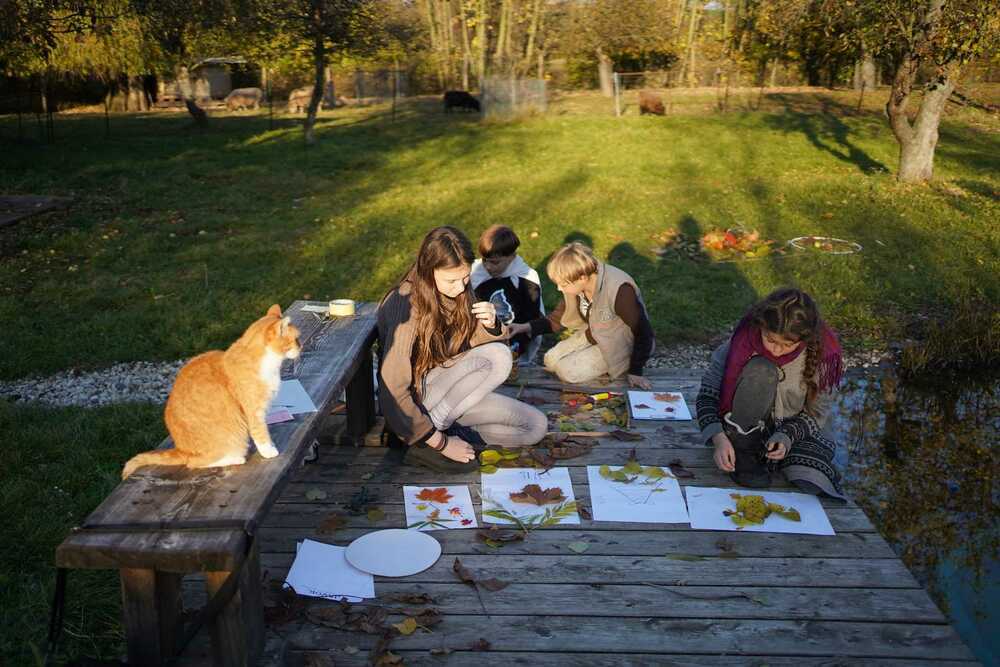
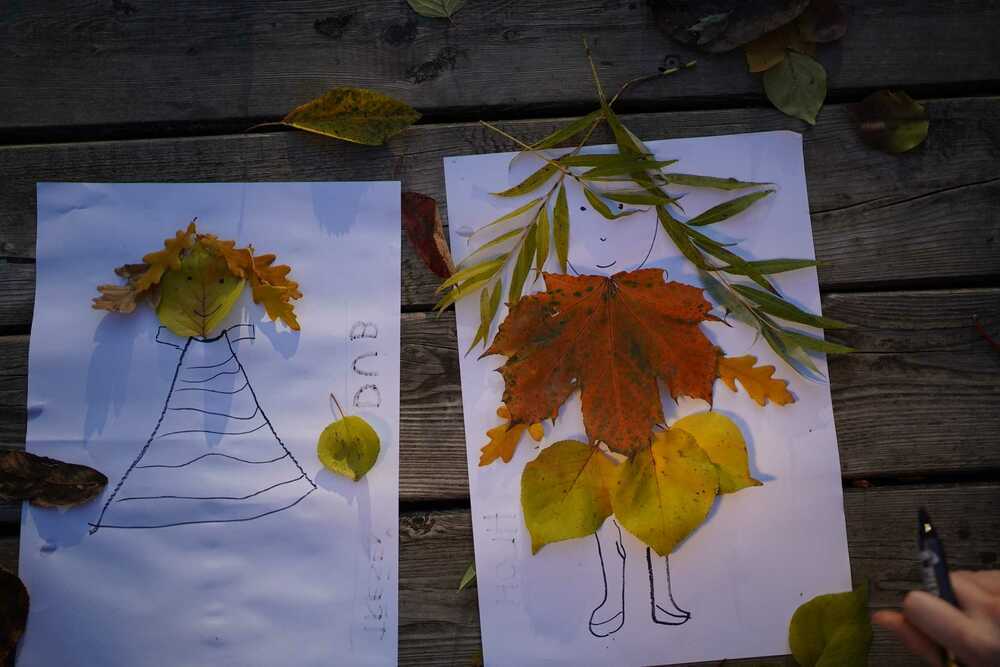
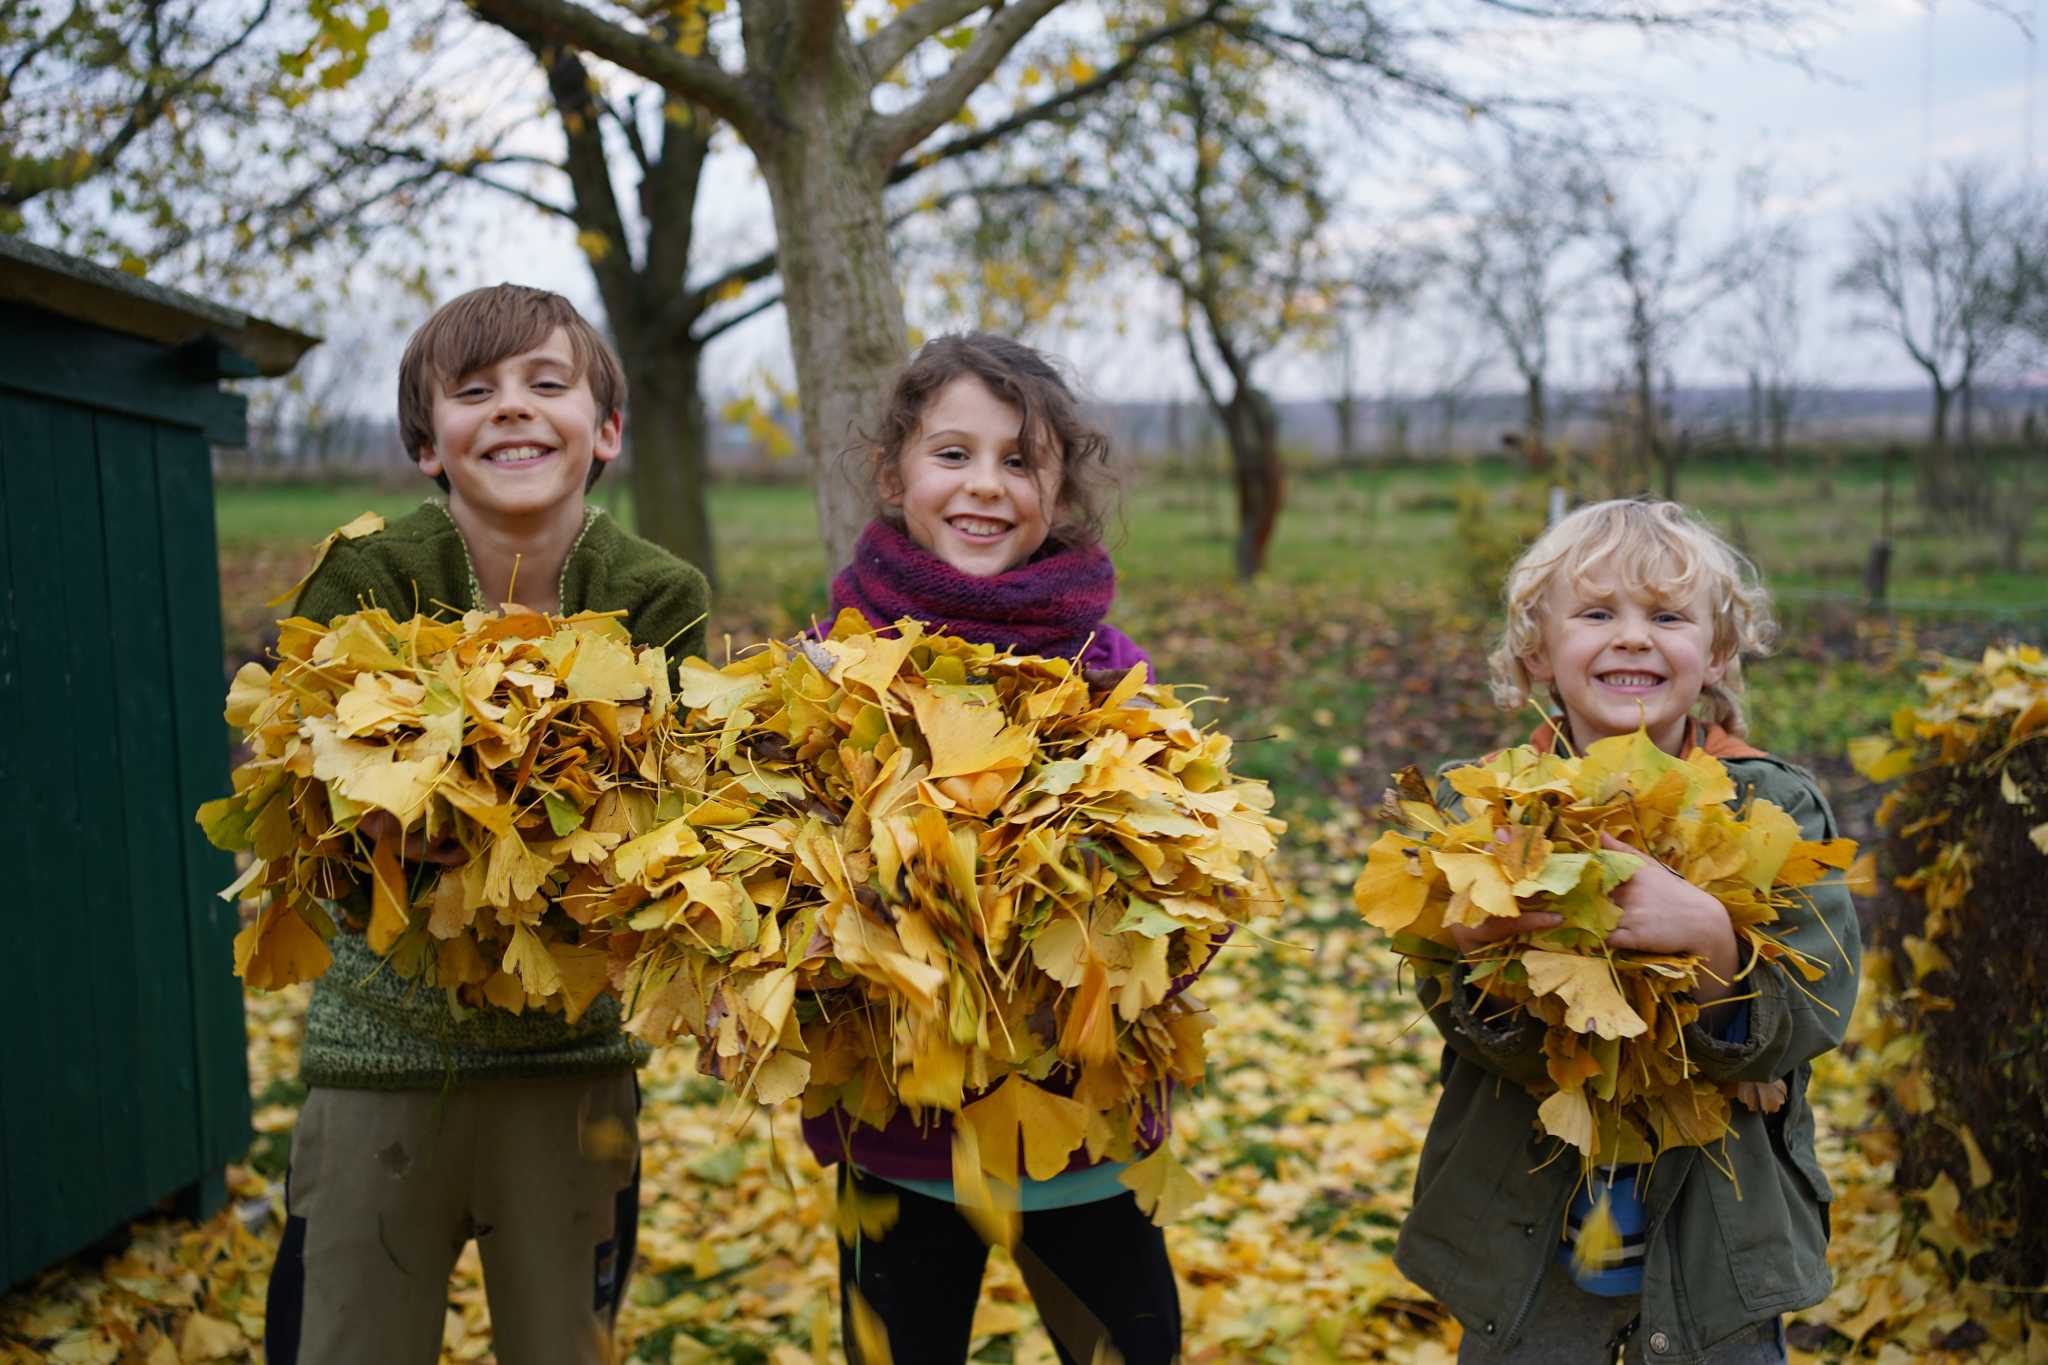
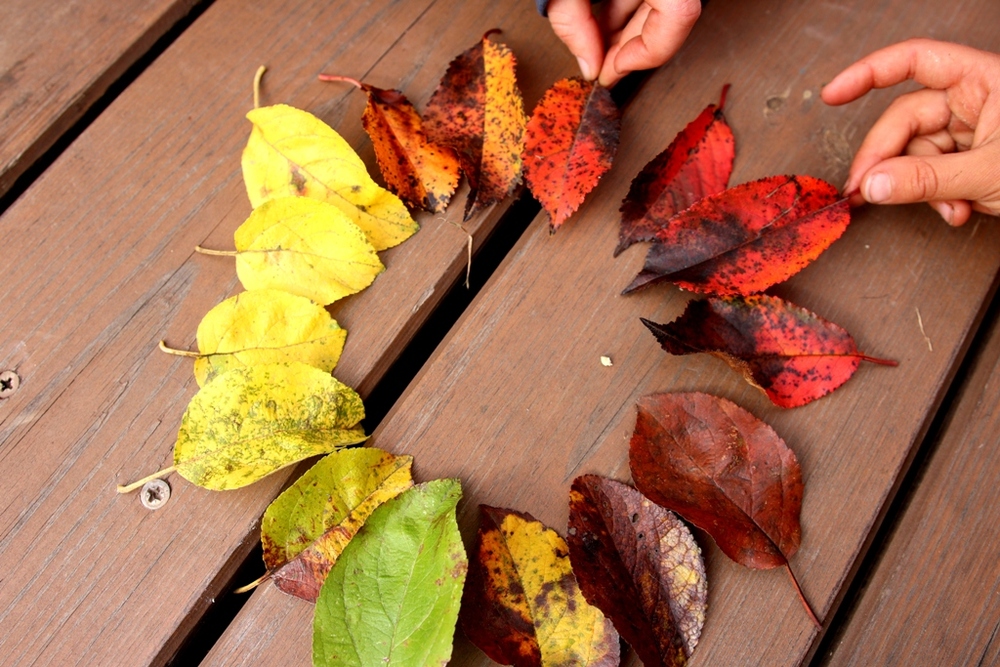
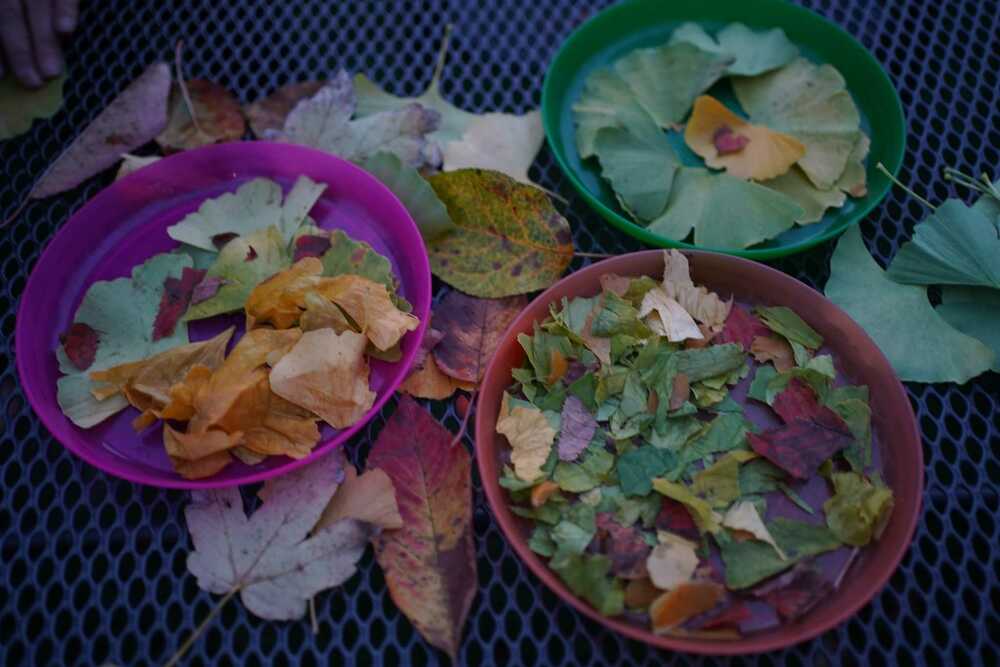
Autumn offers a flood of colours! Brightly coloured leaves invite you to create. Try to collect them and free your imagination when composing images.
YOU WILL NEED: paper, pencils, crayons, paper glue, a place to collect leaves of various colours, a basket to carry them all (optional)
HOW TO DO IT:
The first thing to do is to let the children run around and get wild outside. This will help them concentrate on this rather calm process of composing images. Let them explore what shades and shapes the surrounding nature offers. Let them try to find interesting and differently coloured leaves or other natural materials. They can collect the nicest pieces in the basket or just carry them in their hand. There is no need to stock up, sometimes it is more interesting to make do with a little.
When you have the material, you can start creating. Either right outside (if it's not too windy) or later in the warmth of your home, perhaps with a cup of good tea. Everyone can proceed in their own way and choose their own creation technique. You can choose an interesting leaf, think about what could come out of it, and turn it into something special. Or you can pre-draw a picture on paper and use the leaves to “colour” or otherwise complete it. Anyone who wants to can try a leaf mosaic or invent their own technique.
This type of creation is really quick and everyone will be sure to finish at least a small picture. And the themes don't necessarily have to be limited to fairies and unicorns – fire-coloured leaves can also be made into flames blasting from a rocket ship.
DON'T MISS NEW LESSONS AND MATERIALS!
Would you like to receive news from Lessons in Grass by e-mail?
Subscribe to our newsletter