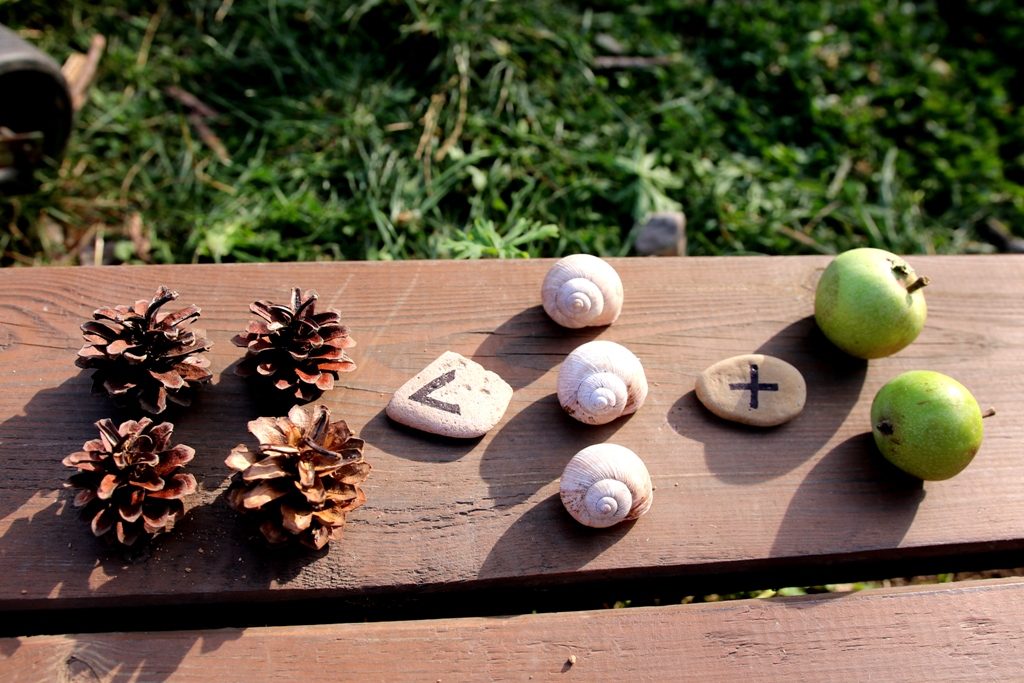
NUMBERS OUTDOORS
Pizza fractions
Let's open a pizzeria and practise fractions ‘at work’. What pizza do you like the best?
Jumping fractions
Let's get some move and fun into the teaching! The children must jump into the right fraction.
Square metre
Create a square metre with your own hands. Measure areas around you in square metres.
Lines of symmetry
Hunt for lines of symmetry of natural as well as man-made objects. Where do you find more symmetry?
Geometric shapes
Exercise your attention and imagination as you search for shapes outdoors.
Measuring 1 are
Children sometimes do not even know that such a unit exists. Let's see how big 1 are really is.
1 metre outdoors
Get children to experience how long one metre is. Compare what is bigger or smaller, measure objects around.
Square decimeter
Get children to experience how long one metre is. Compare what is bigger or smaller, measure objects around.
Signs outdoors
Experience counting and comparing numbers more physically – engage your hands and move.
E-book NUMBERS: more than 50 pages of outdoor lessons, photographs and worksheets.
EXPLORE OUR OTHER OUTDOOR LESSONS:


PIZZA FRACTIONS

Goal: Practise dividing and adding basic fractions ‘at work’ by playing the pizzeria game.
Video: lessonsingrass.com/video
Time: 45 – 60 minutes
Age: 6 – 12 years
Where: an outside area where natural materials can be collected
When: warmer parts of the year
You need: natural materials, cardboard from an old box, crayons, scissors, chalk sticks (a round object as a template), pizza boxes
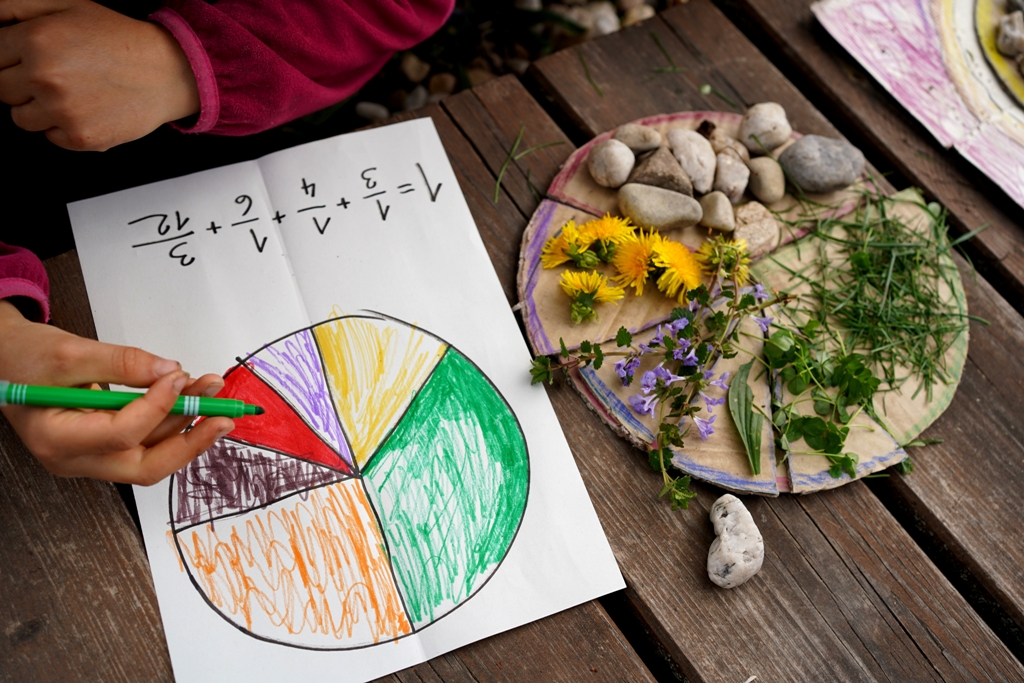
1 HOW TO DIVIDE A PIZZA
The children will have surely divided a pizza or pie at some point in their life, so pizza and pie are a clear, tangible example of fractions for them. We can start by discussing how to divide a pizza if you have two, three or four people, etc. Let's open an outdoor pizza restaurant – this way, children can play with fractions and experience and absorb everything even better.
2 MAKING ‘DOUGH’
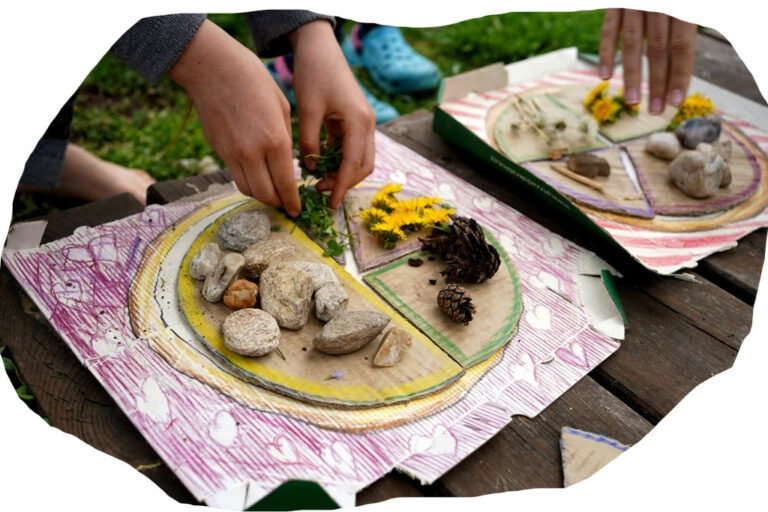
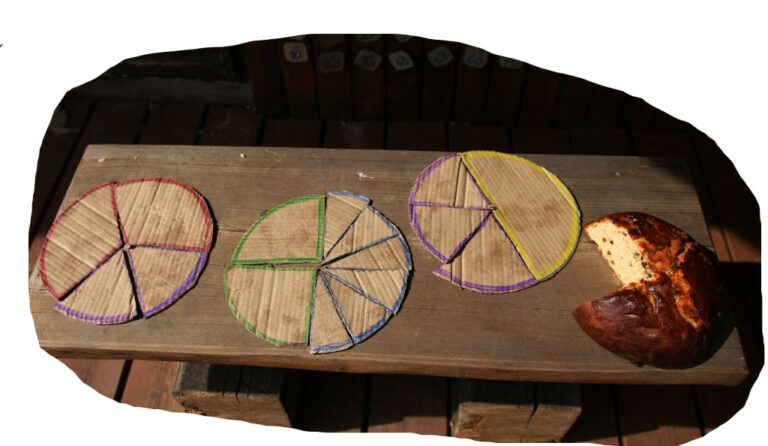
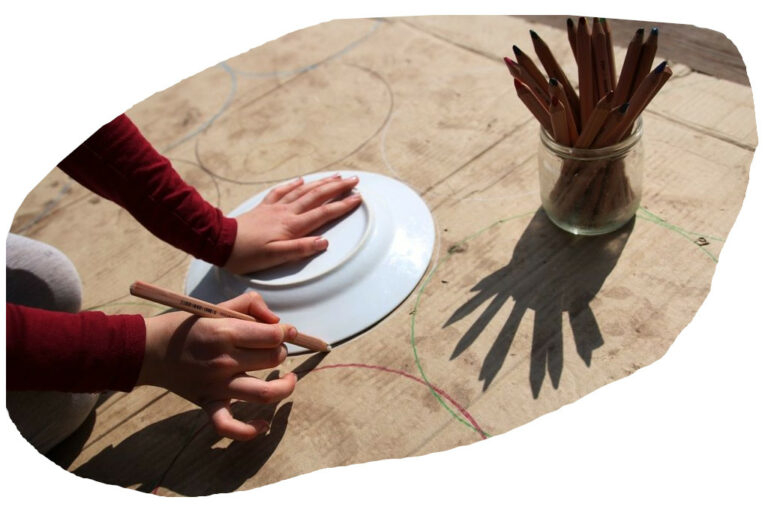
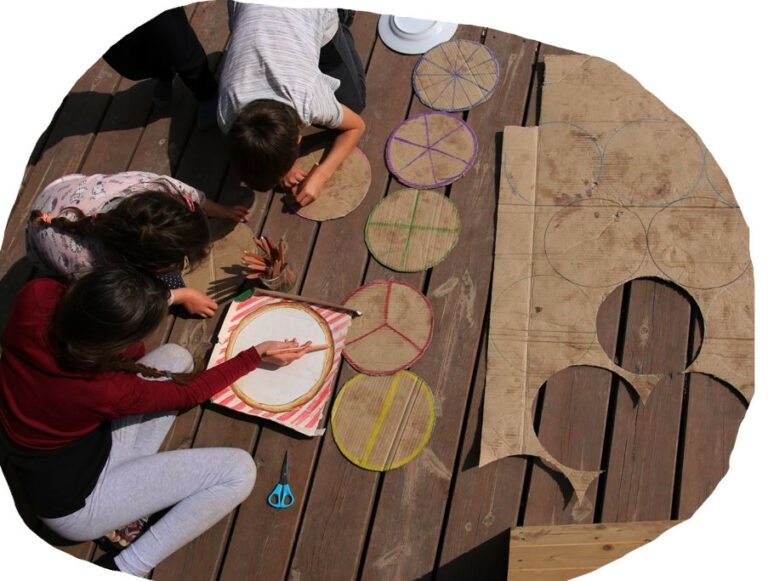
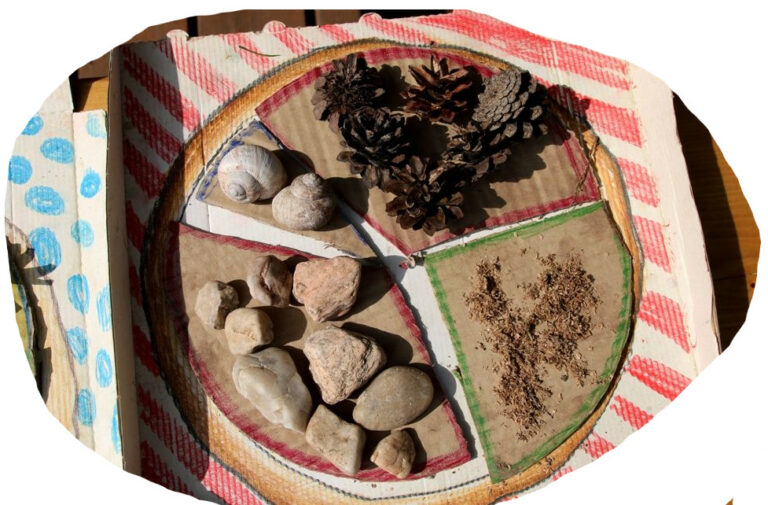
The task is simple: cut out a few circles from cardboard. These will be the pizza bases. Children can work independently, but it is more fun in a group. Something round (e.g. a bowl, a plate, a pot) can be used as a template. There should be at least five circles in each group, which children distribute among themselves (they can even colour code them) and they cut them into: two halves, three thirds, four quarters, six sixths, eight eighths. The very act of cutting the templates is a challenge and a way for children to understand fractions better. We encourage you to let children discover everything in a group. As an adult, you can help just a little, providing hints only so that children have the opportunity to experience the success of discoveries and break-through.
3 PIZZA BOX
Children often start playing with the cut pizza slices. You can support the game by making/colouring a pizza box for each group – a place where the pizza slices will be put together to make a whole pizza. Again, just trace something round on the cardboard or pizza box and perhaps colour a ‘tablecloth’ around it.
4 PIZZA SEASONING AND TASTING
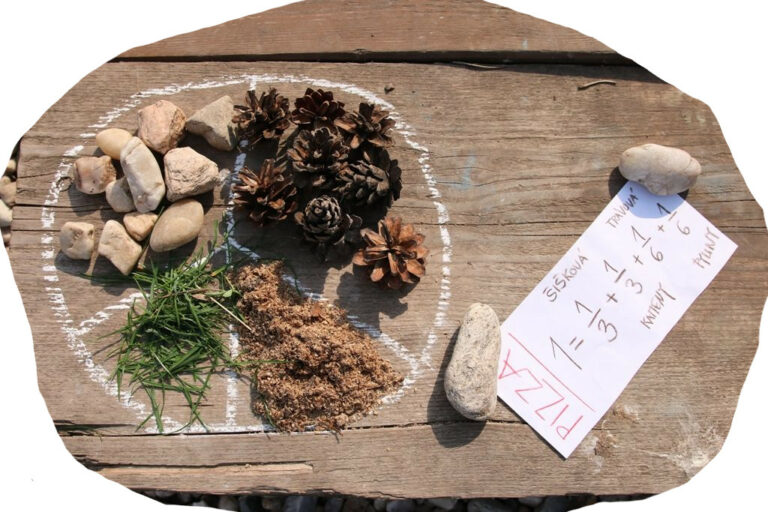
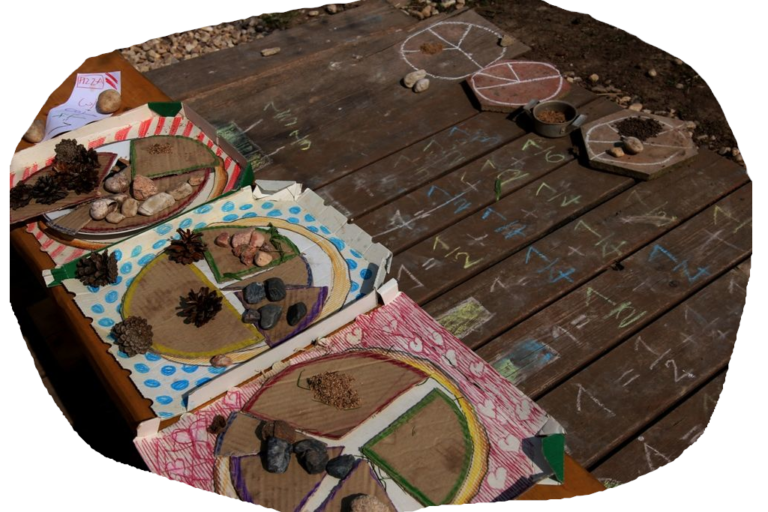
What flavour will the pizza be? Each group/individual prepares their own ‘menu’. They compile one whole pizza from different slices. Children can ‘season’ each slice - decorate it with natural materials they find around. Then comes the all-important ‘tasting’ when the pizzas are displayed and others can guess/write down which slices make up which pizza.
5 REFLECTION
At the end, we can get together in a circle and talk about how we have enjoyed the game and what we have learnt. We can ask children questions like: What were the most common parts of your pizza? What was the production process in your pizzeria? How did you share the work? If you have some extra time and feel like it, you can link this game to other topics and write an article or an interview with children (in groups or together) titled “The World’s First Fraction Pizzeria” - write a short report on how everything went or interview the ‘chefs’ about what was challenging for them, what they enjoyed, or how big their favourite pizzas were (see questions above). The article can be accompanied by photos or pictures and posted on a notice board or on a fence as an invitation for other classes to try out the pizza fractions restaurant as well.
USEFUL TIP:
PIZZA ON THE PAVEMENT
If you do not have enough time or cardboard, you can try a simpler version. Just draw a circle (pizza) in chalk on the pavement, patio or deck, etc. Divide it into some of the specified portions or parts: 1⁄2, 1/3, 1⁄4, 1/6, 1/8 and ‘flavour’ each pizza slice with different (locally available) natural materials. At the end, everyone tries to go through the pizzas on offer and guess/write down how big the individual slices are that together make one whole pizza.
JUMPING FRACTIONS
Goal: Experience fractions in motion. Try dividing a whole on the pavement or in the grass.
Time: 20 minutes
Age: 6 – 12 years
Where: around your school where natural materials can be found
When: year-round
You need: chalk sticks, rope or string, markers, branches/twigs
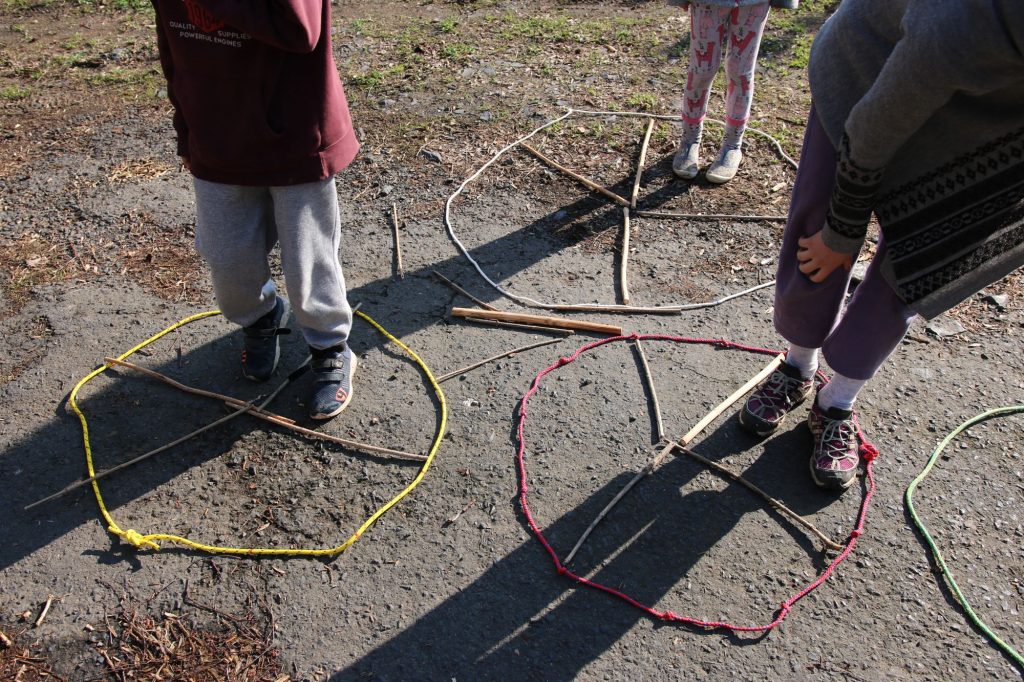
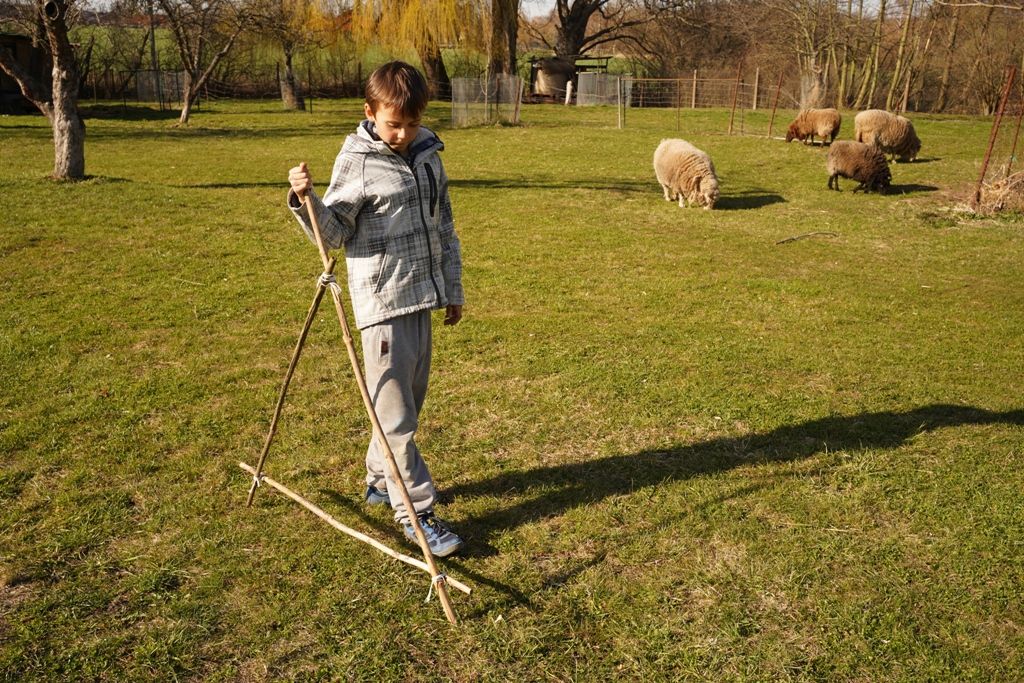
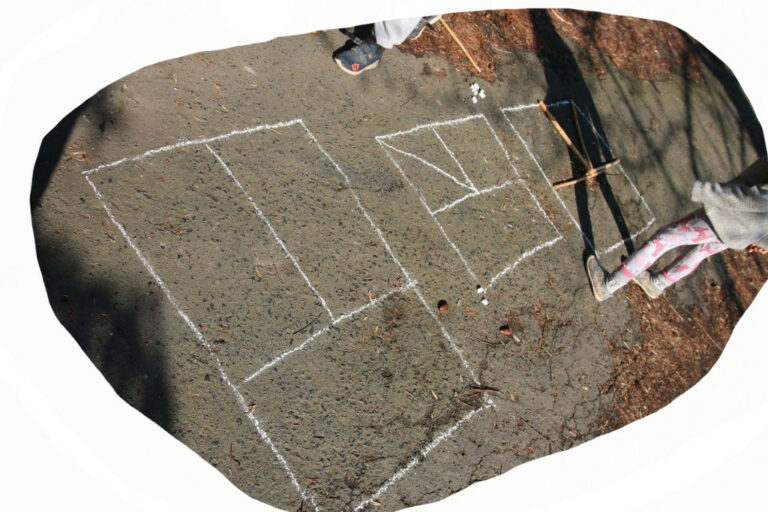
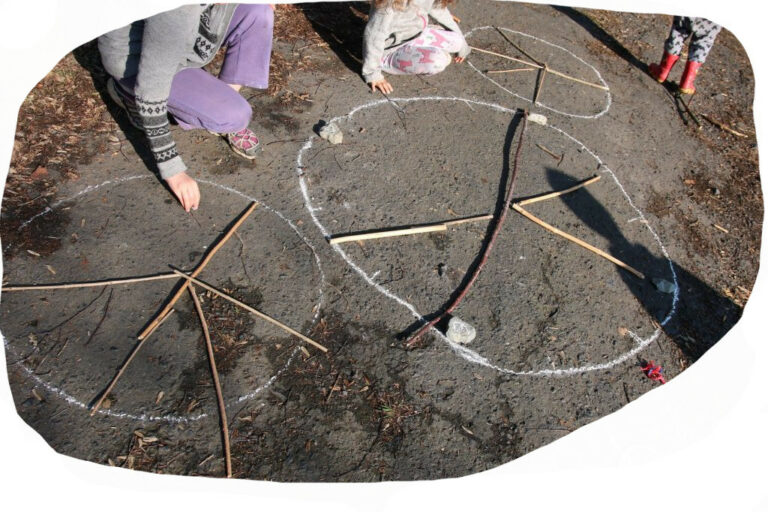
1 DIVISION ON THE PAVEMENT
First, children draw large circles (pizzas/pies) on the pavement. They can use string and chalk to make a regular circle. Then they find a few straight sticks nearby. When everything is ready, work together to figure out how to divide a circle into halves, quarters, thirds, etc., and mark everything with sticks directly into the circles. It is useful to have more than one group or circle so you can compare, confer and discuss together.
USEFUL TIP: DIVIDING SHAPES
We encourage you to try dividing not only circles but also squares, rectangles, triangles, etc. Shapes can be drawn in chalk or made from natural materials.

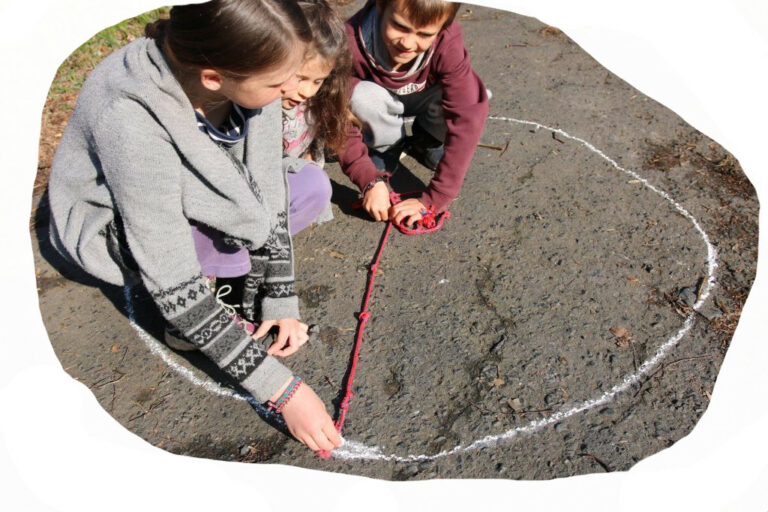
2 ROPE FRACTIONS
If you have longer ropes, you can also make circles directly from them. You can make it easier for children to work with the rope by dividing it into 12 equal parts beforehand (with knots or a marker).
This makes it easier for children to accurately find, for example, thirds and sixths (count off four or two pieces). The method is the same as for the previous activity, but it also allows you to play in the grass, in the snow, or anywhere where you can't draw on the ground in chalk.
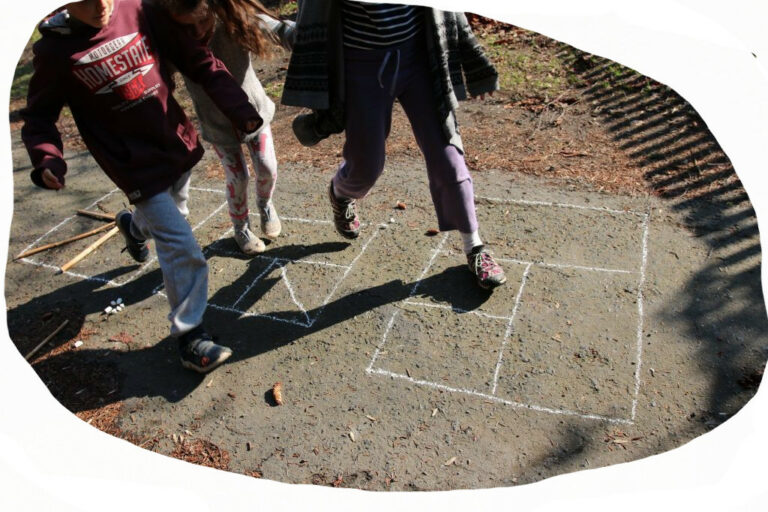
3 JUMPING FRACTIONS
Once children have practised individual fractions using the previous activities, they can play a game full of movement. It will refresh the work pleasantly and relax their ‘fried’ brains. Groups or individuals mark 1⁄2, 1/3, 1⁄4, 1/6 in their circles and then the teacher or someone else prompts:
"Now jump to 1⁄2."
"Now jump to 1/6."
"Now go to 1/7." And so on.
The game is usually full of laughter and mutual support.
4 REFLECTION
Since this class was all about dividing and jumping, we will stick with that. Say various statements to the children and let them jump to fractions based on how much they agree. E.g. Statement 1: I enjoyed today's jumping fractions (if a lot, jump into the ½ shape, if a little, jump into the ⅙ shape). Statement 2: I enjoy math full of movement, Statement 3: I would rather sit in the classroom, Statement 4: I am clearer about division into fractions now than I was at the beginning of the lesson, Statement 5: I want to play jumping fractions again sometime...
LINES OF SYMMETRY
Goal: Explore symmetry of natural as well as man-made objects.
Time: 25 minutes
Age: 6–12 years
Where: around your school where you can find natural materials or observe buildings
When: year-round
You need: the Lines of Symmetry worksheet, sturdy paper or cardboard, scissors, rubber band/ wooden skewer, scotch tape, marker
1 PREDICTING SYMMETRY
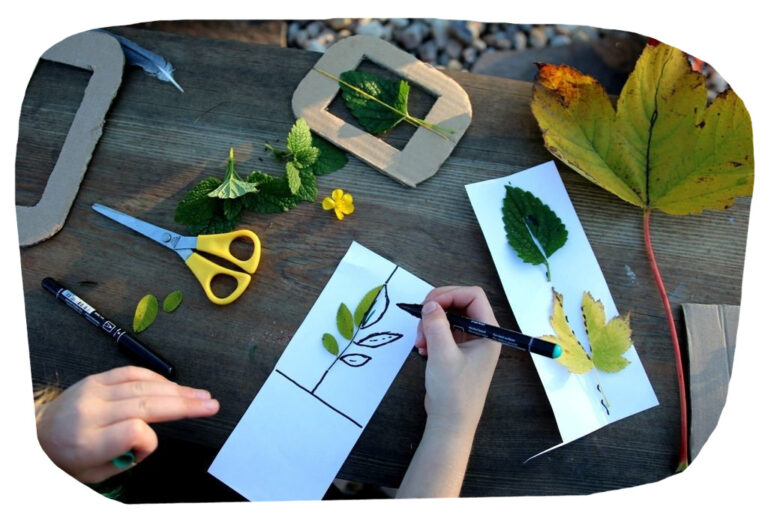
To start with, try guessing with children in which objects around us you can see lines of symmetry. Let children write or draw their guesses using the worksheet. You can give the worksheets to groups of two or three children, or each child can have their own.
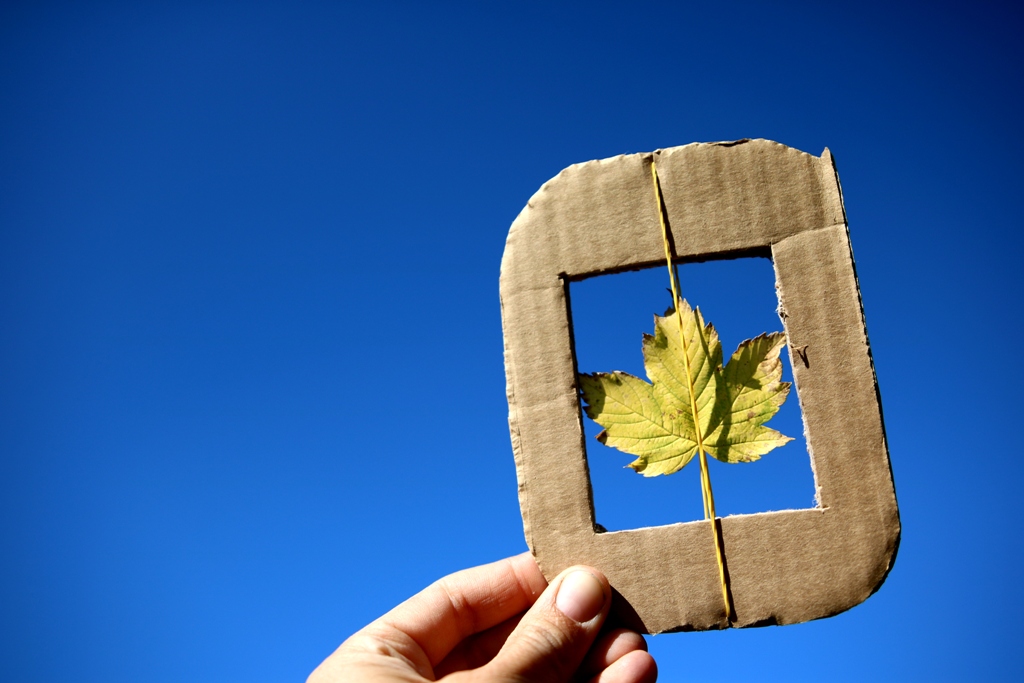
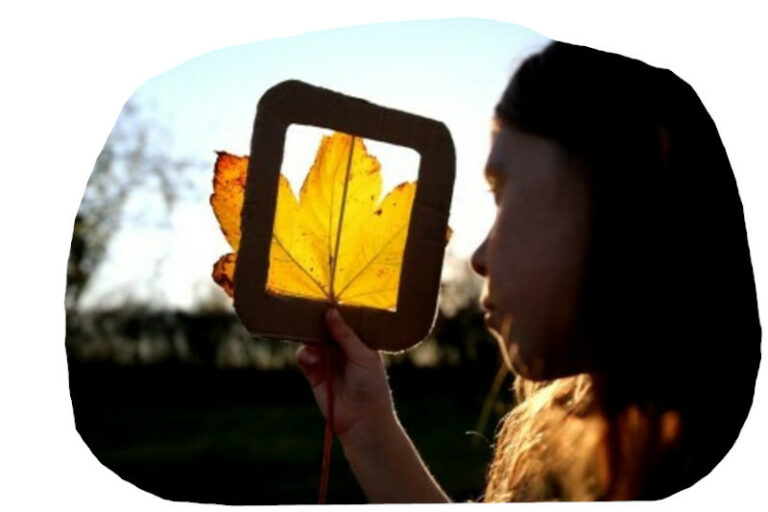
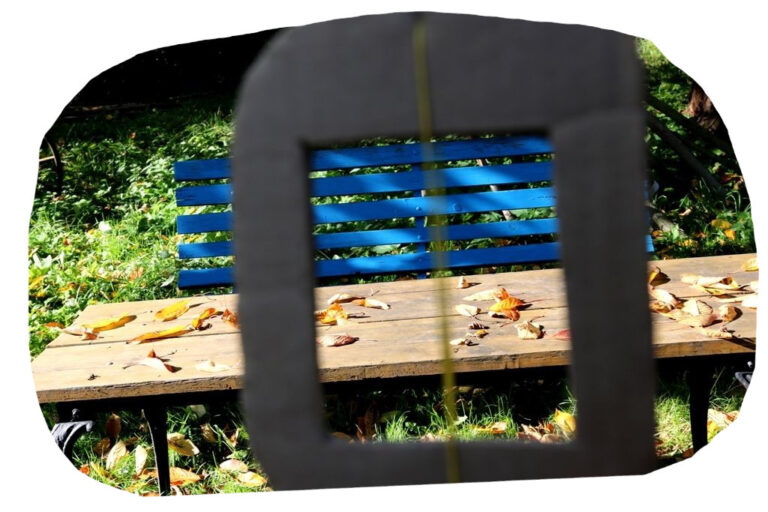
2 PREPARING A SYMMETRY FINDER
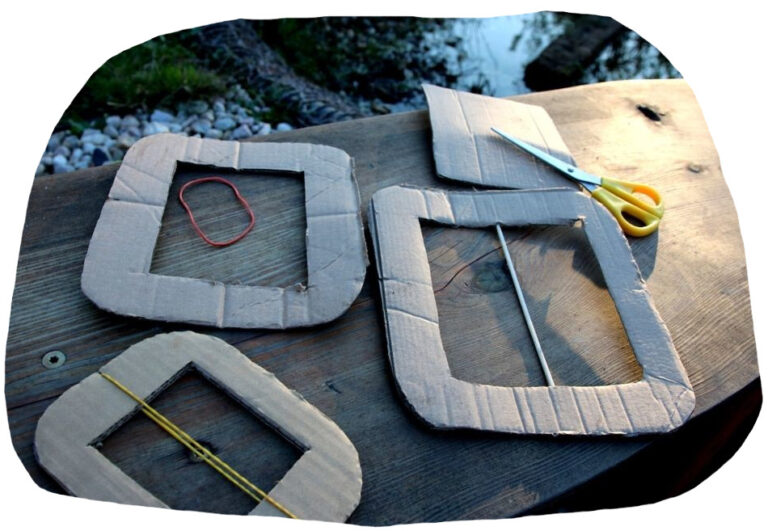
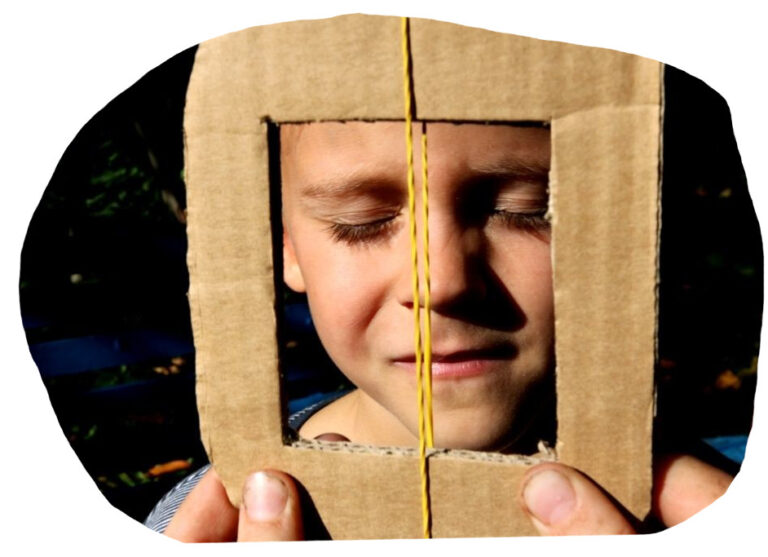
Distribute squares of cardboard or sturdy paper to groups (2 to 3 children) and make symmetry finders. Simply cut out a square or a rectangle in the cardboard or sturdy paper and cut small notches in the top or bottom of the frame for the rubber band. Alternatively, you can insert a wooden skewer into the folds of the cardboard or attach it with scotch tape to mark the line of symmetry. The tool is ready.
3 LOOKING FOR SYMMETRY
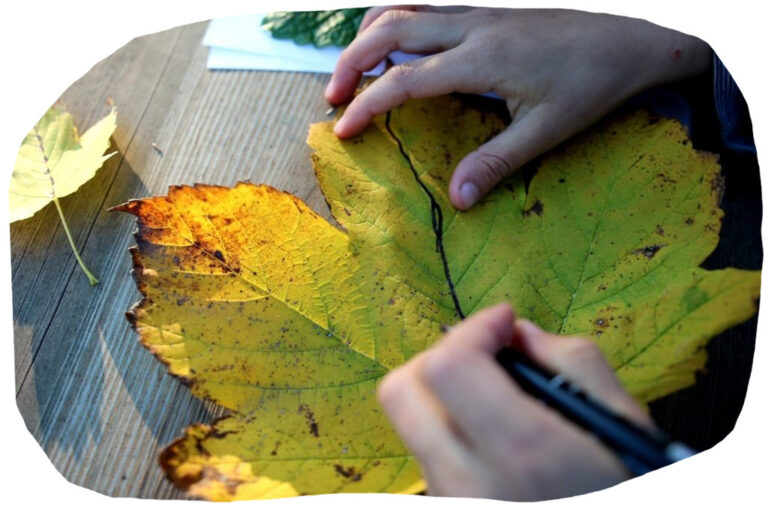
Groups set off on a symmetry hunt in the surroundings (in an area you agree upon before the activity). The task is simple – find natural materials, shapes and objects and determine whether or not they are symmetrical. You can set the number of objects (for example 5 + 5) depending on the time you have. Children can draw a line of symmetry on one suitable natural material and then cut and glue it to their worksheet.
4 REFLECTION
At the end of the lesson, groups share what they have discovered. It is okay if some things repeat (leaves, windows, doors of buildings, faces). That is a good confirmation. Together, revisit the guesses made at the beginning: which were correct and which were incorrect?
We also encourage you to compare together how easy it was to find lines of symmetry in natural materials, and how easy it was on buildings or other man-made objects.
! USEFUL TIP
When you return to the classroom, you can briefly retest the frames and compare what it was like finding symmetry outside and in the classroom.
SQUARE METRE
Note: You can adapt the lesson easily for other units as well.
Goal: Measure and determine the difference between 1 metre and 1 square metre in practice. Create a square metre with your own hands using sticks, fabric or cardboard. Try and guess and then measure areas around us in square metres.
Time: 40 minutes
Age: 6 – 12 years
Where: an outside area
When: year-round
1 MAKING A PREDICTION
Have the children try to outline an area of one square metre in the sand, in the soil, in chalk on the pavement, or using branches or stones on the ground. How accurate will our guess be?
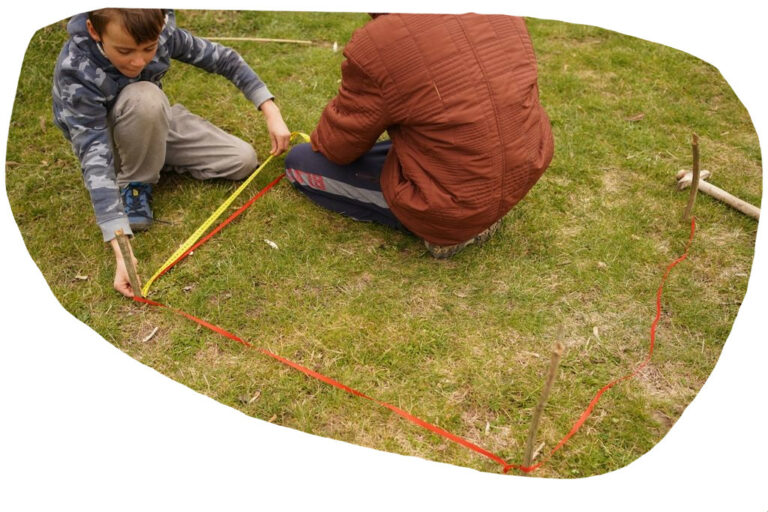
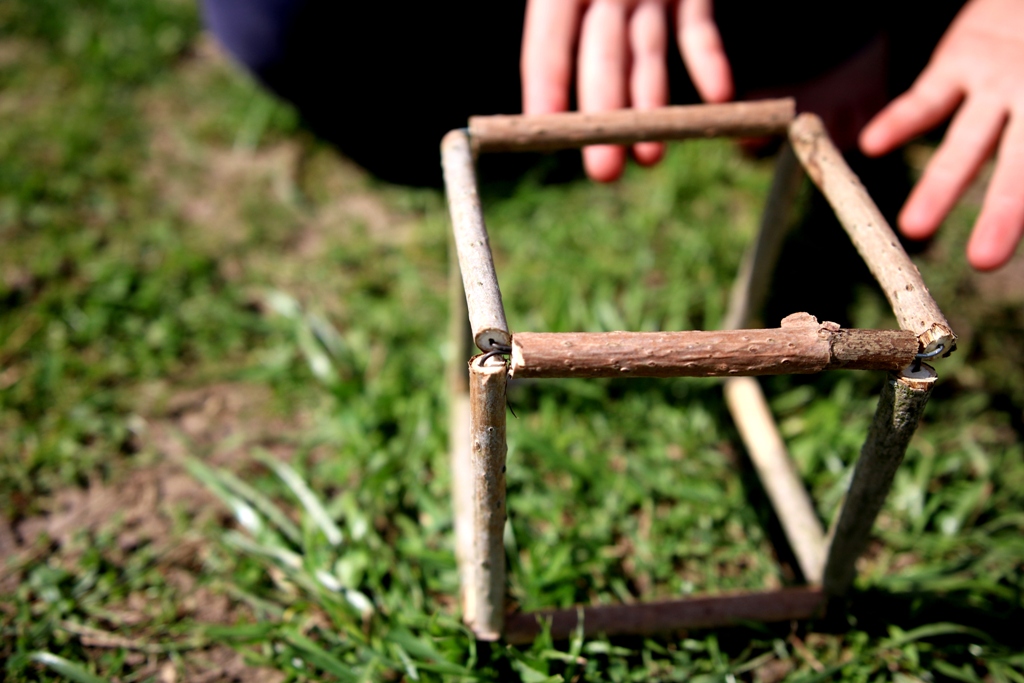
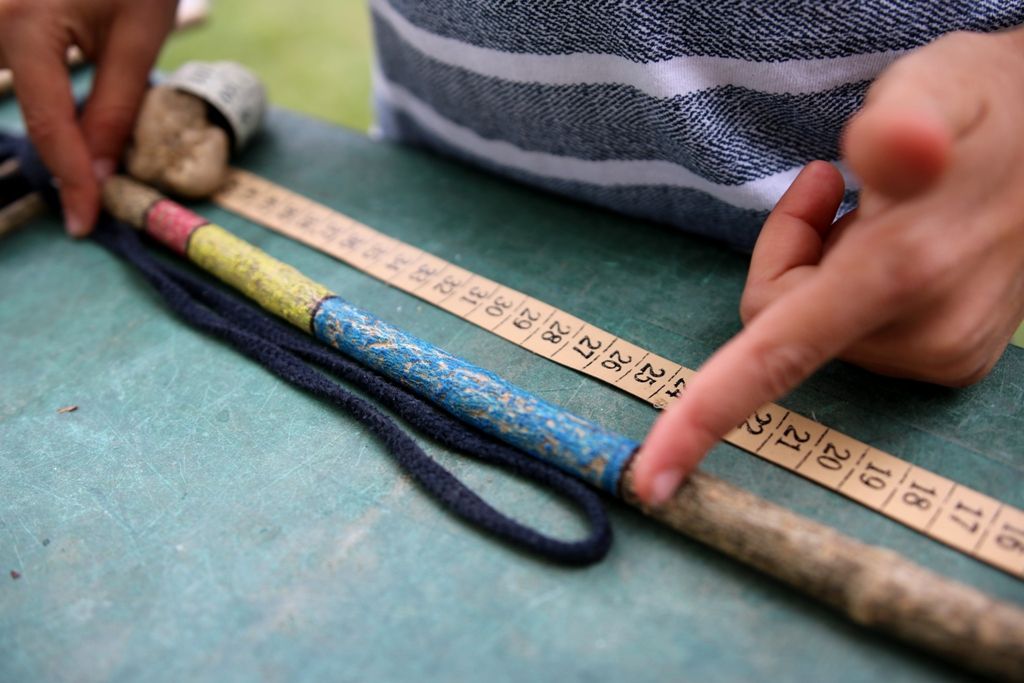
2 PERIMETER
Now, we're going to mark 1 square metre accurately. Using a long string, 4 sticks for pegs, and a tape measure or a retractable measuring tape, create a square metre on the ground. Let the children do as much of the work as you can. Let them figure out how to hammer the pegs in, how to tie the string, etc. Just help them keep an eye on the right angles so their ‘square metre’ stays square. At the end, we can review briefly what we have created and what we have found. What is the perimeter of a square metre?
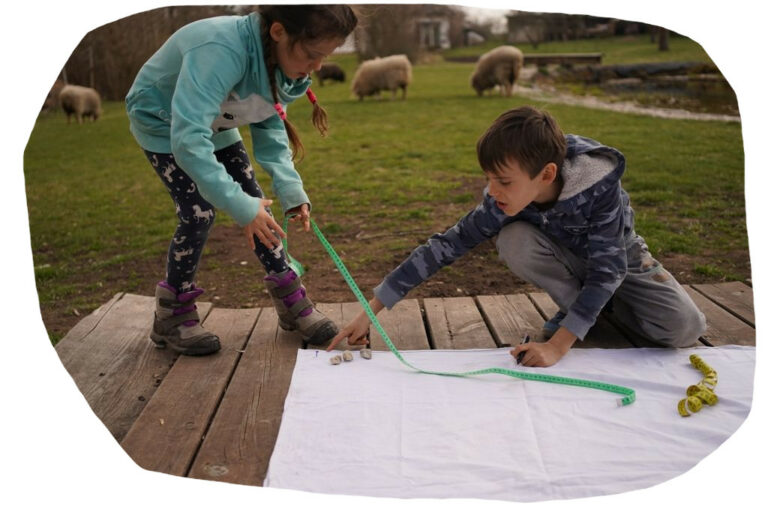
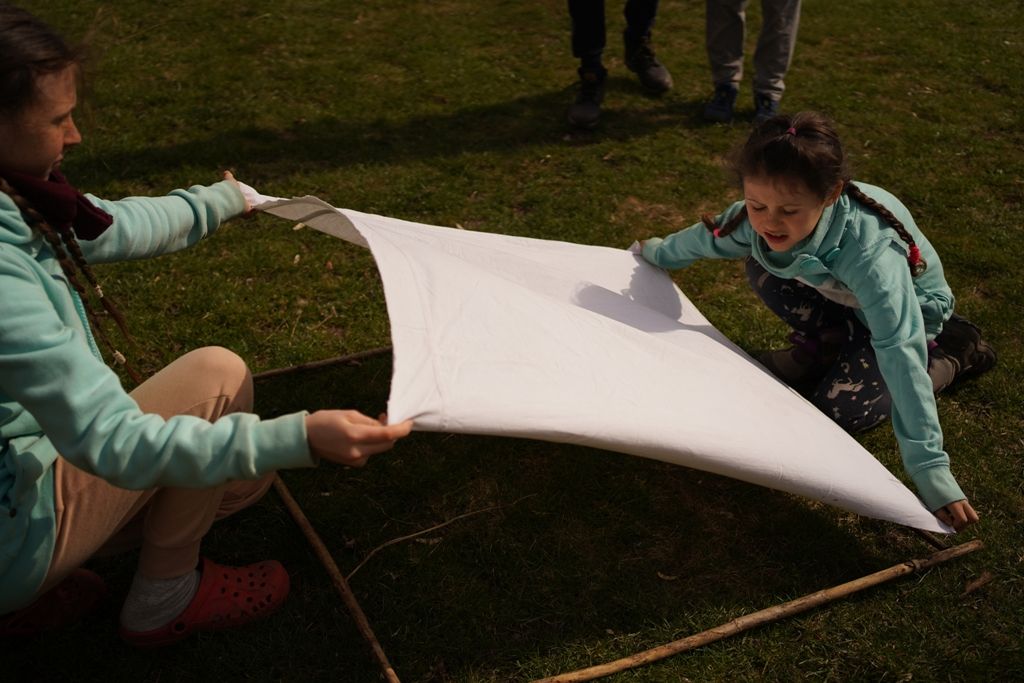
3 AREA
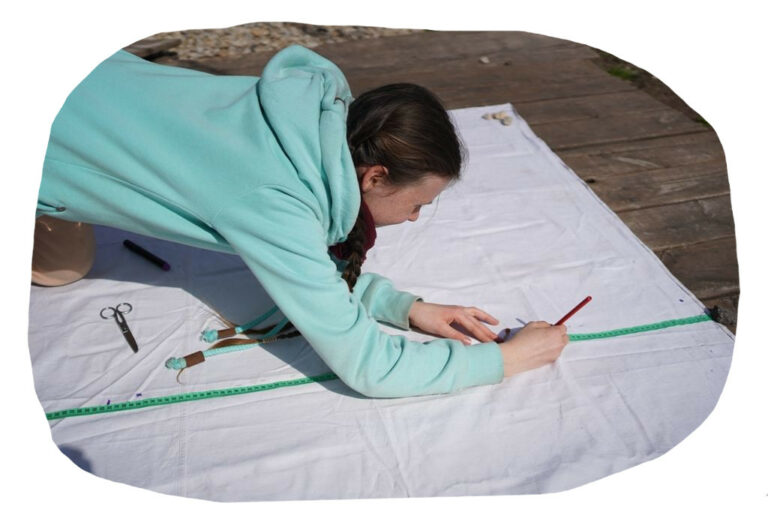
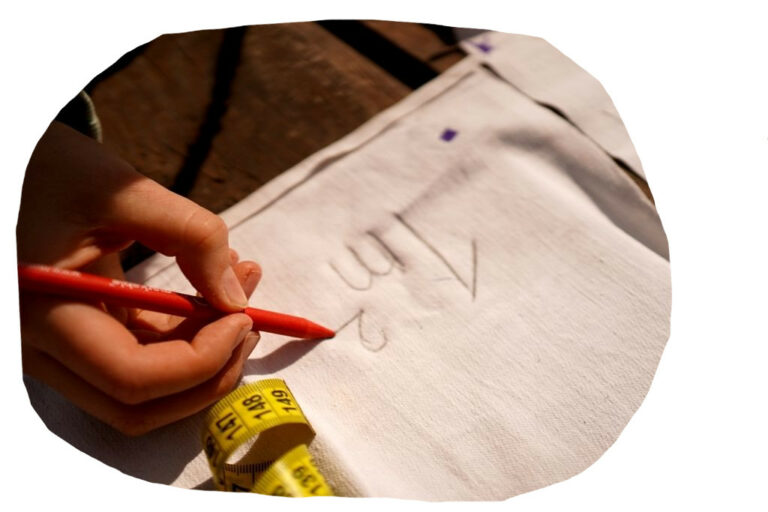
We are experienced now and we can take on a bigger challenge. On a large piece of fabric, like an old bed sheet (preferably not too stretchy), draw one square metre. How to do it?
Again, let the children lead the way and help them only if they ask or if there is no other way to move forward. Check the square drawn on the fabric and start cutting it out. Now the children have created a square metre, i.e. the area of a square with each side having 1 metre.

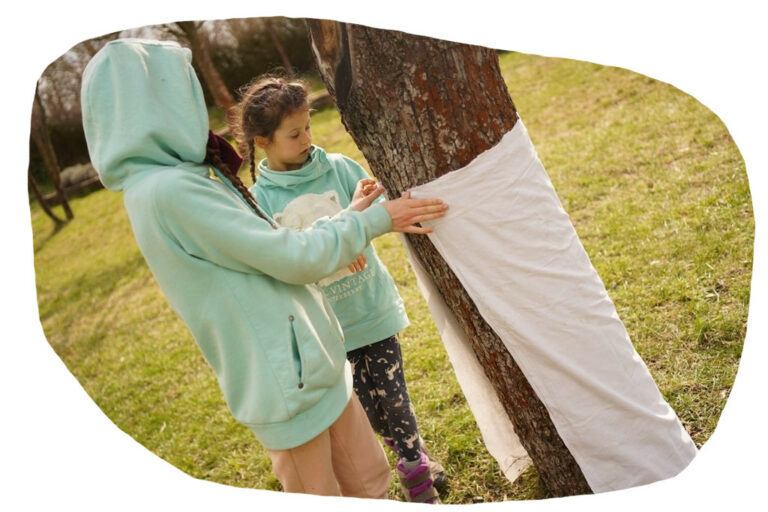
4 MEASURING
Let's get out and measure! How big is the sandbox? How many square metres is the flower bed? Always guess with children first and then check and verify. At places where you can draw, children will find it useful to use chalk to mark each square metre first and then add them up. If children can't think of it themselves, send them to measure tree trunks, each other, windows, etc.
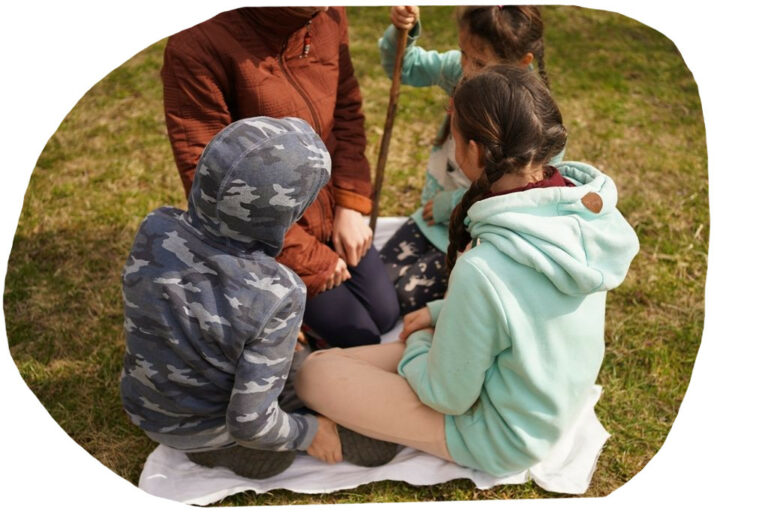
5 REFLECTION
Finally, we will look back together at what we have been doing and what we have discovered. How accurate were your guesses from the beginning? What did we discover when making 1 square metre? What did we discover when we measured? How did we work together and what was the greatest challenge? How could we measure an area (e.g. a sandbox) if we didn't have our square metre cut out of fabric with us? What other questions can we think of?
EXTENSION
ISLAND
See how many people you can fit into one square metre – standing, sitting, lying down, etc. Our record is 10 children, but you will surely beat that number!
FRACTIONS
Children can divide their square metre into halves, quarters, thirds, etc. and repeat their fractions this way.