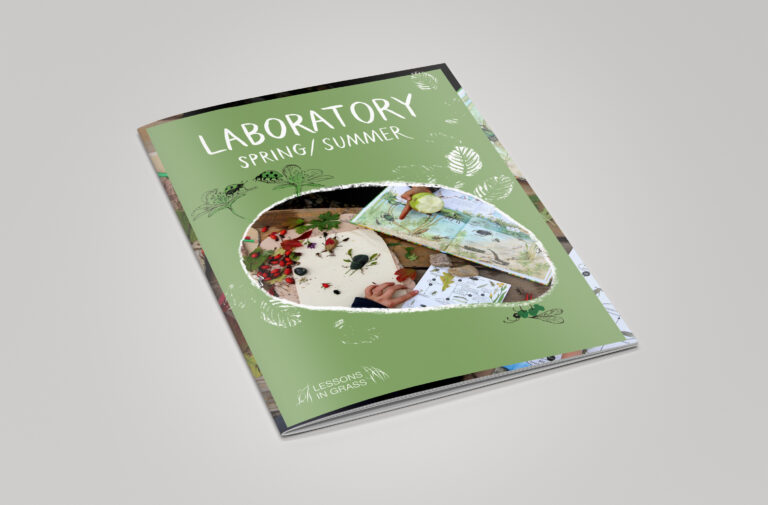
LABORATORY OUTDOORS
Human body
Let's discover our body and develop one’s creativity by creating models.

Why so early?
Why is it that some plants bloom so early in spring? Let's find the answers!
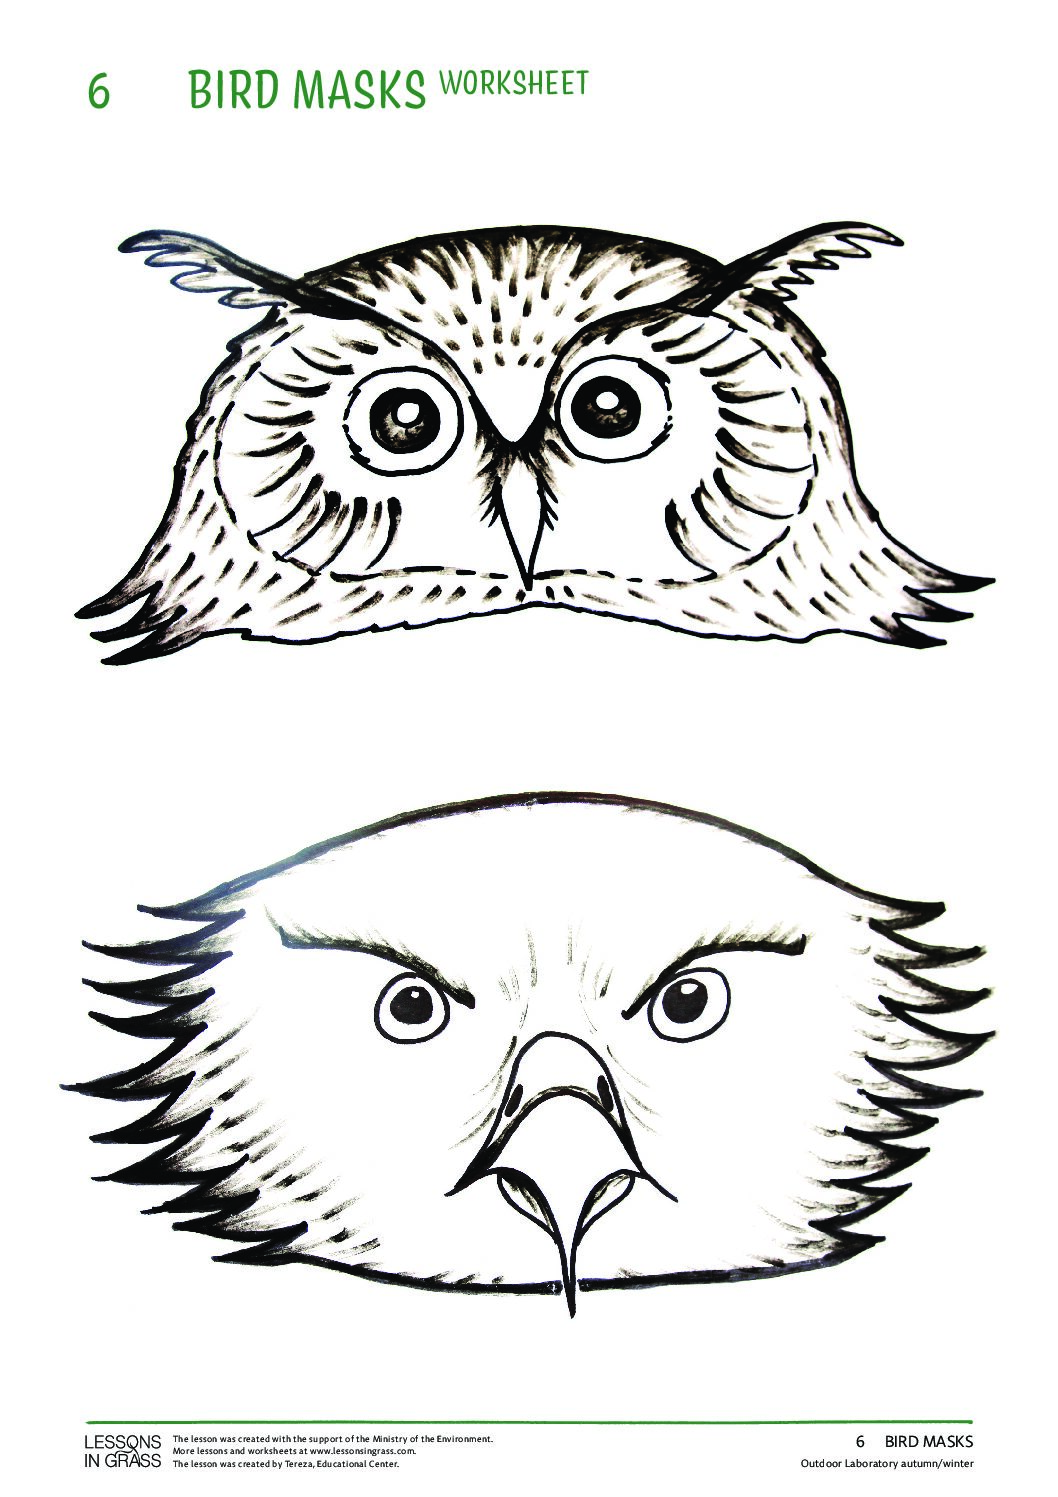
Bird masks
Experience bird life by pretending to be one. Make up stories about various bird species.
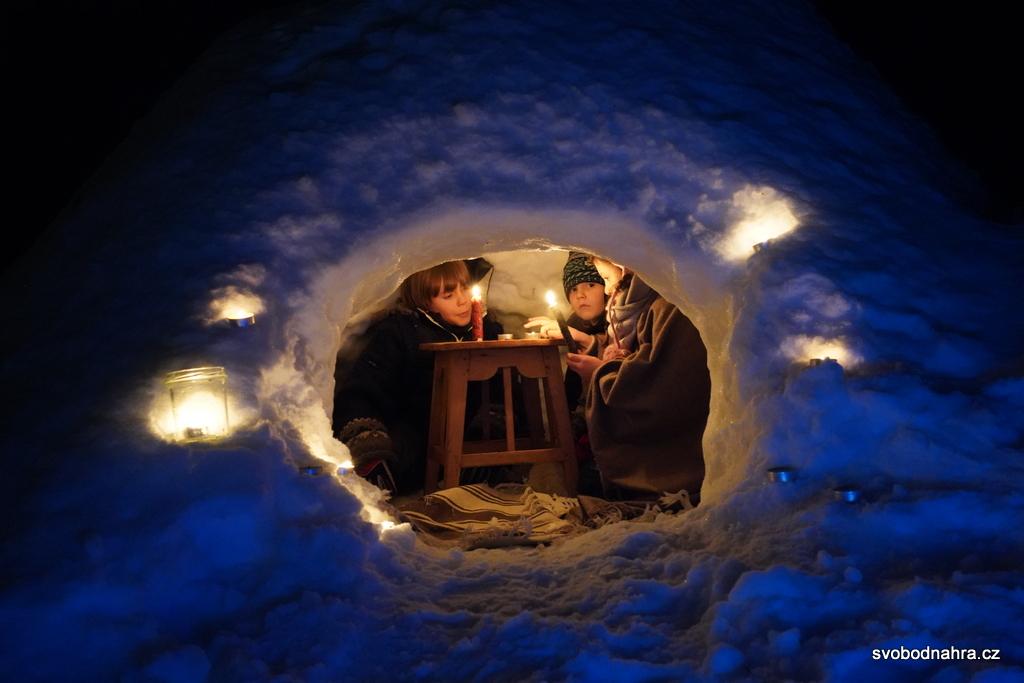
All about snow
Explore the snow and make experiments. Five smaller activities.

The Solar system
Make a Solar System model, examine the orbits and speed
of the planets.
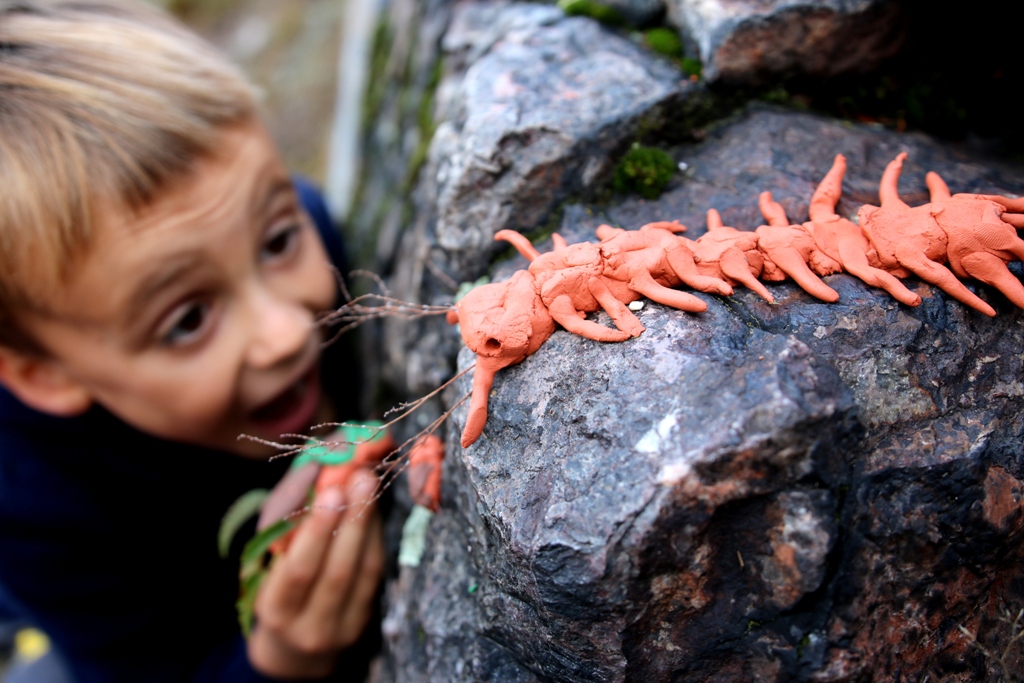
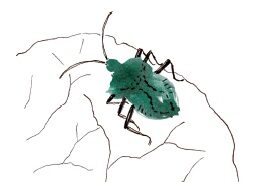
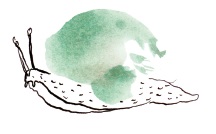
Invertebrate Models
Get to know invertebrates better, explore their shapes, colours and details.
YOU CAN FIND MORE IN THE LABORATORY E-BOOK
LABORATORY e-book: more than 50 pages of outdoor lessons, photographs and worksheets.
EXPLORE OUR OTHER OUTDOOR LESSONS:


HUMAN BODY
Goal: Discover our body with focus on bones and organs we have in our chest. Develop creativity by making models from natural materials.
Time: 40 minutes
Age: 7–13 years
Where: area with various common woody plants
When: growing season
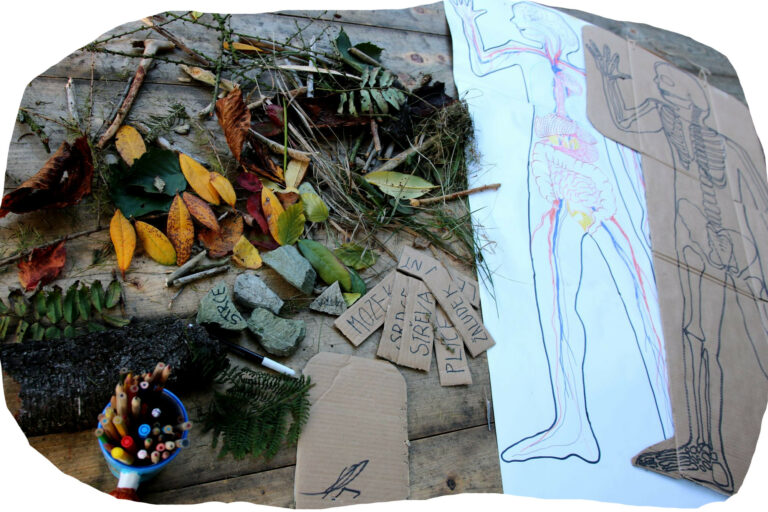
You need: T-shirts you can draw on with a washable marker (or a textile marker if you want to keep them), cardboard, sturdy paper, scissors, scotch tape or glue, markers, crayons, writing materials, writing pads, natural materials
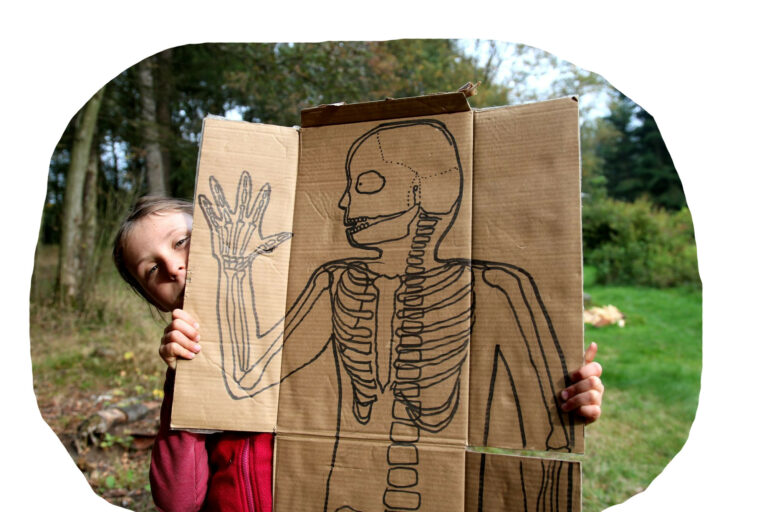
Before you start: Draw a child’s silhouettes on a piece of cardboard (a large box is ideal). Using a drawing or a human body atlas, the teacher then draws the skeleton and internal organs inside the silhouettes (will be used in the second step).
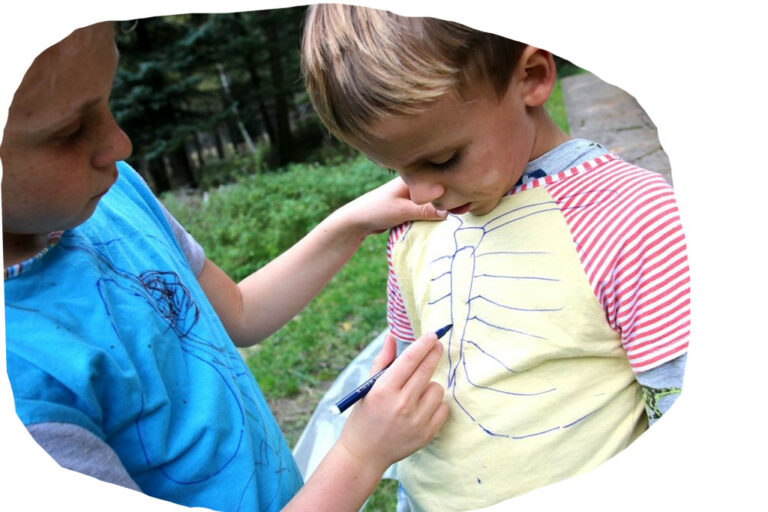
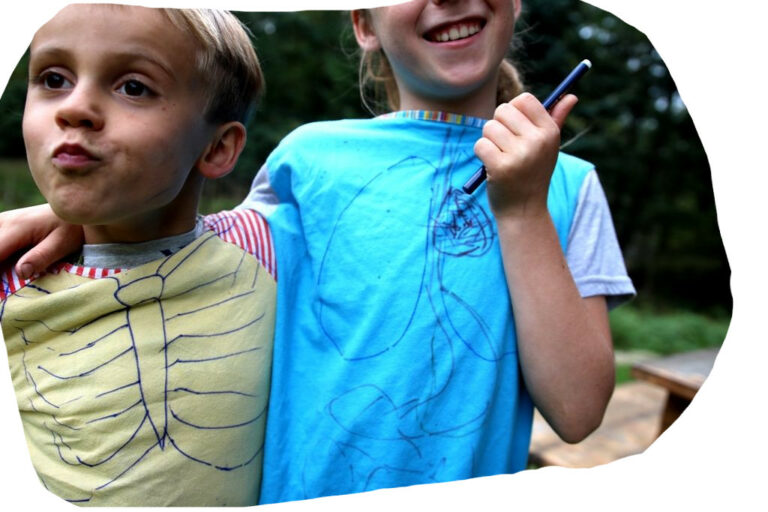
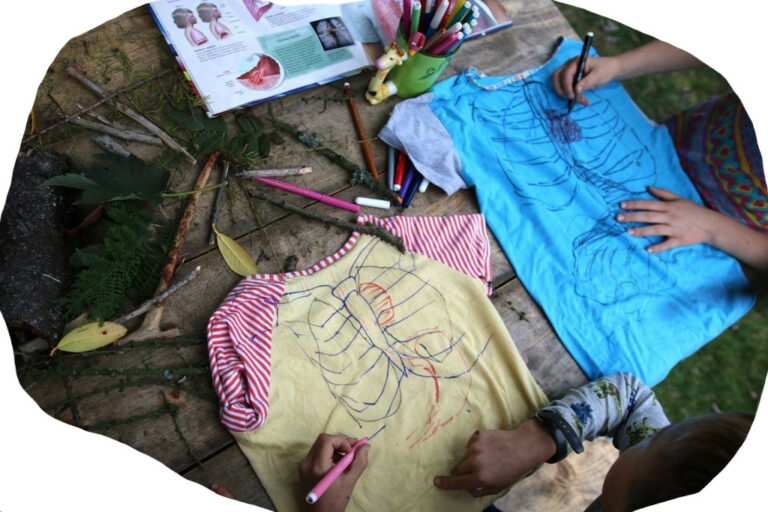
1 MAKING A PREDICTION
Working in pairs, children guess WHAT is inside their bodies and WHERE. They mark it on their T-shirts. Tell them to use all their senses: feel their body with their hands, listen to the sounds their body makes, and observe where their body moves when they breathe deeply. Also, ask them to recall where it hurts when they overeat, etc.
Most groups will be able to identify the heart (by the heartbeat), the bones of the chest (by touching the ribs, the shoulder blade, the shoulder joint, the collarbone, the breastbone), the lungs (by movement when they breathe deeply). Some children manage to guess their stomachs. This task aims at sparking children’s interest in their bodies. Do not insist on accuracy; getting just a rough idea is ok.
! USEFUL TIP
If you have time, try the following activity: tell children to choose two markers of different colours. They will use one colour for the initial guess and the other one for marking the actual place where they could feel or hear a bone or organ. This activity will help to increase their inner motivation.
! USEFUL TIP
Explain to children the importance of testing their guesses. What makes your heart beat stronger or your breathing faster? What happens when you run? Suggest jumping a few times and seeing what happens.
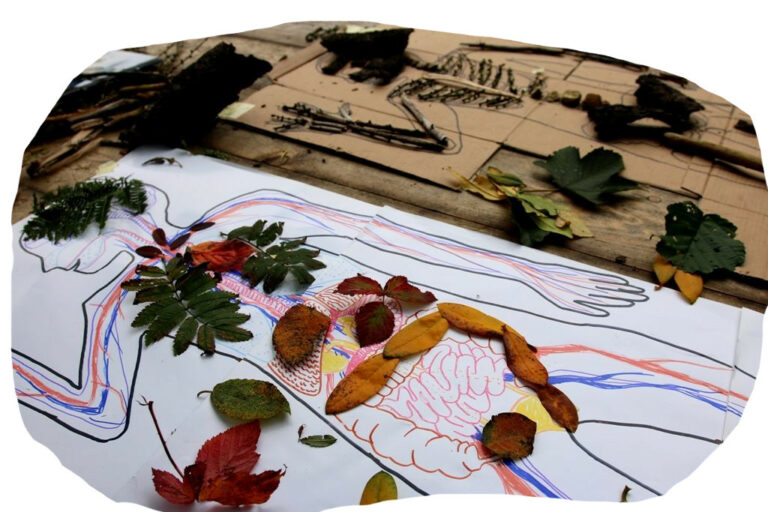
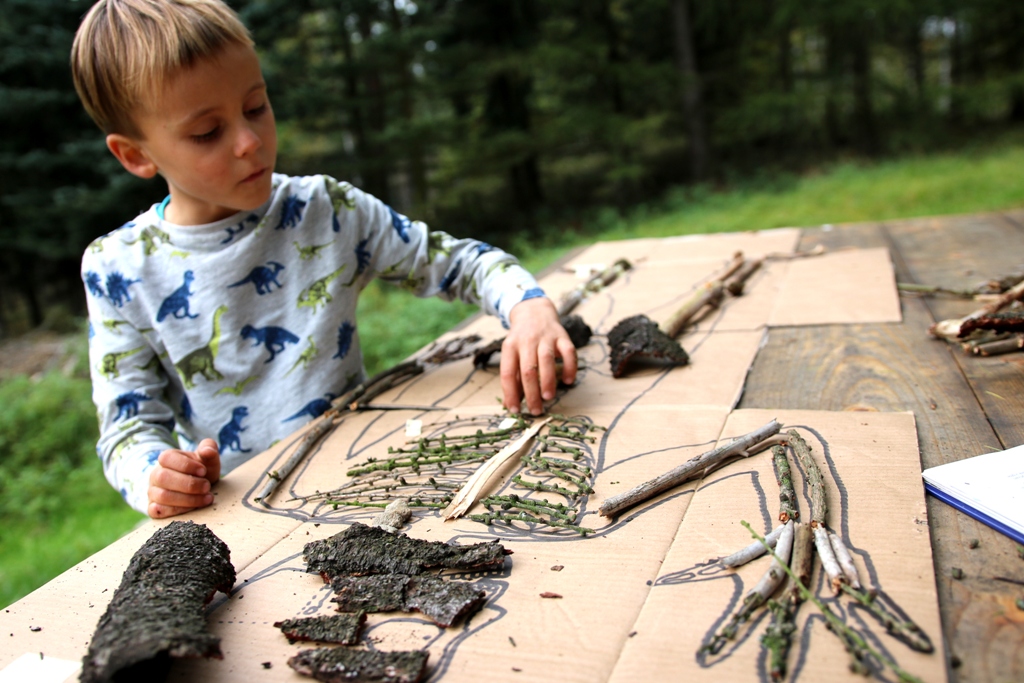
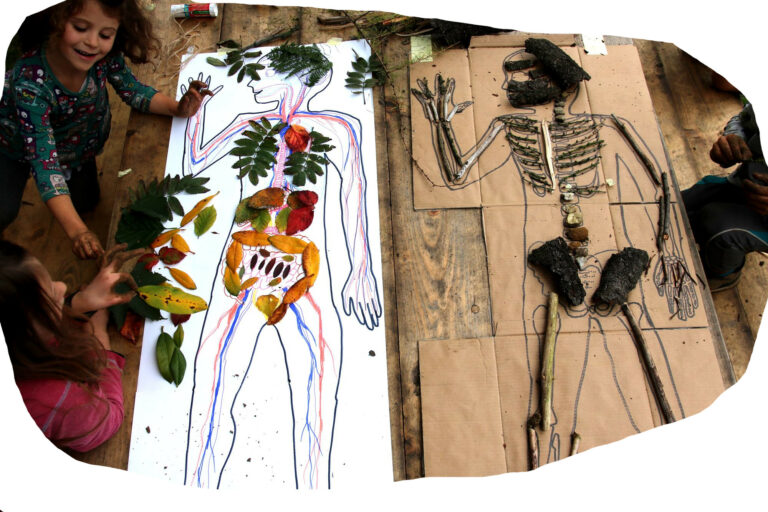
2 WOODEN SKELETON AND LEAF ORGANS
Divide the class in several groups of three to five children. Some groups will create wooden skeletons, other groups leaf organs. Let the children decide in which group they want to work.
The groups of "skeletons" will assemble a WOODEN SKELETON – a skeleton made of various natural materials (twigs, cones, stones, bark etc.). The human skeleton is complex and consists of many parts. You can tell the children to focus on the torso area first and to complete the rest (limbs, skull, pelvis, etc.) later if they have time. The task of the “organ” groups is to find as many diverse leaves as possible and choose different leaves to represent individual organs.
The children can use the cardboard silhouettes you made before. They can check what bones and organs are in our bodies and where they are. Or, if you managed to create more cardboard silhouettes, they can compose natural objects directly into the drawing. You can also use silhouettes on the sidewalk as described below. If it is windy, glue the leaves to the silhouette or load them down.
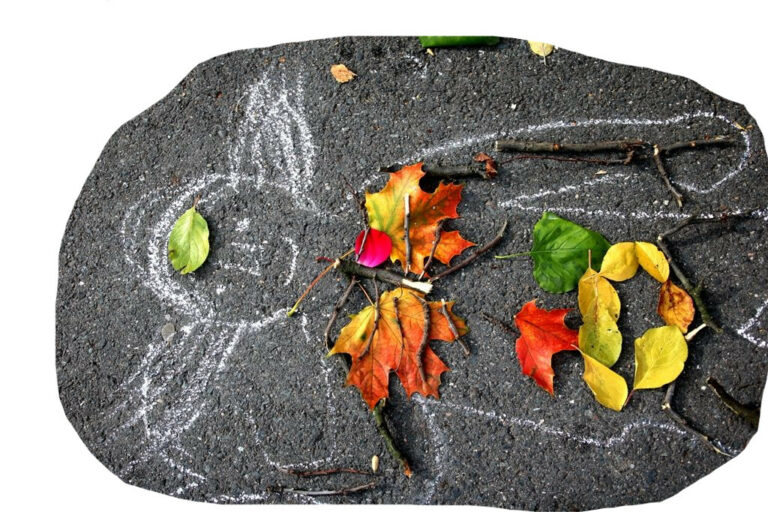
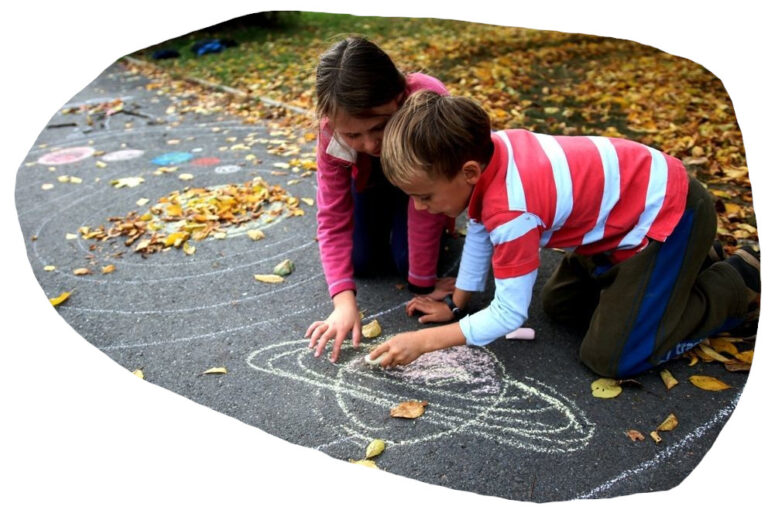
! USEFUL TIP: A SKELETON ON THE PAVEMENT
If you are working with a large group (or if you are short of time), ask children to work in twos or threes and draw their silhouettes on the pavement with a piece of chalk. Then tell them to fill the silhouettes with twig bones and leaf organs.
Children are good at using their imagination – they can play with the skeletons and pretend to feed them with berries.
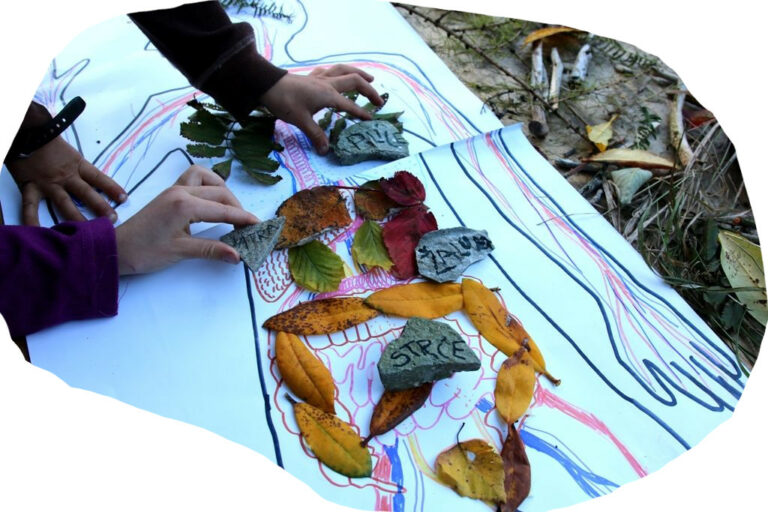
3. LABELS
Ask each group to prepare a set of labels (names of bones or organs). They can write the names on stones or cards. Adjust this activity to the age and knowledge level of your class.
4. LABELS AND REFLECTION
The groups swap the labels and place them in the appropriate places. Mistakes do not matter much at this point. The discussion that follows is more important.
Ask questions such as: Are you able to tell the names of the organs and where they are? What material did you use for particular organs and bones? What was difficult, and what was easy to remember? What surprised you?
If the class is interested, get back to the T-shirts. Let them compare and contrast what they drew at the start of the lesson and add any missing parts.
VARIATION:
MUSCLES
If you have time, try to make muscles with your class.
First, let the children feel their muscles with their hands. They can touch their arms, shoulders or neck and find out where they feel muscles and where bones. Then tell them to arrange the muscles on the wooden skeleton. The best material for this is dry grass.
Make sure that the children understand how the muscles work and attach to the bones. Tell them to consult an atlas or show them some pictures of muscles on the body.
Let the children ask questions and discuss while working.
CLASS TIPS
WALL PICTURE: Hang the WOODEN SKELETON and LEAF ORGANS in the classroom.
BONE SET: Keep the twigs that children used for bones (e.g. from elderberry) to be able to assemble the skeletons another time in class or outside.
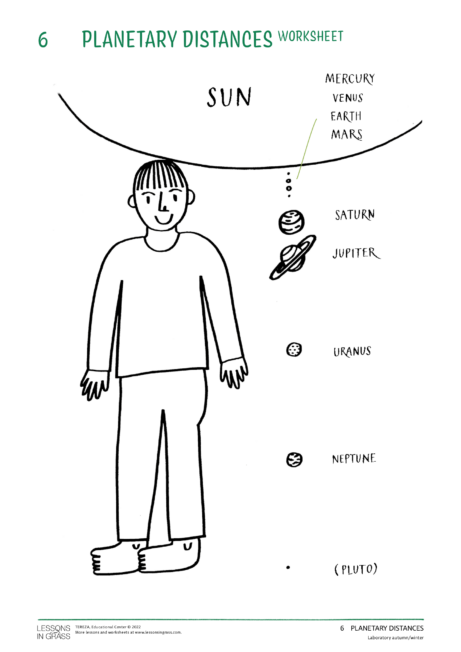
Goal: Make a Solar System model using natural materials. Examine the orbits and speed of the planets.
Time: 40 minutes – 2 hours (depends on the choice of activities)
Age: 6–13 years
Where: somewhere with a wide variety of natural materials
When: all year round (colourful autumn is the best)
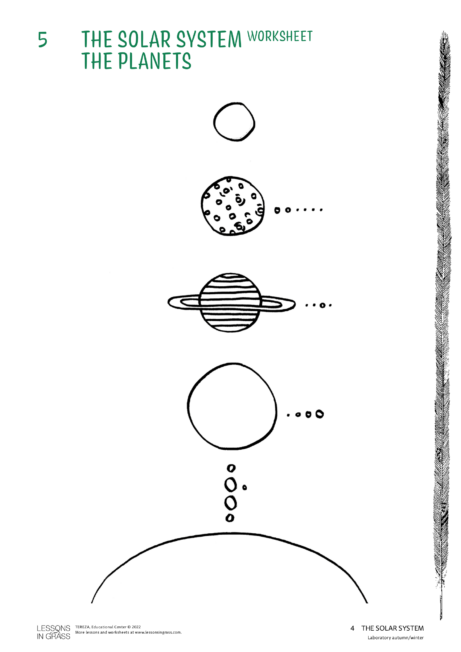
You need: natural materials, the Planets worksheet, coloured pencils, markers, scissors, glue sticks or scotch tape, writing pads
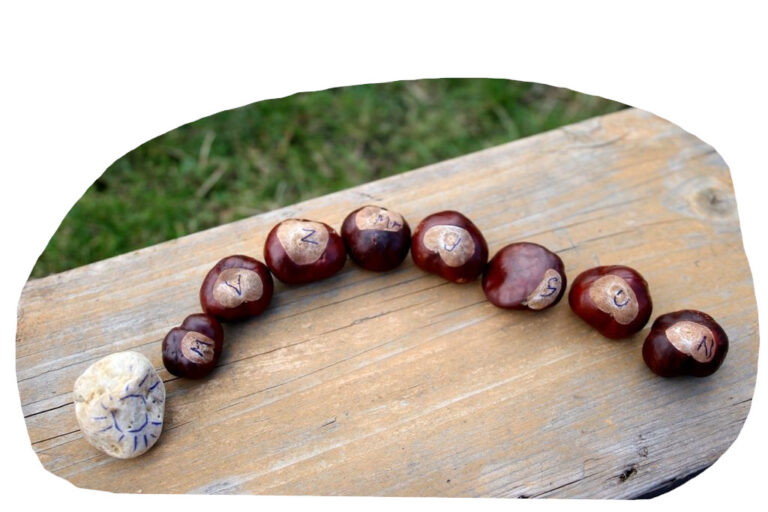
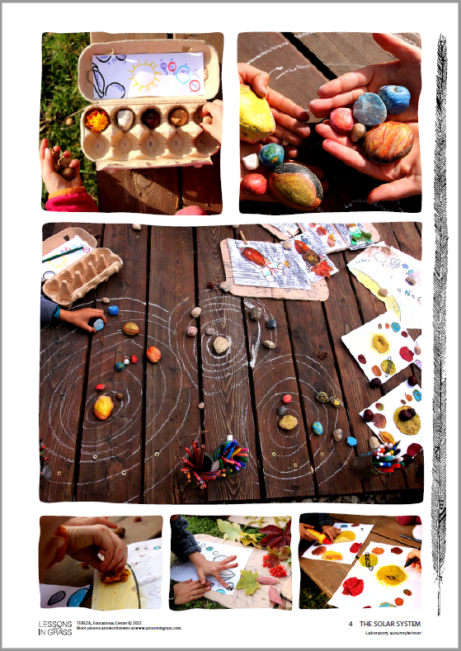
1 MAKING A PREDICTION
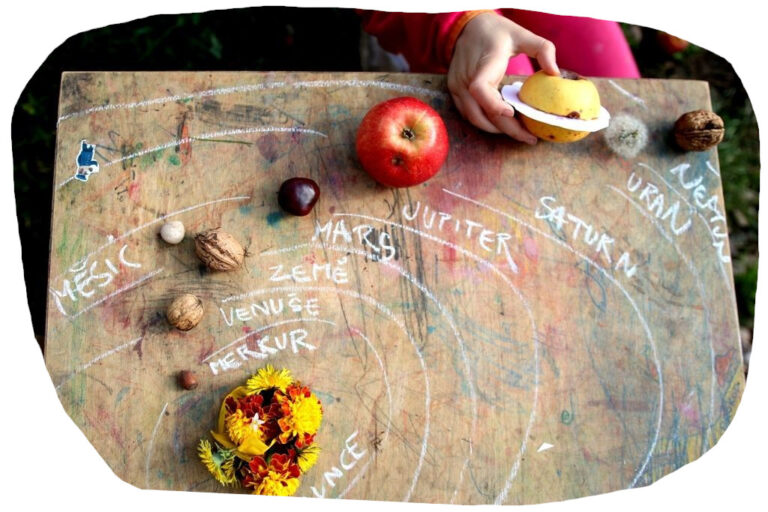
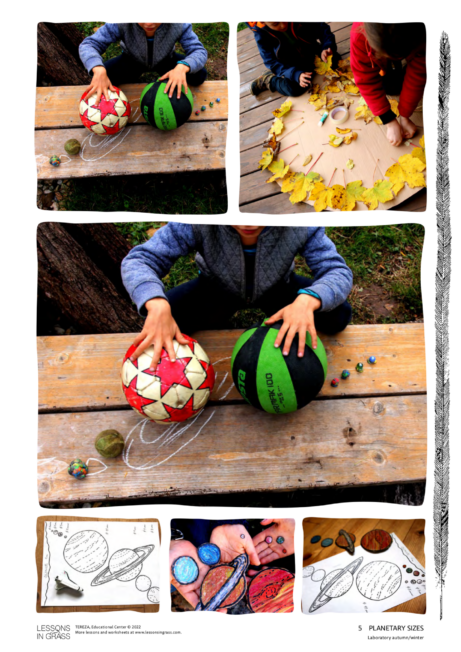
Divide the children into groups or pairs. First, they will try to make a solar system model using different natural materials (stones, chestnuts, flowers, etc.) Let them recollect the information needed on their own (e.g. the number of planets in the solar system).
The children will then try to draw the planets on a sheet of paper and label them. Do not evaluate at this point – this activity aims to encourage internal motivation and interest in the topic.
2 MILKY WAY MODEL
Start with making a Milky Way model. Tell children what the Milky Way is, what shape it is, and how we can observe it at night. Use leaves, pinecones, or sticks (twigs are great for forming leaves into spirals) or draw the Milky Way on the pavement with a piece of chalk.

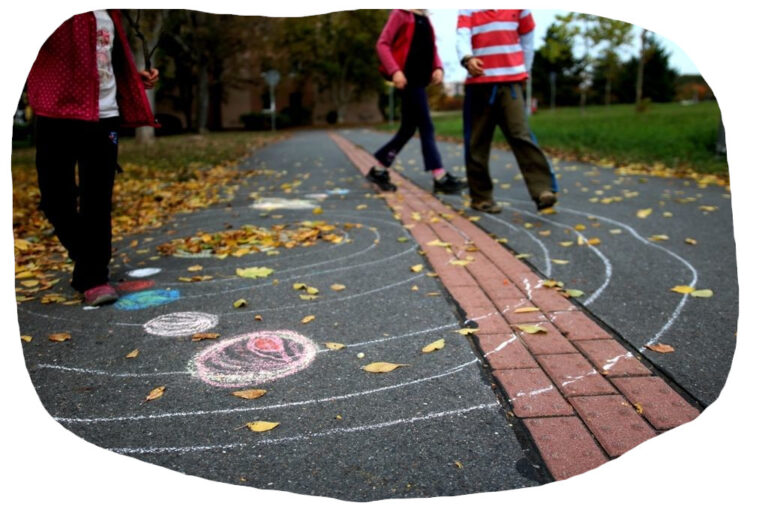
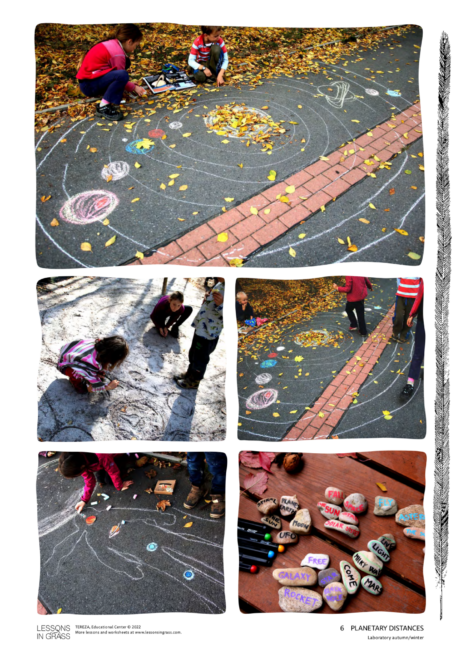
3 SOLAR SYSTEM MODEL
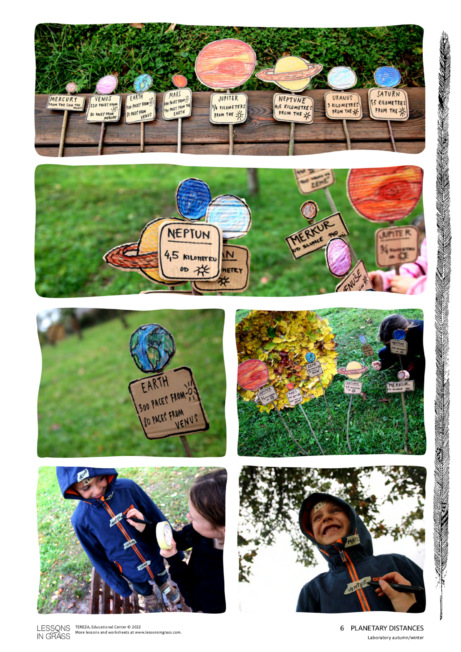
Let’s leave the Milky Way and fly off to explore the Solar System! It’s time to make a big model. First draw the Sun in the centre, then introduce the individual planets and sketch them around the Sun (with their orbits).
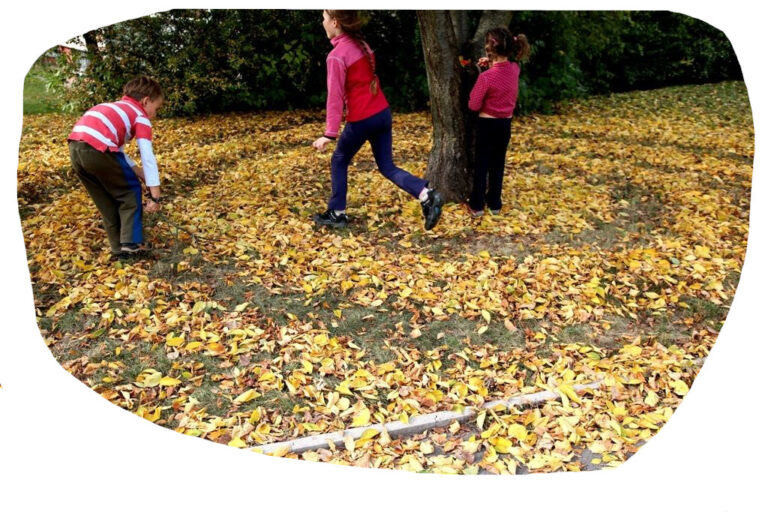
4 RUNNING AROUND THE SUN
Children love pretending to be the planets orbiting the Sun. Let individuals or groups run or walk around the Sun (a group of children holding hands can represent the giant planets).
Find somewhere with plenty of space for this activity and let the children run around and relax before doing more work. Now is a great time to discuss the speed of the planets. Some children experience a great “Aha!” moment when they realize that the planets have years of different lengths.
5 SOLAR SYSTEM FORMATION
It is time for a quick game. Find a spot where the children can stand in one big crowd. Explain how the accumulated material expands and let the children start moving away from each other. The Sun is in their centre – this could be the teacher, a tree, or a pile of backpacks. Children run around the Sun and gradually make clusters of eight planets. The bigger the planets are, the more children there are in one group, e.g. Mercury and Mars can be represented by one child, Venus and Earth by two, Jupiter by 8 – 11, Saturn by 6 – 9, and Uranus and Neptune by 3 – 4 children.
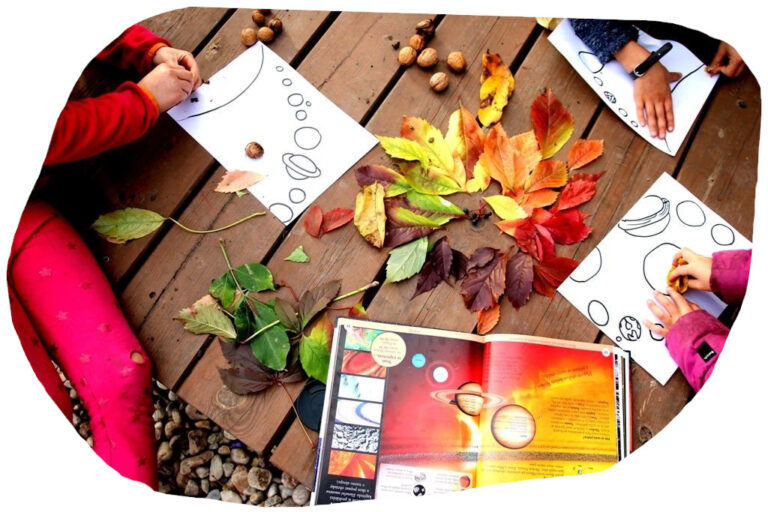
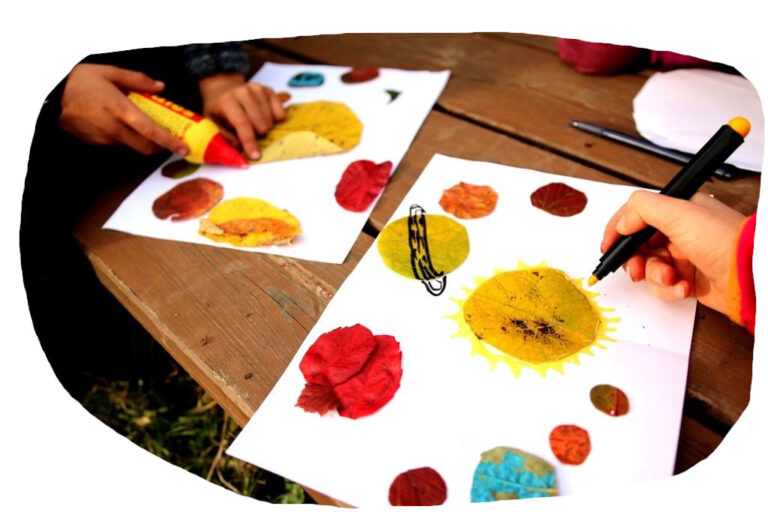
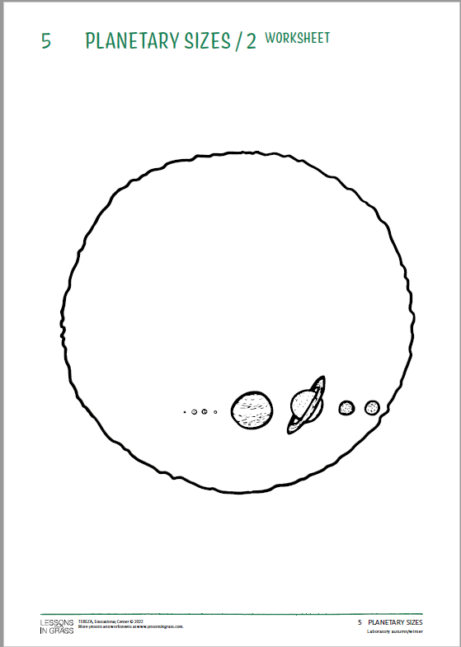
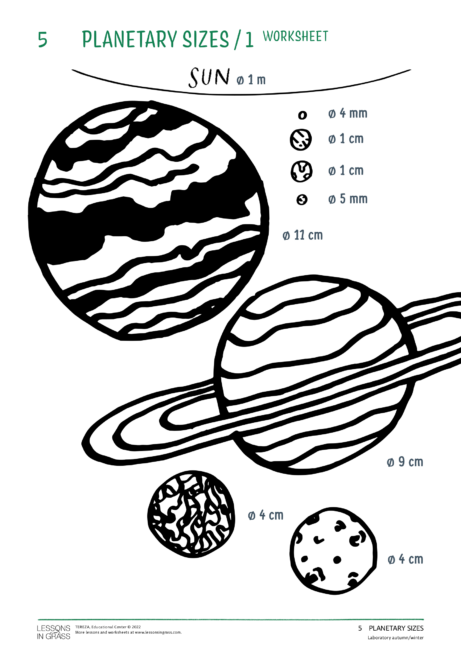
6 COLOURFUL PLANETS
Colouring the planets (on the Planets worksheet) is a great challenge, too. You can mention scientists’ ideas of what colours the planets are.
It is useful to show children a picture of the planets on a poster or in a book. If they are interested, explain why the planets are the colours they are. The children will get a better idea of what colours to use on their worksheets using natural materials (or coloured pencils, if necessary).
7 GALAXY AND REFLECTION
Close the lesson by making one last model of the solar system. The children will compare their latest model with the one they had made at the beginning. Go through the ”Gallery of Solar Systems“ together and discuss what you have learnt today. Share the greatest discoveries, surprises and what they remember most.
! USEFUL TIP
If you work with smaller groups, adjust the numbers of children making the large planets. The goal here is not absolute accuracy, but to enjoy the experience and have fun learning.
VARIATIONS:
LEAF PLANETS
If you have time, the children can try to make a leaf model of the planets. They will cut the planets out of leaves and glue them on the reverse side of the worksheet. Once again, focus on the diversity of colours of the planets (and thus their composition), and search for suitable colours and structures.
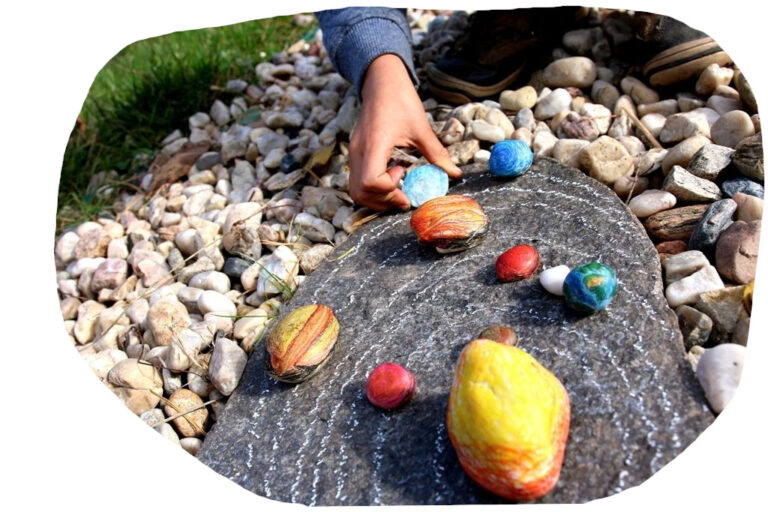
STONE PLANETS
Find a suitable spot for making a stone solar system model. Children work in groups and use coloured pencils and markers. Then the groups present their models to the rest of the class.
LEAF ROCKETS
You can also make brightly coloured pictures with the space theme using colourful leaves.
Want more of the Solar system lessons?
Explore all the Solar system activities and worksheets in the Laboratory Autumn/Winter e-book:
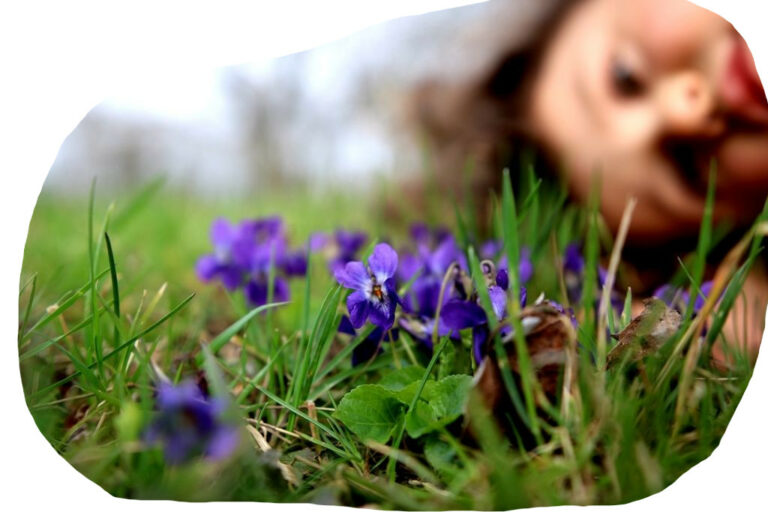
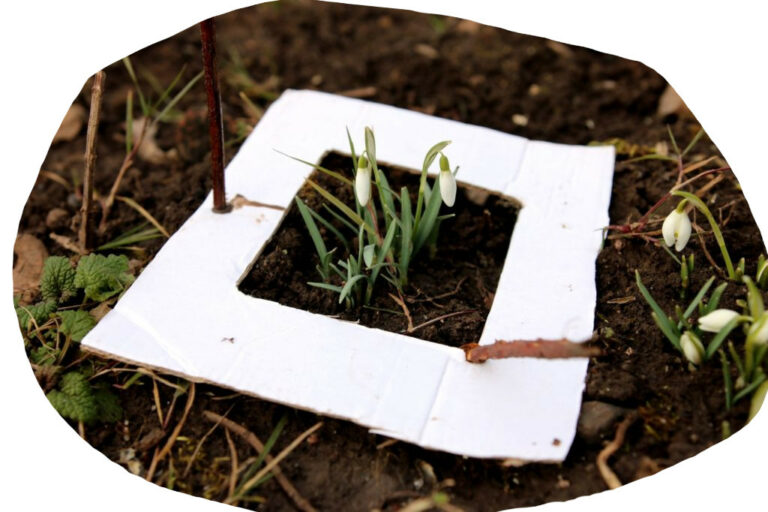
The lesson’s theme: Yellow, yellow daffodil, dancing in the sun, oh yellow, yellow daffodil, you tell me spring has come. But why is it that some plants bloom so early in spring? Does it benefit them in any way? Maybe we could answer these questions right in the fields. Let’s go out to explore springtime flowers and the context!
Goal: Using your own ideas and a worksheet, discover why some plants flower so early in spring and what enables them to do that. Explore springtime flowers and the context outside. Reveal relationships and interactions between plants, trees, and animals in springtime.
Time: 30 minutes
Age: 8 –15 years
Where: around your school (anywhere you can find trees, shrubs and plants)
When: late winter and early spring
You need: worksheet, (magnifying glass), coloured pencils, pencil, paper, fact sheet (for teachers only at first – to allow children to find the information by themselves)
1 QUESTIONS
How come certain plants and trees bloom so early in spring? Why do they take the risk of freezing to death or getting devoured? While children explore plants that are blooming around their school, many questions might pop up in their heads. It is a good idea to write them down and return to them later if you have the time and inclination. But for now, focus on a single question together: Why do certain plants bloom so early in spring? Alone or in groups, have the children make some guesses (call them ideas or hypotheses if you like). Then have them write down three guesses in the worksheet.
2 THE SCIENTIFIC APPROACH
Once you have your hypothesis, as scientists you can:
1. go out to the field and observe;
2. set up and run an experiment; or
3. study sources describing how your question has been examined by others and what has already been figured out by scientists. Ideally, combine various approaches – if you have enough time, have a go at all three. If your time is limited, give the children the worksheet to complete. This will give them information they can test hands-on.
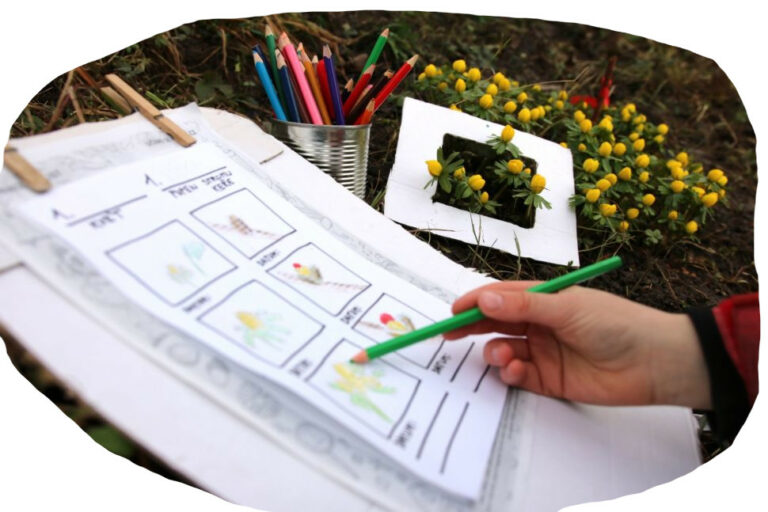
3 UNRAVELLING TIES AND RELATIONSHIPS
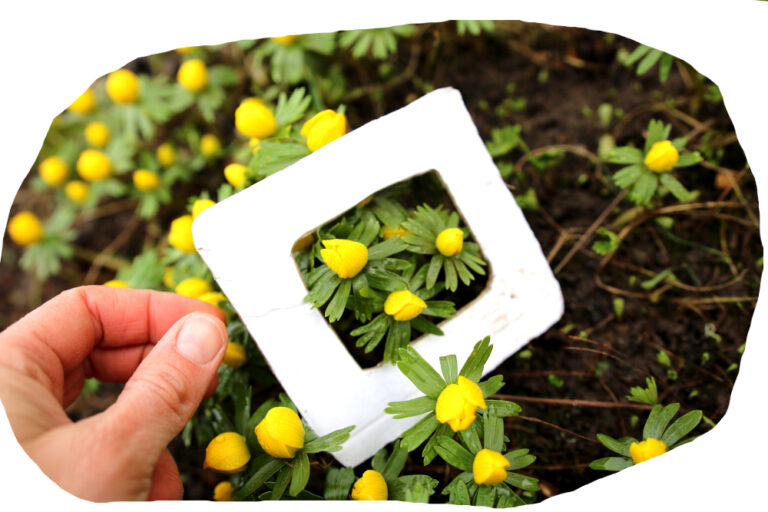
The worksheet contains several captions, pictures and explanations. Let children work in groups to make the CAPTION-PICTURE-TEXT matches. Then comes the sharing part: What new things have they discovered through the text? Do they agree or not? It’s best to go test everything outside. Where do herbs bloom? Do trees above them already have their foliage?
RECOMMENDATION: It is worthwhile to draw the children's attention to the following:
1. Do not test how toxic spring herbs are on your own skin! Instead, you can observe if certain parts of the herbs might have been nibbled on.
2. Most spring herbs are protected species. So we must not disturb their underground parts or even their above-ground parts. You can examine the structure of the plants (to find out whether they have underground storage organs or not) in atlases, field guides, or on the Internet.

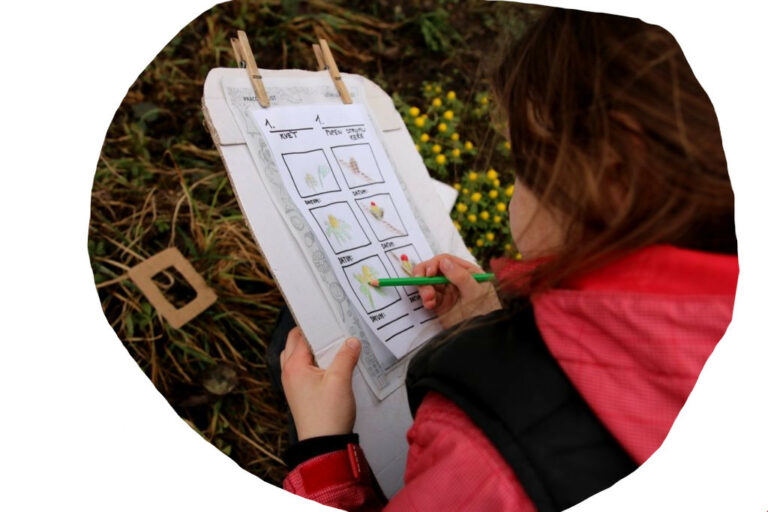
4 SCIENTIFIC CONCLUSION
Wrap up your scientific exploration with the children by letting them write an evaluation in the worksheet. Use one of the hypotheses (predictions). Children can share the connections they managed to uncover with others (on a notice board, on the Internet, or otherwise).
5 REFLECTION
We recommend that you also reflect upon the lesson itself. This can take the form of a discussion or making notes on the blackboard, index cards, etc.: What was the work like for me? Who found what outside? What was challenging? What was easy? What would I do differently next time? What were my original assumptions and how did things turn out at the end? What did I discover in this activity? What surprised me?
It is also good to collect and write down other questions that children think of (it’s an excellent basis for the next lesson).
WHAT CAN YOU EVALUATE? (EVIDENCE OF LEARNING):
Children
- write down at least 2 guesses (hypotheses) and an evaluation of each (which of them was closest to / furthest from reality) in the worksheet.
- describe at least 1 relationship or connection (between herbs, trees and shrubs and animals in spring) they discovered in the worksheet.
- find at least 2 flowering plants outside and examine them (e.g. what species they are, what they look like, where they grow, whether they serve as food for animals, etc.).
USEFUL TIP: Spring herbs offer a great opportunity to explore and find relationships and links in nature. Children can discover interactions and connections on their own through observation and a few pieces of information. If this is successful and children really figure things out for themselves - and outdoors, too - all the new information and experiences will be very powerful, as they are connected to emotions and stories. Not only is this kind of information easy for the brain to retain, but it is also easier to work with afterwards. We recommend that those interested should read the fact sheet revealing all the contexts.
Want more Spring Time lesson plans?
You can get the lesson including the worksheet in Laboratory Spring/Summer
It's our most polupar e-book so don't hesitate and get a copy too!
ALL ABOUT SNOW
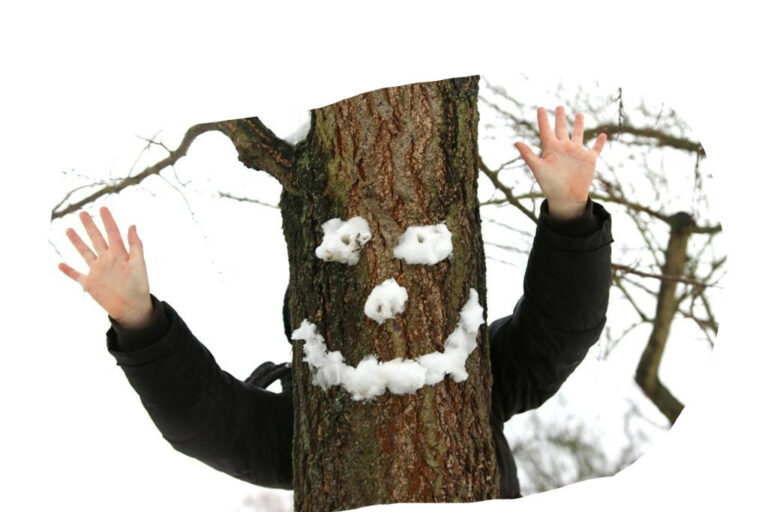
Goal: Observe snow and think of research questions. Find answers to these questions by means of simple experiments. Sum up the properties of snow in a presentation.
Time: 30–90 min (depends on the choice of research questions)
Age: 4–15 years
Where: a snow-covered spot
When: when there is snow outside
You need: markers, containers, box of matches, tissues or filter paper, twigs, string
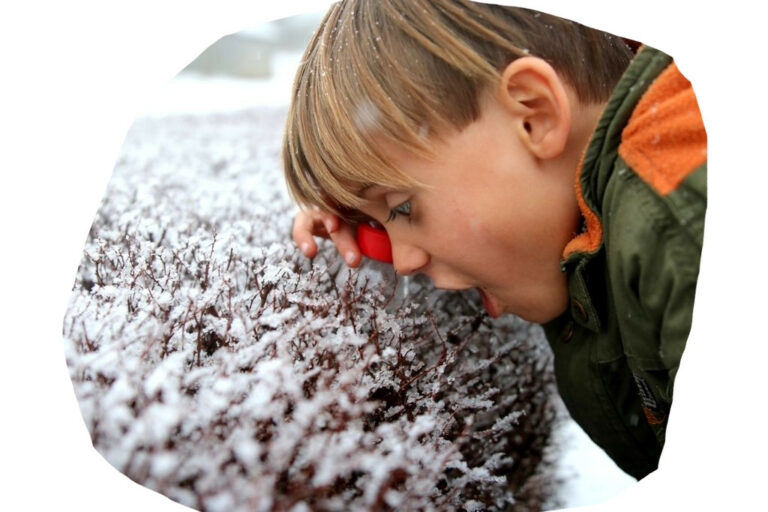
1 MAKING A PREDICTION
When it is snowy, go outside and have some fun with the snow – observe it, smell it, press it, or have a snowball fight (be careful not to get too wet). Ask children if they want to ask any questions about snow and write them down. Choose questions you are able to answer (i.e. what you have time and suitable conditions for). Assign the questions to groups or let children choose (if you have time for free research). Make checkpoints for the questions – all groups take turns and answer the questions. Here are some sample questions: How much does the snow weigh? How much water does it contain? Which is more resistant: snow or ice? Let children discuss these questions and note their guesses and answers.
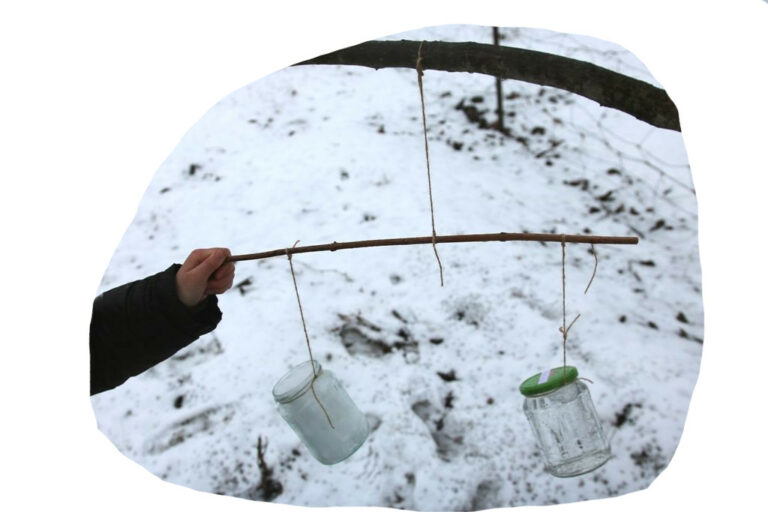
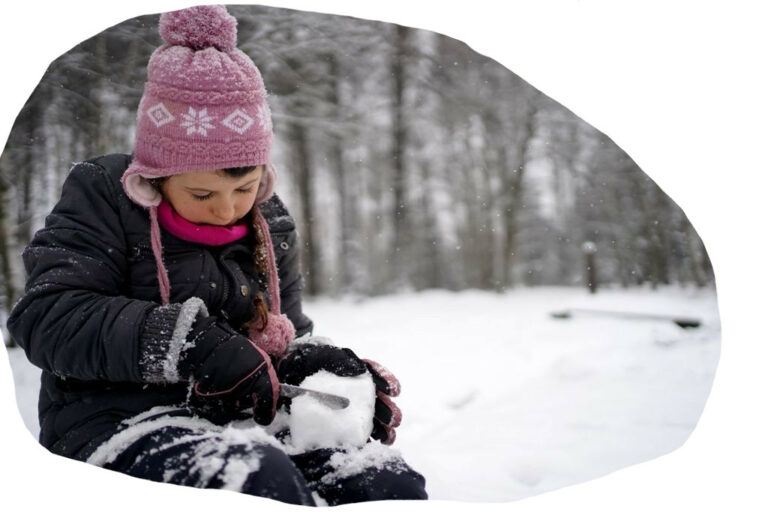
2 SNOW WEIGHT
Which is heavier – a glass filled with water or snow? Does it make a big or small difference? How can we find out if we have no scales outside? Take along two jam jars, scissors, string, and a straight twig or coat hanger. Make simple scales using the twig and string. Hang the empty jars on the scales, balance them out, then add water in one and snow in the other. It is better to close the jars. What do you think will happen?
USEFUL TIPS: If you have enough time and children enjoy the research, you can let the children make the scales themselves.
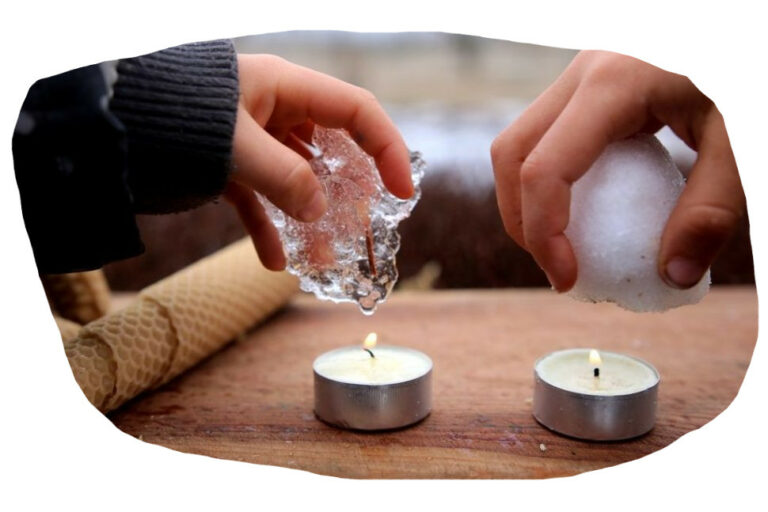
3 WHICH WILL DRIP FIRST?
Try another simple experiment with a snowball and a piece of ice. Let the children guess what they think will drip first if placed above a candle – ice or the snowball? Note down their ideas and start the test. Light two candles (if you are working outside, find a place with no wind). Children hold the snowball and the ice above the candle and wait for the first drip. Surprisingly, it’s ice. How is that possible? (Snowflakes make pockets of air that work as insulators, while ice does not. That is why ice starts melting first.)
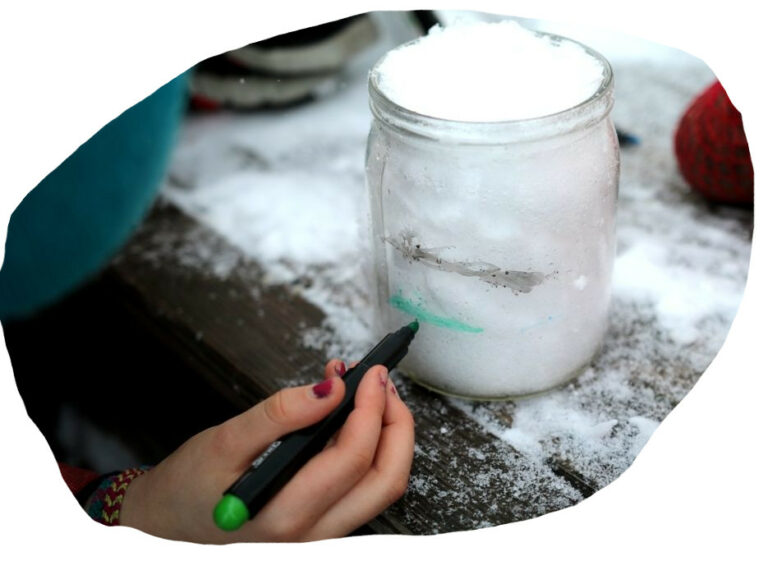
4 HOW MUCH WATER DOES SNOW CONTAIN?
This is another simple experiment. Children put some snow in a transparent container. Tell them not to press the snow too much, but fill the container with “fluffy” snow. Once the container is full, children mark the anticipated level of melted water. Move the container to a warm place and watch how the snow melts. It is usually a big surprise to see how little water remains after the snow melts. Then compare your guesses to reality.
USEFUL TIP: Guess and observe how fast the snow melts in different conditions depending on the temperature, insulation, etc. This may inspire new questions and connections.
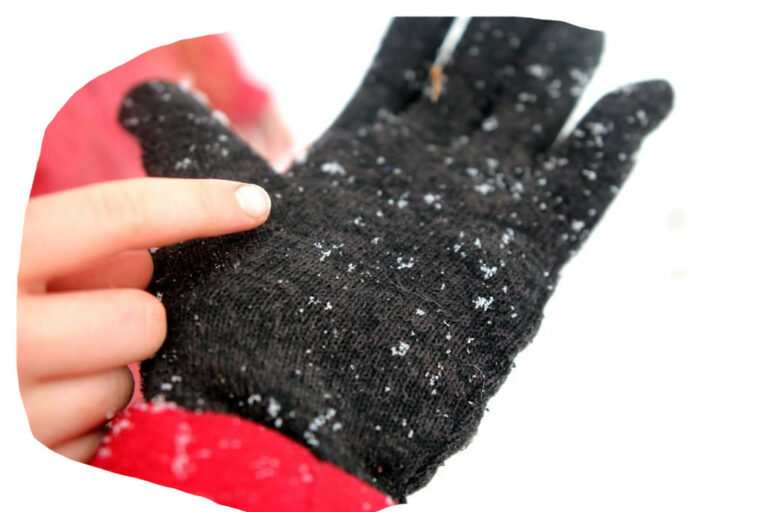
5 HOW CLEAN IS SNOW?
Try to find out how much dirt there was in the snow by filtering it through a filter or tissue paper. Take samples of snow from different locations near the school (by the road, in the garden, by the pavement, on a tree, etc.) Then compare the how clean the samples were.
6 REFLECTION
Towards the end of the lesson, it is good to get back to the initial guesses and questions (however many tests you did). Go through them with the children once again and evaluate – which did you manage to find answers for? Which remained unanswered? Did you discover anything new? What other experiments would you like to try? What do you need to carry them out? Sum up your “snow experiments” in a poster, article, comic, lecture, tour, or another form of outcome. Informing others about the results of their work will be a great experience for the children. They can present the experiments and discoveries to another class, their parents, students from a lower grade, your colleagues, or the elderly from your neighbourhood. It can be enriching for both parties.
BIRD MASKS
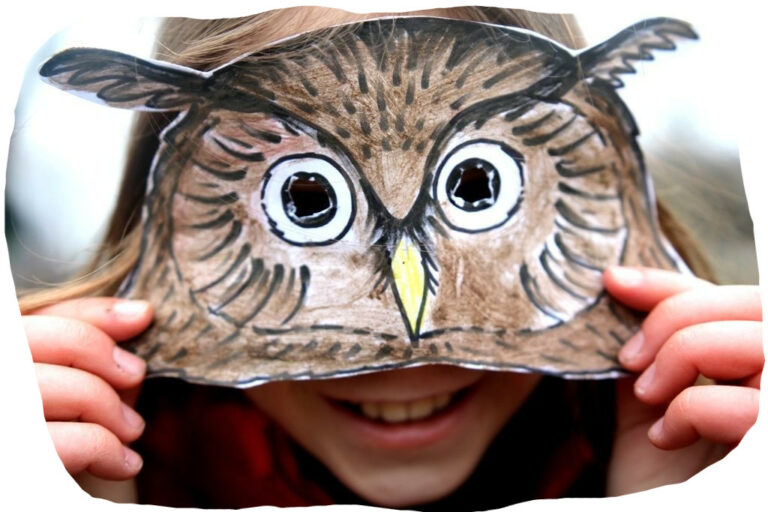
Goal: Experience bird life by pretending to be one. Make up stories about birds and act out the behaviour of various bird species.
Video: www.lessonsingrass.com/video
Time: 20 minutes
Age: 4–11 years
Where: somewhere suitable for running
When: year-round
You need: paper, coloured pencils/crayons/watercolours, brushes, bowls for mud paint, rubber band, scissors
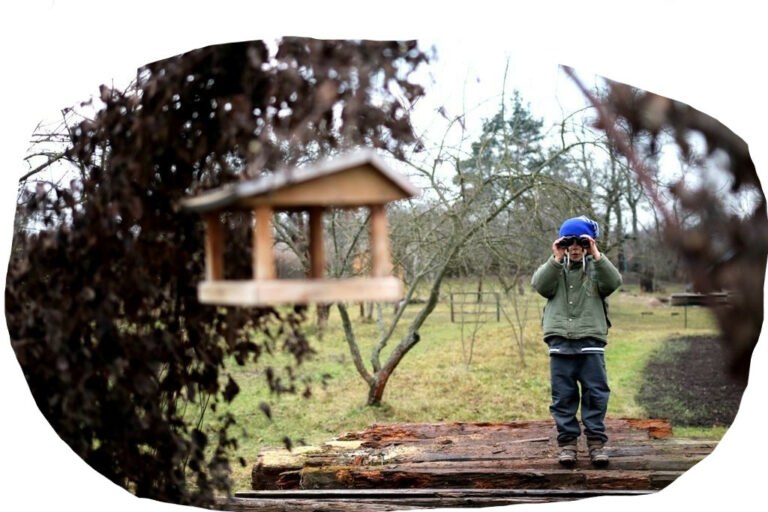
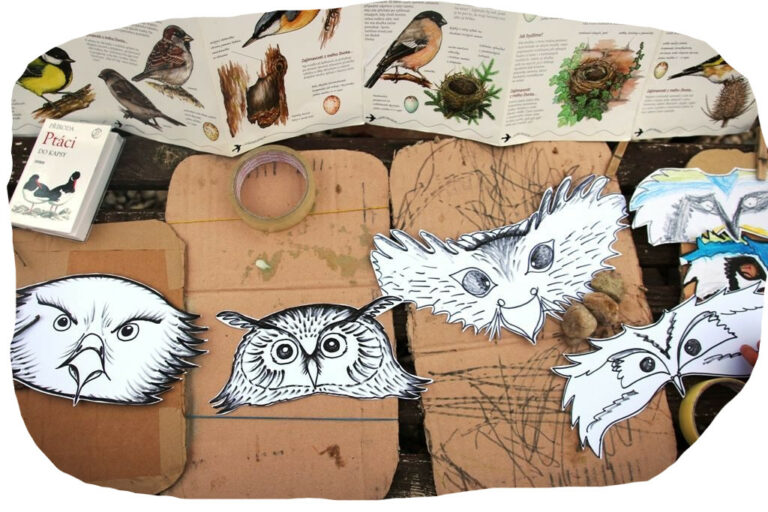
1 WATCH
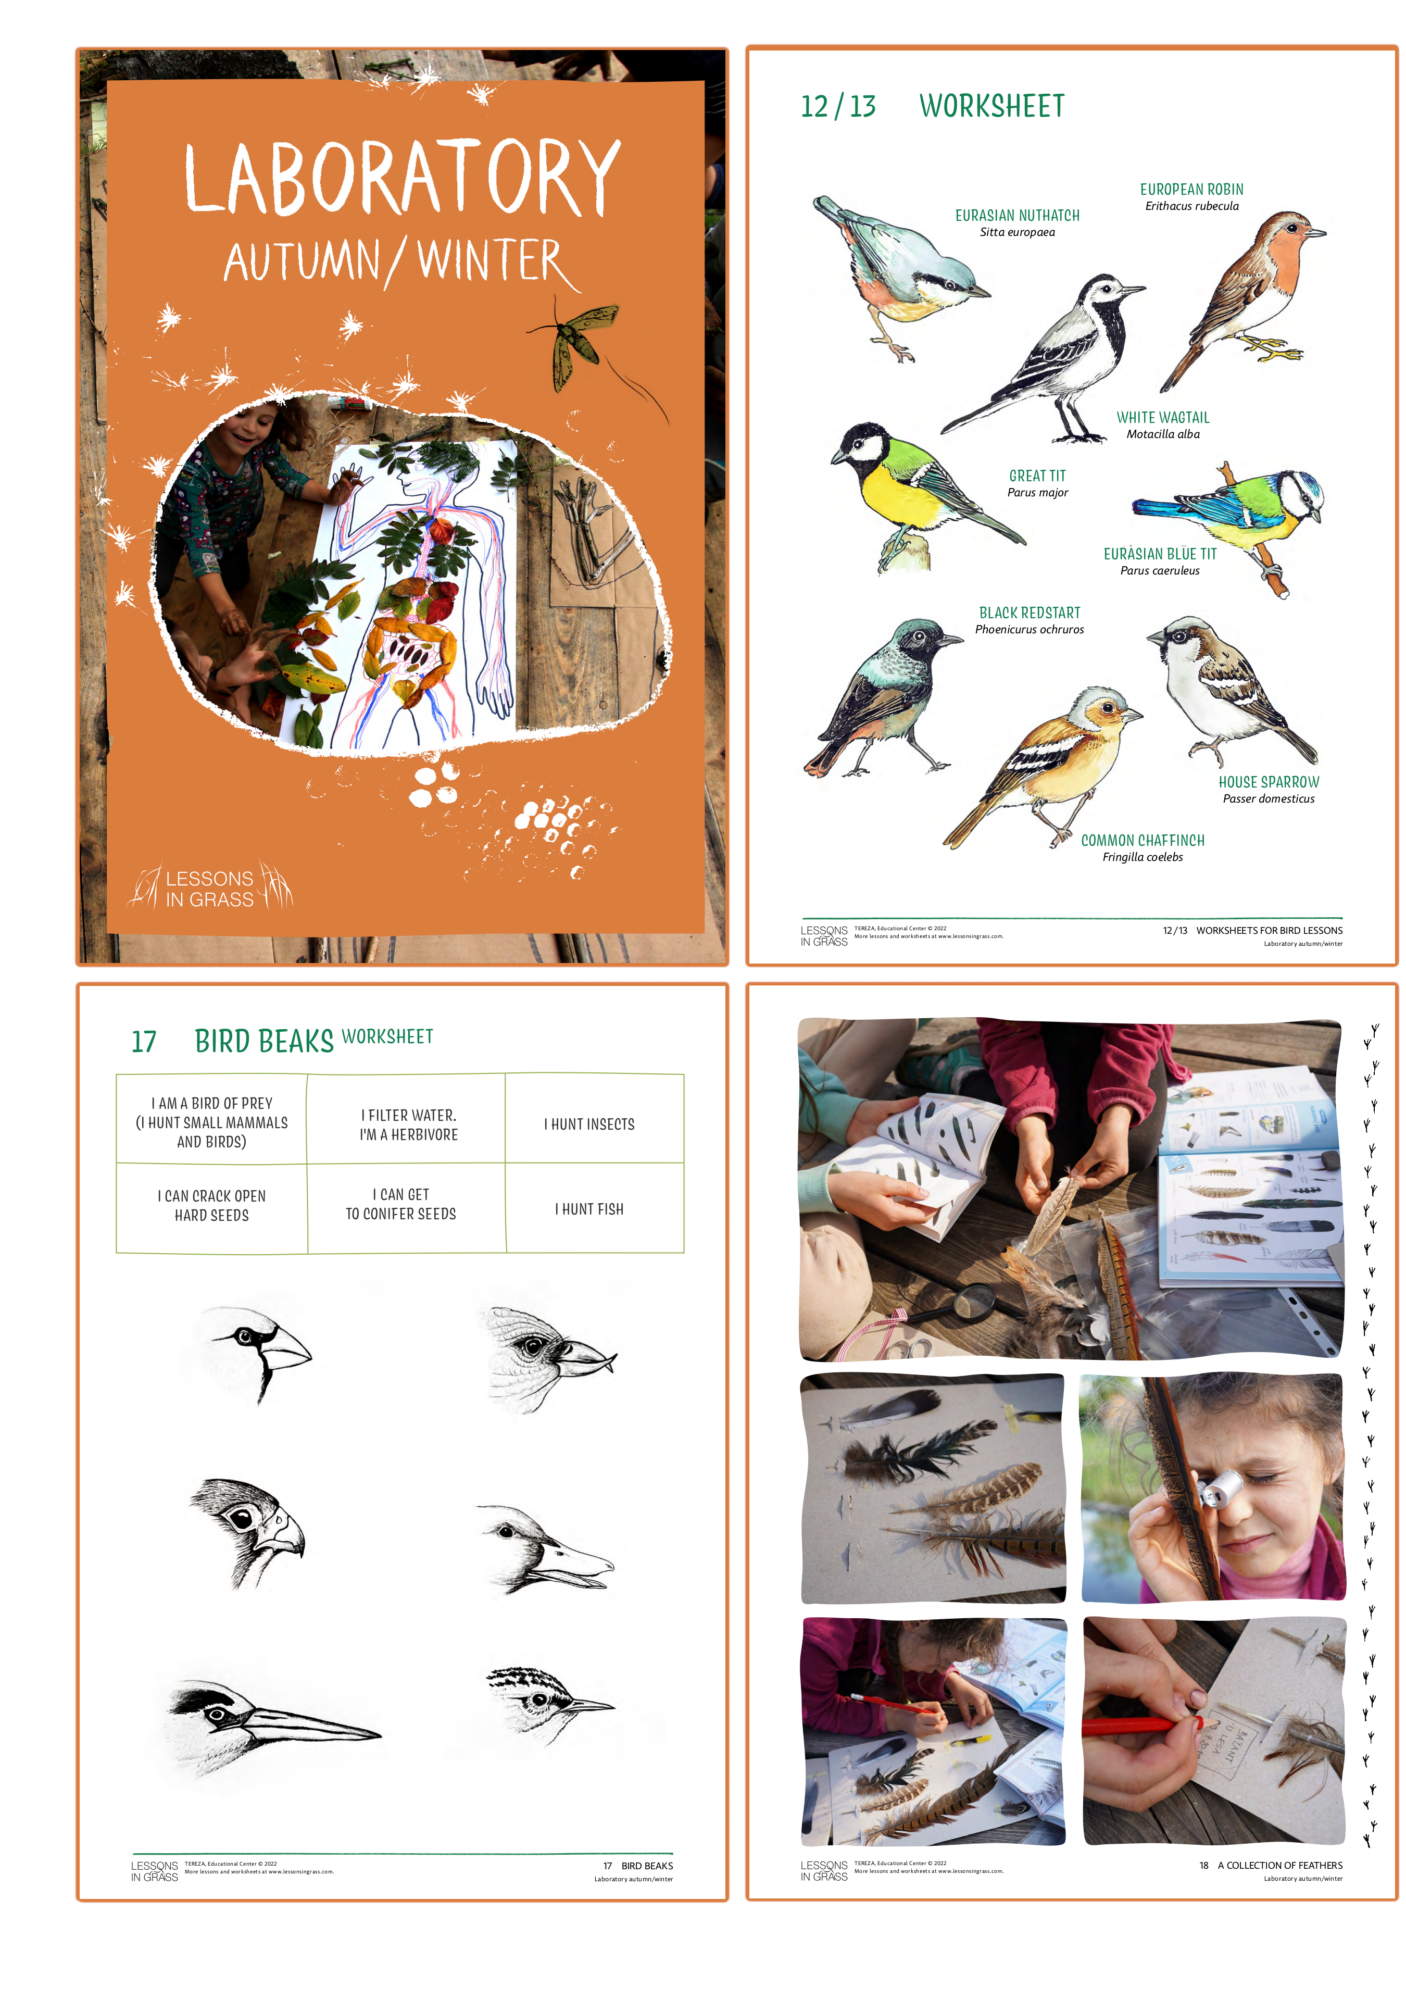
First of all, go outside and watch birds in their natural habitats; how they behave, their colours, shapes, movements, listen to their songs. If you cannot watch them outside, consult a favourite book about birds. Then let children choose a bird they like to use it as a model for their mask.
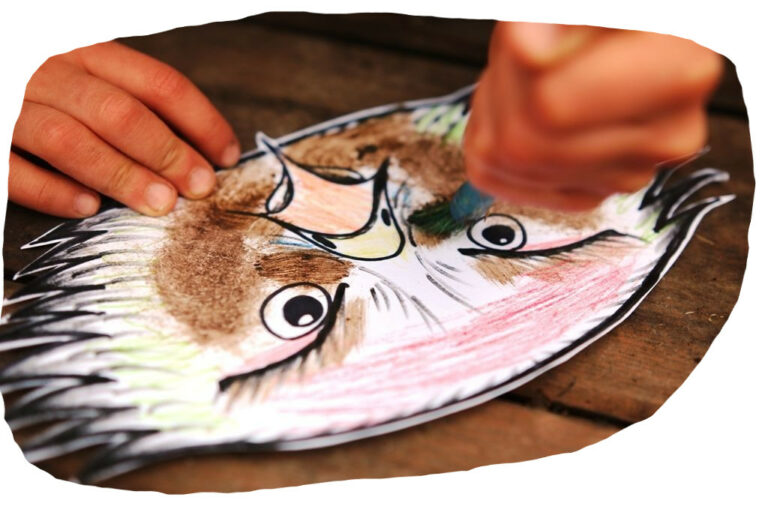
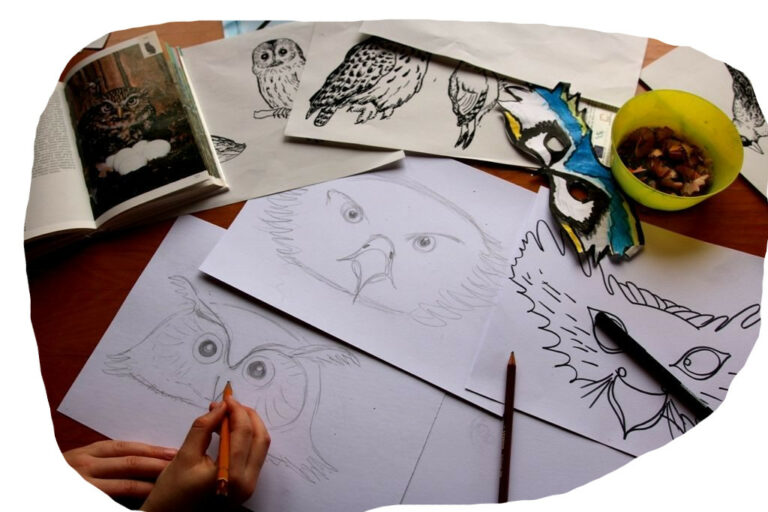
2 BIRD MASKS
This is an opportunity for children to imagine and try out (at least for pretend) what it is like to be a bird. Draw a simple shape of a bird on sturdy paper. You can also use the attached templates (see below).
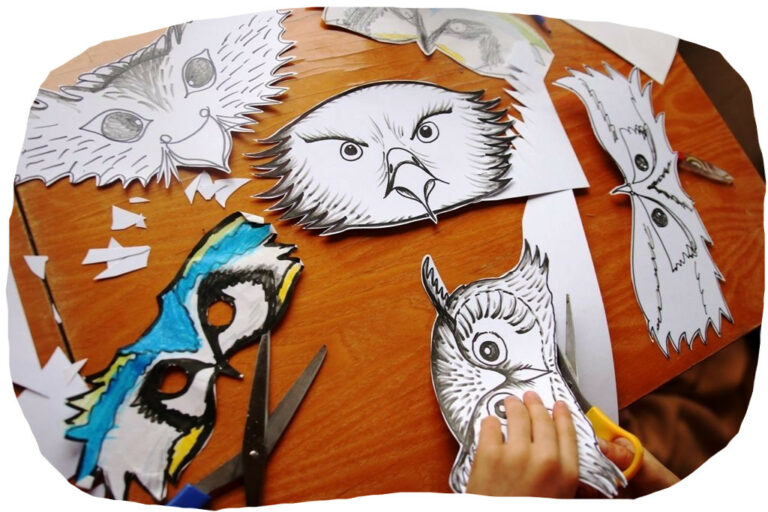
Have children colour in the masks. They can use the birds they watched outside as an inspiration, consult an atlas, or simply use their imagination. Coloured pencils, crayons and water colours are popular, although many children will enjoy painting with mud. In wet weather, simply swipe the brush in wet grass and birds of prey and owls will immediately get an interesting texture.
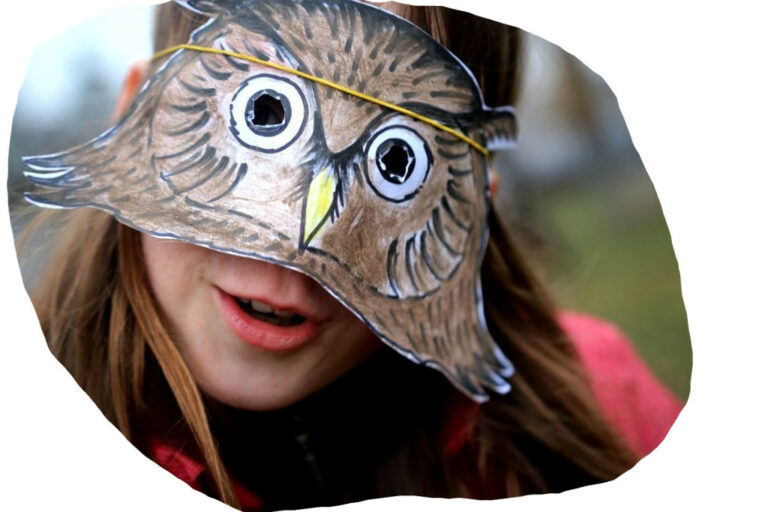
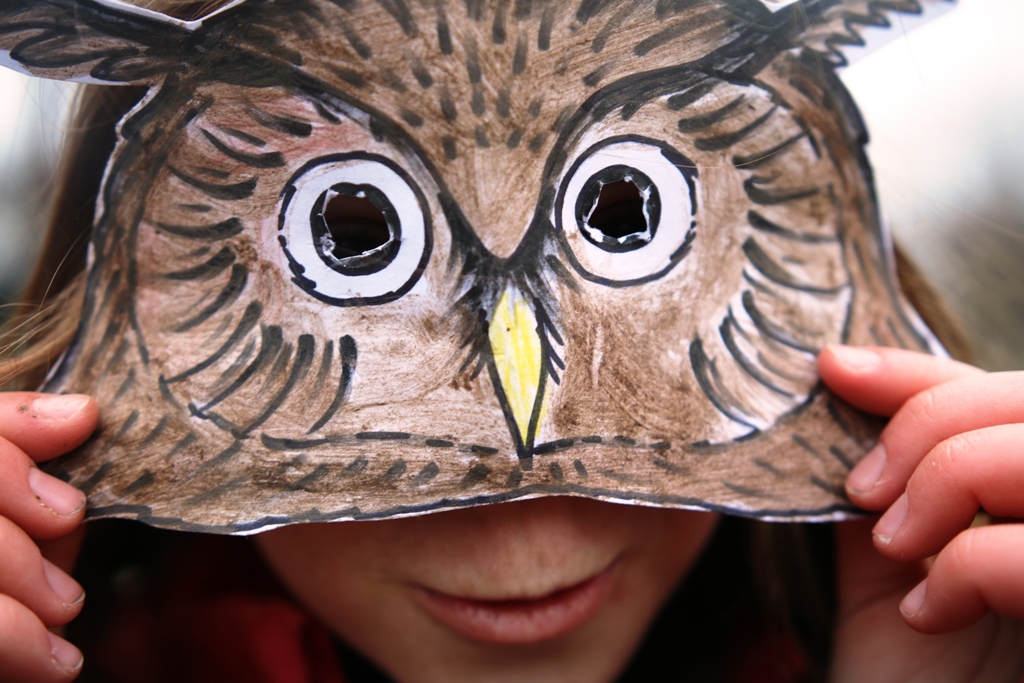
3 IN THE BIRDS’ SKIN
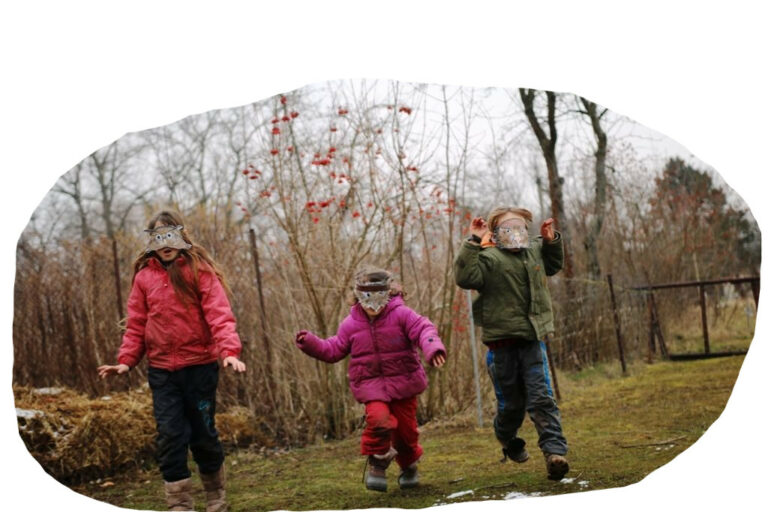
When the masks are coloured in and dry, have the children hold them up to their faces to mark where to make the eyeholes. Afterwards, put them on by pulling a rubber band over the child’s forehead to secure the mask. This is quick, holds the mask well and the mask does not tear.
Then children take off to play. Let their imaginations run wild. Sometimes you will hear questions such as: Where does a tit hide from a bird of prey? What does a nuthatch feed on? Where does an owl sleep? These are excellent opportunities to talk with children over a book, atlas or the internet and to learn more about birds.
4 REFLECTION
Briefly discuss with children what it was like pretending to be a bird. What bird characteristics do they like and why? Would they like to have those characteristics too? What are the disadvantages of being a bird? You can also talk about making the masks. What was easy or what was difficult? Did they find something inspiring in it? And finally, children can write a short text (a story, a poem or a comic strip) in which they describe a day in the life of a bird. They can include information about what the bird does in the morning, where it sleeps, where its family lives, where it looks for breakfast, and if it has to look out for any dangers. When they finish the texts, children are welcome to read them aloud, but do not force them.